
Basic Bow

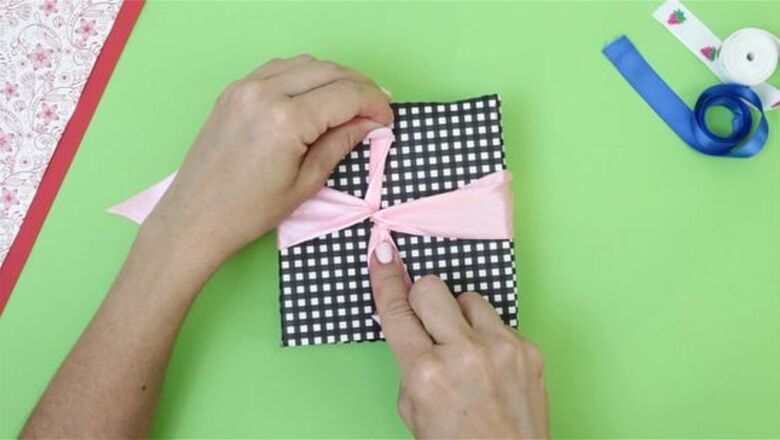
Tie a piece of ribbon or string around your box or package. You can use any type of string or ribbon to make a classic, basic bow. Simply slip your chosen ribbon under the item, pull it around the sides, and tie it in place on top with a single-handed knot. As long as the left and right end stem from the knot in the center, you’re golden. If you're tying a bow on the top of a package, loop the ribbon under the package, bring the ends together over the package, and knot them together so the ends are equal in length. Alternatively, try tying a bow from a piece of ribbon that isn't attached to a package or item. Tie a knot in the center of the ribbon so the left and right sides are equal in length.
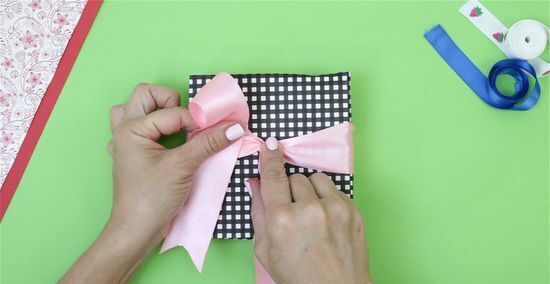
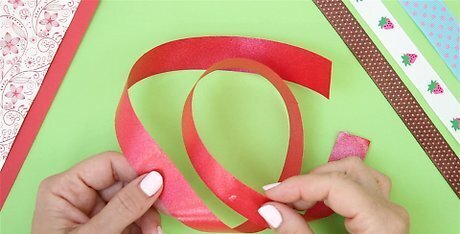
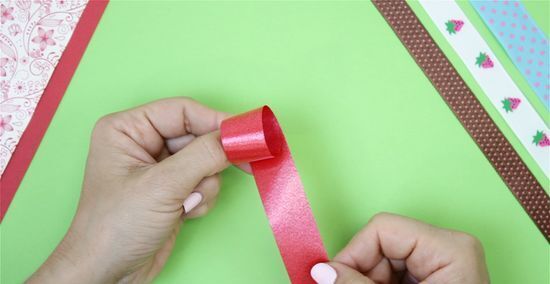
Make a loop with the left side of the ribbon. Curl the left-side piece of ribbon over itself to form a “C” shaped loop. Pinch the loop between your thumb and forefinger to hold it in place. If you’re tying a ribbon, make sure the loop is smooth and not twisted for a finished look.
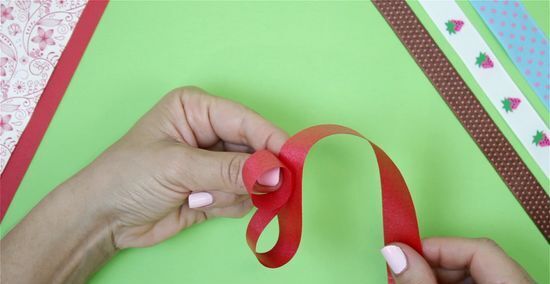
Create a second loop on the right side of the ribbon. Hold the left loop between your left thumb and forefinger as you form a second loop with the right-side piece of ribbon. Curl the ribbon up to create that “C” shaped loop you did before.
Tie the 2 loops together to form a bow. Bring the right loop around and under the left loop. Pull the right loop through until the left loop is the same size. Think about how you tie your shoes and use the same technique.
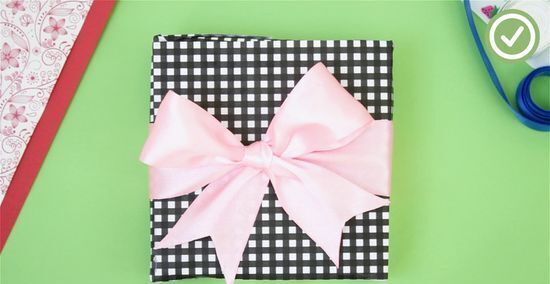
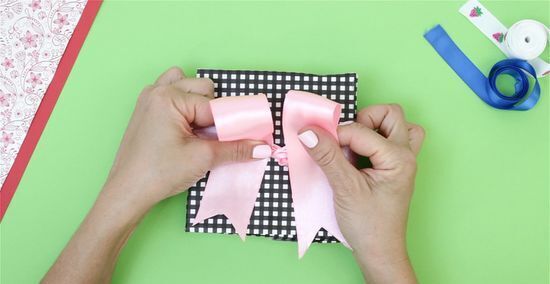
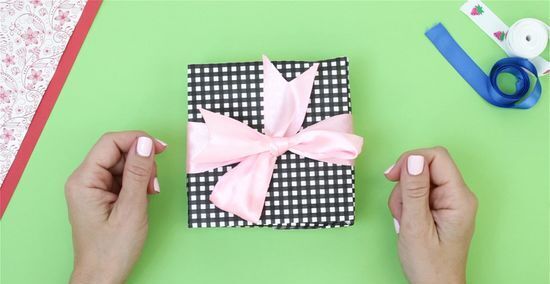
Tighten the bow to secure it in place. Pull on the loops to tighten the knot at their center. Ensure that both loops are the same size for that perfect bow look. If the ends of the ribbon aren’t the same size, use a pair of scissors to cut them to your preferred length. For extra stability, place a dot of hot glue under the bow’s knot to secure the ribbon to the box, package, or item.
Looped Bow
Cut a piece of ribbon that’s about 12 in (30 cm) long. For this style of bow, it’s best to start with a longer piece of ribbon. Make sure the ribbon is straight and unknotted before you cut it.
Make a loop on the left-side end of the ribbon. Start about 3 inches (7.6 cm) from the end of the bow, and fold the ribbon over itself to form a small loop. Hold the loop in place with your thumb and forefinger.
Grab more ribbon from the right to create a second loop. Take the section of ribbon next to the loop and fold it up next to the loop you made before to create an “S” shape. Use your thumb and forefinger to hold the first loop and your middle finger to separate the 2 loops.
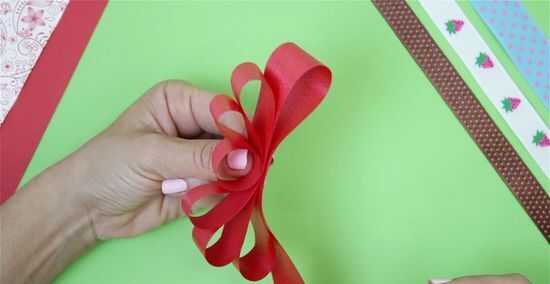
Continue looping the ribbon until you reach the right end. Loop the remaining length of the ribbon accordion style (following the same pattern as before to create “S” shapes). Keep looping until the ribbon’s right end is the same length as the left end.
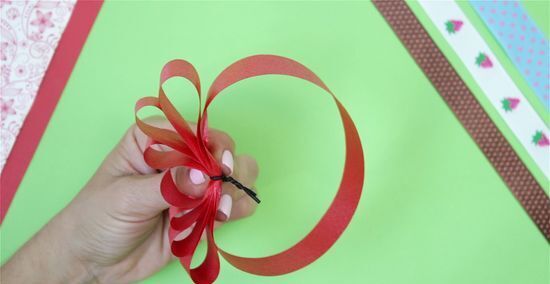
Cinch the center with wire or string. Use a small piece of florist wire or a thin string to tie the loops together at the center, dividing them in half. This creates a pile of loops on the right and left sides of the cinch.
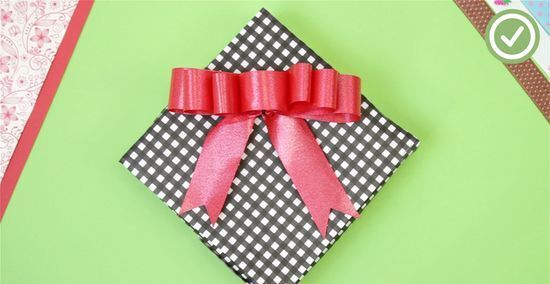
Fluff the loops with your hands. Separate the loops on either side and use your fingers to fan them out. Keep fluffing until the fanned-out ribbon hides the cinched middle. Use a pair of scissors to clip the ends of the ribbon, and your bow is ready to be stuck anywhere. Use a dab of hot glue or a piece of clear tape to attach your looped fan ribbon to a present or box.
Puffy Bow
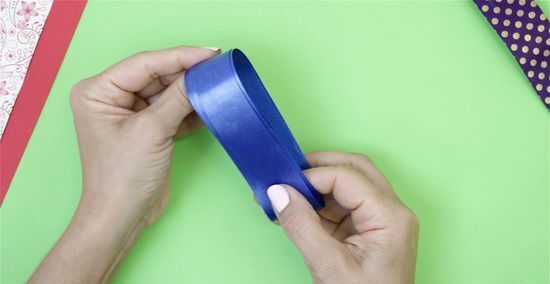
Wrap a piece of long ribbon around your hand. Hold the end of the ribbon against your palm with your thumb. Then, wrap the other end around your fingers to make a circle. Neatly overlap the ribbon with itself so each loop lays perfectly on top of the previous one. Aim to wrap the ribbon around your fingers at least 10 times. The more you wrap, the bigger your bow will be.
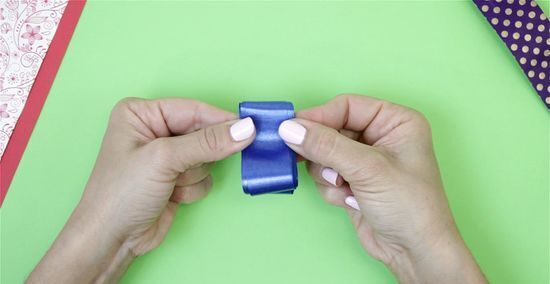
Slip the ribbon loops off your hand and fold them in half. Carefully slide the layers of ribbon off your hand. Do your best to keep the loops in place. Then, fold the stacked ribbon in half.
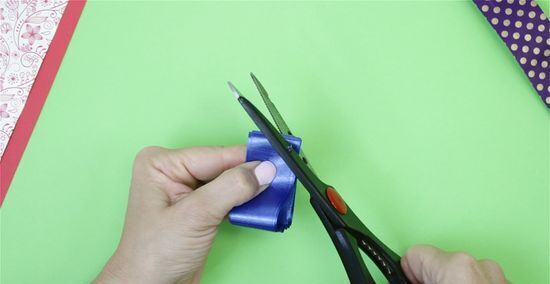
Cut the corners off the folded end of the ribbon. Hold the folded loop in 1 hand so that the center folded part faces up. With the other hand, use scissors to cut the corner off either side of the cinch or folded middle part of the ribbon. Make sure to cut through all the ribbon layers; otherwise, your bow may be uneven. Do your best not to cut the 2 corners too close to the center. Leave a small gap between each cut.
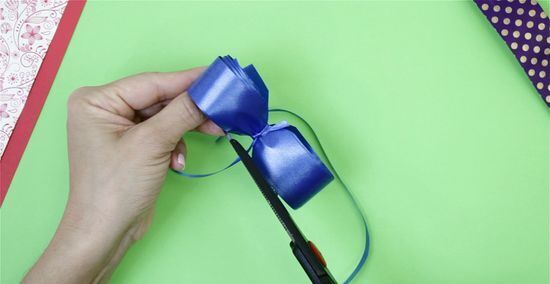
Use a second ribbon to tie the cinch. Unfold the looped ribbon, keeping the layers intact. Tie a second piece of ribbon between the notches you cut in the middle of the loops. If you don’t have another piece of ribbon, consider using florist wire or string. For a classic look, use the same color ribbon as before. For a more eclectic look, try tying a different ribbon around the middle.
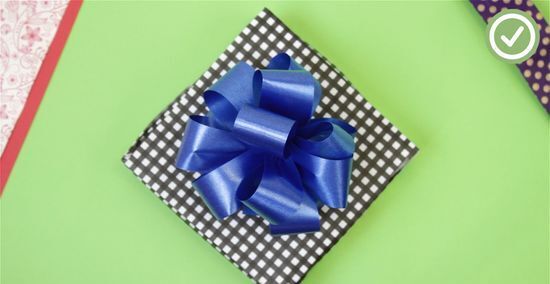
Fan out the loops with your fingers. Separate the loops 1 by 1 from the inside to the outside. Pull the loops gently from the center and twist them toward you to fluff them out. Arrange the loops so that they form a petal-like circular pattern. Now all that’s left to do is place your fluffy ribbon on a present. Use tape or hot glue to attach your large ribbon to a gift or package.


Comments
0 comment