
Wrapping a Canvas Painting
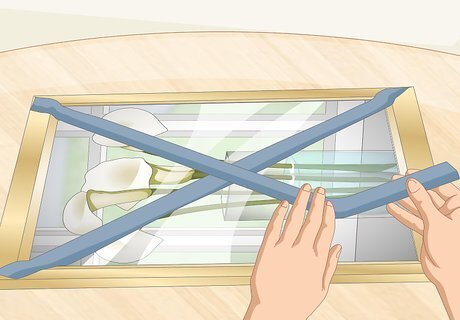
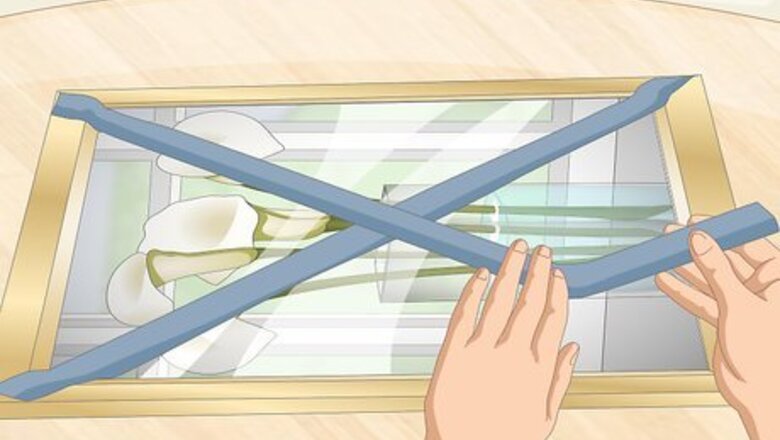
Make an X across the glass with masking tape if the painting is framed. If the glass breaks during the moving process, it can destroy the painting. Making an X prevents the glass from shattering completely if it breaks, protecting the painting. Use masking tape or painter’s tape. Sticky tape like duct or packing tape will leave remnants behind and could ruin the glass. If your painting isn’t framed, then skip this step. Don’t let any tape touch the painting itself. You can also remove the painting from its frame for moving and follow this process to pack an unframed painting.

Lay a blanket on a table to cushion the painting while you work. Don’t let your painting directly touch a hard surface. Cushion it with some padding. A thick blanket or sheet will work. Lay this down on the surface you’re working on. Make sure anything you use is clean. If you have foam or something like that, this will also work. Anything that pads the painting and prevents it from pressing on a hard surface is fine. If you’re wrapping a larger painting, then spread the padding out on the floor instead of a table. Don’t work on a table too small for your painting or it could fall over.
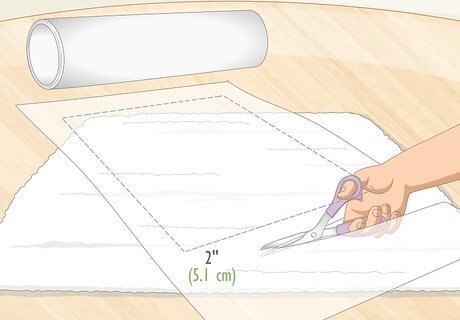
Cut a layer of glassine paper 2 in (5.1 cm) longer than the sides of the canvas. Measure out a sheet that leaves about 2 inches (5.1 cm) on each side of the painting so it wraps around the canvas. Cut the paper to the correct size if you have to. For especially wide paintings, you may need to lay 2 sheets side by side. Glassine paper is a non-stick material that protects the painting from moisture and dirt. It is available online or from craft stores. If you don’t have glassine paper, don’t use wax paper as a substitute. This could stick to your painting. For short trips or less valuable paintings, the glassine isn’t crucial. Just be sure to unwrap your paintings as soon as you arrive at the location. If your painting isn't framed or canvassed, cut 2 pieces of cardboard the same size as the painting. Then sandwich the painting between these 2 pieces instead of using glassine.
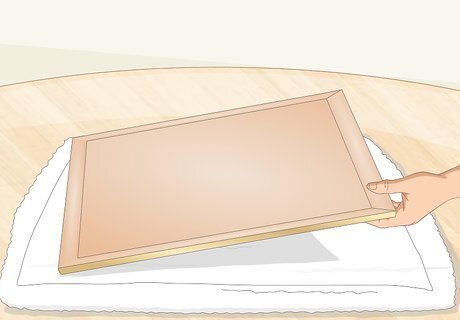
Lay the painting face down on the glassine paper. Don’t press it down or apply any pressure. Just gently lay it down in the center of the paper. Cut away some of the paper if it’s too long. Remember to leave about 2 inches (5.1 cm) of glassine on each side.

Tape the glassine paper to the back of the canvas with artist tape. Fold the glassine over the side of the canvas so it reaches the back of the painting. Use a small strip of artist tape to attach it to the wooden part of the canvas. Fold the remaining 3 sides and tape them the same way. Only use artist tape for this step. Any other type of sticky tape could damage the painting. Glassine isn't necessary for paintings that aren't framed or canvas. You can add it for an extra layer of security, if you prefer.
Adding Cushioning
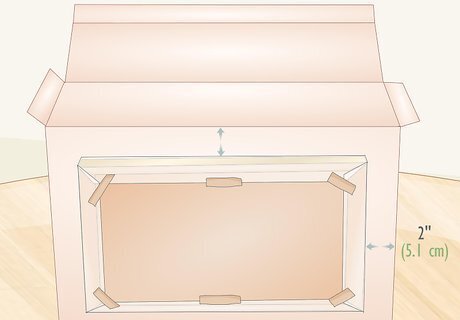
Get a box that leaves 2 in (5.1 cm) of space on all sides of the painting. This empty space allows enough room for cushioning. Measure your painting’s perimeter, then find a box that allows 2 in (5.1 cm) of cushion space on all sides. Plan to use one box per painting, unless you have a specialized box for transporting multiple paintings. If you can’t find a box the right size, you can always cut one to the correct size or make your own out of sheets of cardboard.
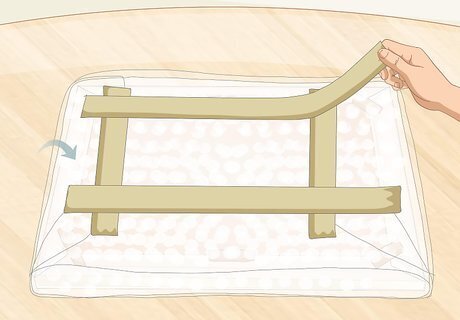
Place cardboard on each corner if the painting is framed. This extra layer of protection prevents the wooden frame from being damaged. Either get cardboard corners from the store or make your own out of cardboard scraps. To make cardboard corners, cut 2 strips of cardboard the width of the painting. Tape them together to make a corner. Then, cut 2 cardboard triangles and place their corners at the joint where the 2 cardboard strips meet. Tape up the whole shape and slide it onto the corner of the painting. Make 3 more to cover all 4 corners. You can also do this if the painting isn’t framed. It’s not crucial, but if the painting is very valuable, then it would be a good idea.
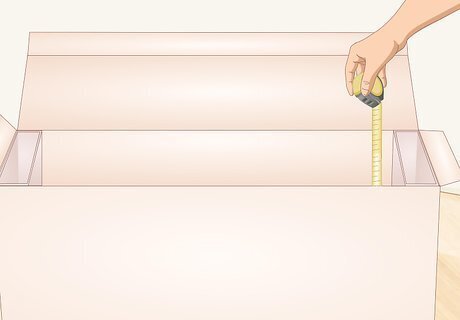
Measure the depth of the box you’re using. This tells you how much padding the box requires to prevent the painting from bouncing around. Measure the box depth, then subtract the width of the painting. The result is how much padding you need on each side. For example, if the box is 8 inches (20 cm) deep and the painting has a width of 3 inches (7.6 cm), then it needs 2.5 inches (6.4 cm) of padding on each side.

Wrap the painting with bubble wrap until it reaches the box depth. Lay out a sheet of bubble wrap with the flat side facing up. Place the painting on top and begin rolling it in bubble wrap. Measure every few layers to see how thick the package is. Stop when it reaches the depth of the box. Make sure only the flat side of the bubble wrap touches the painting. The bubbled side could leave impressions on the painting. Rolls of bubble wrap are usually cheap. Check online or at an office supply store. If you don’t have this much bubble wrap, then wrap the painting with 2 bubble wrap layers. Then use blankets, Styrofoam, or a similar padding material to fill out the rest of the box.
Fold all the edges of the bubble wrap and secure them with packing tape. Start at the end of the painting/ Roll the remaining bubble wrap towards the painting and tape it down. Then apply a strip of tape along any bubble wrap edges to prevent them from getting caught during the moving process. It's okay to use packing tape at this point because none of the tape will touch the painting directly. Don't use masking or artist tape for this task. These aren't sticky enough and the wrap could come loose.
Loading the Painting into the Box
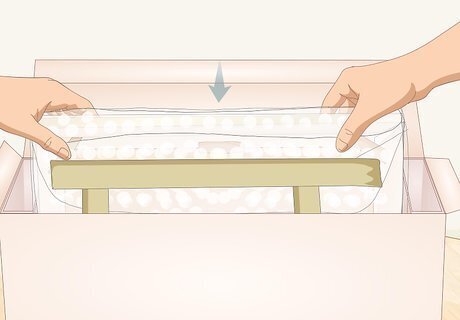
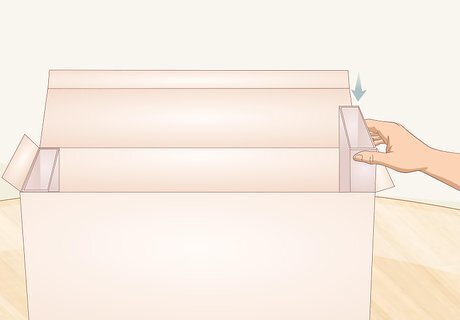
Slide the painting into the box carefully. Position the box so the open side faces up. Then take the painting and lower it into the box. Work gently so you don’t slam the painting onto the ground. Work with another person for larger paintings. If you find that the painting doesn’t fit, remove it and take off a few layers of bubble wrap. Try again and see if it fits now.
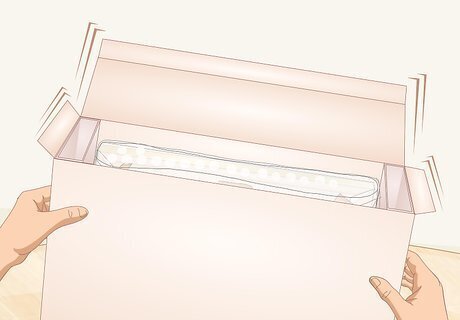
Test the box to make sure the painting doesn’t shift or rattle. Before taping up the box, make sure the painting has enough padding. Pick the box up and shake it a little. If you hear the painting sliding around, then it may not have enough padding. Take it out and add some more bubble wrap or packing material, then test it again.
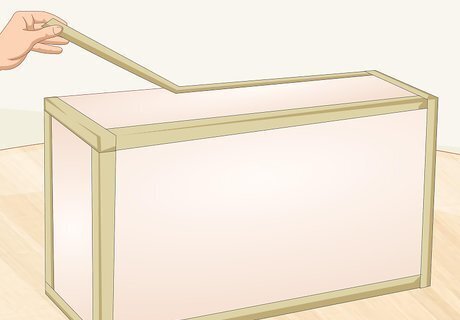
Use duct or packing tape on all the sides of the box in case you slide it. First, use packing tape and seal up the box opening. Then, tape up all 4 sides of the box. This prevents the box from ripping open if the movers slide it around during transport. Don't use painter's tape for this because it is too weak to protect the box or keep it closed.
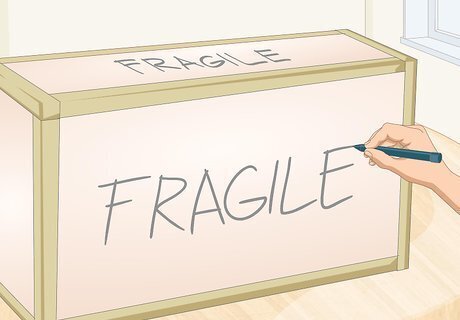
Mark the box as “Fragile.” Professional movers are always careful with that they transport, but make sure they know that a fragile item is in this box so they’re extra careful. Write “Fragile” on every side of the box in red marker so it’s easy to spot. If you’re transporting several paintings, also label the box with the painting inside. This will make unpacking much easier. While a paper painting without canvas may be less fragile, still mark the box as fragile. It's still a valuable item. If you're using a moving company, get insurance on your items just in case your paintings get damaged.


Comments
0 comment