
- Make a deckle out of a wooden frame and window screen so that you can mold, press, and shape your paper.
- Blend scraps of recycled paper with water to create a slurry and base for your DIY paper.
- Add food coloring, seeds, or glitter to your slurry to make your paper even more unique.
Pulping the Paper
Attach a sheet of window screen to a wooden frame. Use a pair of sharp shears or scissors to cut the screen into a 12 in × 8 in (30 cm × 20 cm) rectangle. Then, place the cut section of screen over a wooden frame. Staple or nail the screen to the outer edges of the frame. This simple contraption is called a deckle and will help press, shape, and mold your DIY paper. If you don’t have the materials to make a deckle, try shaping the paper by handing by pressing it between 2 pieces of cloth.
Collect about 6 cups (768 g) of recyclable paper from around your house. Newspaper may be the easiest source to start with, but you can also use old print-outs, notes, or phone books. Just about any un-waxed paper product will do. Keep in mind that the color of the papers you use and the amount of dark ink on the paper will affect the color of the paper you make. For instance, dark and inky materials will produce dark gray paper. To make white paper, collect white sheets of paper with little ink to no ink on them. Even the smallest amount of ink can turn your paper gray. Avoid using glossy or shiny paper from magazines, photographs, or wrapping paper, as it doesn’t work well for papermaking. 6 cups (768 g) of scrap paper can make a handful of pages, depending on the size and thickness of your paper.

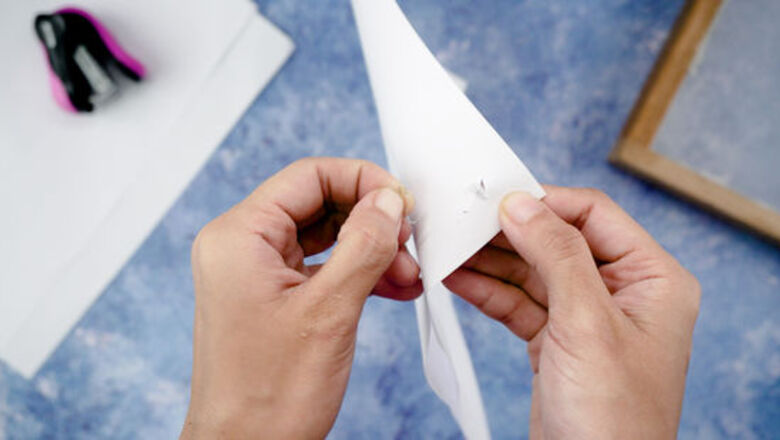
Remove any plastic and/or staples from the paper. Especially if you’re using junk mail, your paper scraps are likely to contain plastic from envelope windows. If staples or other contaminants are left in the paper, they could damage your blender during the pulping process.
Tear the paper into 2 in (5.1 cm) wide strips. The pieces don’t have to be perfectly uniform, but they should all be around 2 in (5.1 cm) in size. If you’re making a large amount of paper and don’t want to spend hours ripping up individual sheets, try putting the paper through a shredder. If you’re doing this project with kids, they’ll love tearing the paper apart. Let them be in charge of this step!
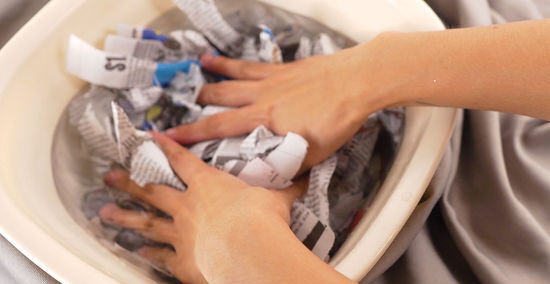
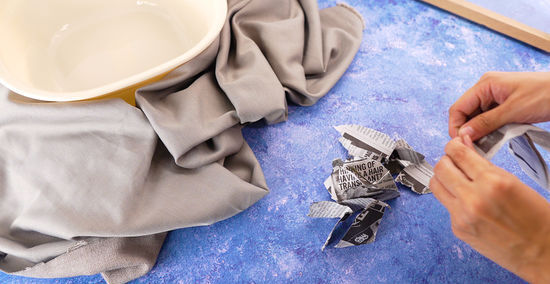
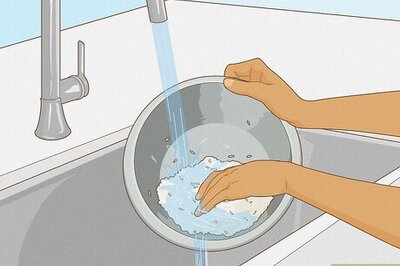
Soak the paper in warm water for at least 4 to 6 hours. Put the shredded pieces of paper in a kitchen pitcher or a large plastic bowl until the container is roughly half full. Fill the pitcher (or plastic bowl) to the brim with warm tap water to ensure that all of the paper scraps are completely submerged. Let the scraps soak for 4 to 6 hours or overnight, so they become nice and soft. If all your paper doesn’t fit into one pitcher or bowl, no worries! Soak the paper in multiple containers at once or in one large plastic bucket. If you want whiter paper, add ⁄2 cup (120 mL) of white vinegar to the pulp mixture to “bleach” the paper scraps.
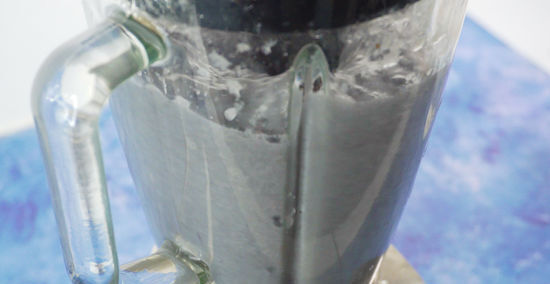
Blend the paper with water for at least 30 seconds to turn it into a slurry. Pour the soaked paper scraps into a blender until it’s about two-thirds full. Then, add 2 to 3 cups (470 to 710 mL) of water. Run the blender on “slow” and blend for approximately 30 to 40 seconds. Blend until the mixture is smooth and there are no flakes of paper remaining. Try not to over-blend the paper, as a thin, soupy slurry won’t mold into paper well. Blend your soaked paper scraps in batches if you soaked them in multiple pitchers or bowls. This way, the blender won’t be too full and can blend each batch evenly. This thick, oatmeal-like mixture is called a slurry and is a combination of paper pulp (blended soaked paper clumps) and water.
Adding Unique Elements
Change the hue of your paper with food coloring for an artistic flair. Put 5 to 6 drops of food coloring into 1 blender's worth of slurry. After you add the food coloring, stir the slurry with a spoon until the color is evenly distributed. If you'd like to make 2 different colors of paper, add drops of different colors to separate batches of slurry. If you mix more than 2 colors in a single pitcher, you'll end up with an ugly brown. Try adding drops of brewed coffee to color and darken your paper with a natural dye.
Create seed paper by adding a handful of wildflower seeds to your slurry. Pour half a packet of seeds into your slurry after you've blended it. This type of paper makes a great artistic and unique gift. Plus, the texture is fun to color on. If you'd rather not use seeds, try dropping a small handful of shredded flower petals, dried herbs, leaves, or green grass into the slurry.
Add a pinch of glitter to the slurry to make your paper sparkle. For bright, glistening paper, drop 1 tsp (4 g) of glitter into the slurry after blending. Choose whatever color you’d like; just avoid adding too much glitter because it could dry out the slurry.
Setting the Paper
Fill a large foil pan at least a third of the way full with warm water. Use a pan that’s at least 18 by 24 inches (46 cm × 61 cm) so you can make a large batch. Fill the pan halfway with water to make delicate paper, or fill it less than a third of the way full for tough, fibrous paper. A large casserole pan or even a rectangular plastic bin works well for this step; just make sure the basin is a little wider and longer than your deckle.
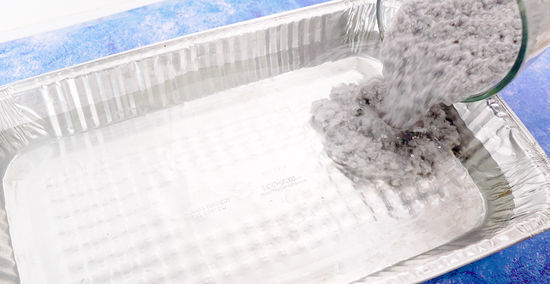
Pour the blended slurry into the pan and stir. Start by adding at least 5 cups (1190 mL) of slurry. The amount of slurry you add to the water will determine the thickness of the paper. If you’re new to making paper, experiment a bit with the amount of slurry you use. Change the paper thickness by adding more or less slurry to the pan. Stir the slurry around with a spoon or your hands until it’s evenly distributed throughout the pan. The more slurry you add, the thicker the paper will be. The less slurry you add, the thinner the paper will be.
Immerse your deckle in the pulp mixture. Hold the frame at a 45-degree angle and submerge it into the basin with the screen side facing downward. Once the frame is fully submerged, tilt it back, so it’s level under the slurry. Lightly shake the frame from side to side until the pulp on top of the screen lies flat. If you don’t even out the pulp on top of the screen, you’ll end up with an uneven paper that has thinner and thicker spots.
Lift the screen up and out of your pulp mixture. Be careful not to tilt the frame as you lift it. Hold the frame over the basin for 4 to 5 minutes so the excess water can drip out of the pulp. Wait until most of the water has drained from the pulp. If you don’t want to tire out your arms, just rest the frame on 1 corner of the pan. If the paper is thicker than you’d like it to be, remove some of the pulp from the top. If it’s too thin, dip it into the slurry mixture again and pile more slurry on top of the screen.
Couching the Paper
Transfer the wet sheet of paper to a towel using a sponge. Flip the frame upside down and place it on top of 2 to 3 towels. Make sure the side of the frame you nailed or stapled the screen to is facing upward, so the paper is pressed against the towels. Gently press down on the back of the screen to transfer the sheet of paper from the screen to the drying towels. Then, use a sponge to press out as much water as possible from the other side of the screen, periodically wringing out the sponge as you do. If you don’t have towels, try using a large sheet of felt or cloth instead.
Lift the screen up and away from the transferred paper. Gently lift the towel out of the frame, leaving the wet sheet of paper on the towel. If the paper sticks to the screen, you may have pulled too fast or not pressed out enough water. Try drying out and flattening a thicker piece of paper by placing another towel on top of it and pressing down on it gently with your hands. Consider using a hair dryer to blow hot air on the underside of the paper for 10 to 15 seconds to help it transfer. Transferring the paper from the deckle to the towel is called couching (pronounced “coo-ching”). Sometimes, thicker paper doesn’t transfer to the towel easily. If your paper gets stuck, gently peel it off the screen using your fingers.
Set the paper out to dry overnight. Take the paper and lay it out to dry on a flat surface, or hang it up on a laundry line using a clothes pin. Depending on the thickness of your paper, it can take anywhere from 6 to 8 hours for it to dry completely. Try speeding up the drying process by blowing hot air from a hair dryer on the paper. Use the lowest setting, and keep the hot air on the paper for about 10 minutes. Avoid leaving your paper to dry on a colored sheet of paper because it may take on the shape and color of the material it’s drying on.
Store and use your DIY paper once it’s dry. When your paper is completely dry to the touch, you can start using it! Try storing it in a closed book to keep it nice and flat until you’re ready to create, or start drawing, printing, or painting on it right away. Here are some creative ways you can use your homemade paper: Send a friend or family member a letter using paper designed specifically for them. Create name cards for weddings or parties. Make a book or journal using the paper. Print a picture or story onto the paper. Scrapbook or create a collage.


Comments
0 comment