
Making the Papier Mâché and Prepping the Face
Mix together 1 cup (120 g) of flour and 1 cup (237 ml) of warm water. Place the flour and water into a large bowl. Use a whisk to mix the flour and water together. Continue mixing until the water and flour has formed a glue and is a batter-like consistency. Sift the flour first if you want the papier mâché to be super smooth. Add more warm water if the mixture is too thick. You can also make papier mâché mixture out of elmer's glue and water.
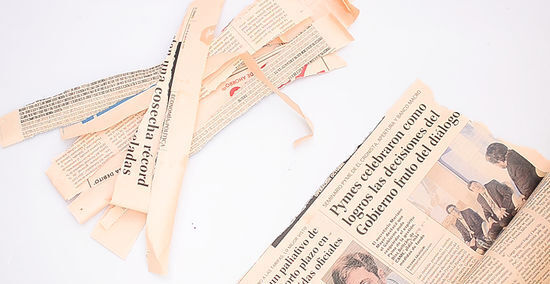
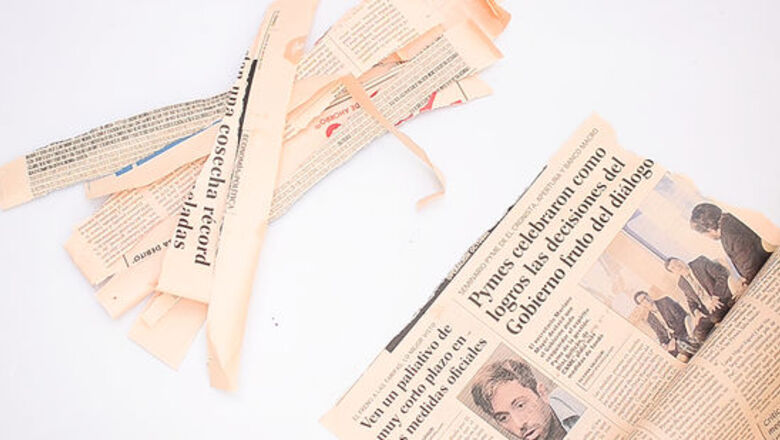
Cut 10 sheets of A3 newspaper into long strips. Use scissors to neatly cut the sheets of newspaper into strips that are approximately ⁄2 in (1.3 cm) long and 4–6 in (10–15 cm) wide. Alternatively, you can rip the newspaper into strips if you prefer. Make sure that the strips are roughly these dimensions, as the strips will be easiest to work with at this size. You can use an old comic or magazine instead of a newspaper if you prefer. You probably won’t need a whole newspaper worth of strips, however, it is better to have too many than to run out while you are making your mask.
Cover the face that the mask will be molded on with petroleum jelly. Rub a generous amount of petroleum jelly over your friend’s face. This prevents the papier mâché from sticking to their face and helps the mask to come away cleanly. Pay special attention to their hairline, eyebrows, and upper lip, as this is where the papier mâché is most likely to stick. Alternatively, use aloe vera gel instead of petroleum jelly. Make sure that your friend has their hair out of their face and tied back if necessary before you start applying the papier mâché.
Laying Down the Newspaper Strips

Dip each newspaper strip into the glue mixture before you apply it. Each newspaper strip needs to have an even coating of glue before it can be applied to your friend’s face. Make sure that the full length and both sides of each strip is covered in glue. If you are using a glossy magazine rather than a newspaper, spend a few extra seconds soaking each strip in the glue mixture.
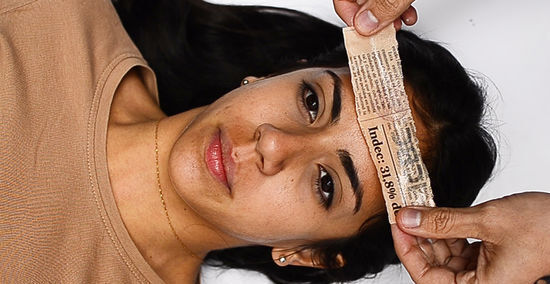
Place 1 layer of strips along your friend’s jawline, forehead, and nose. Begin to apply strips of newspaper to your friend’s face and make sure that each one rests flat. Place the strips across your friend’s forehead, down their jawline following the angle, and across the bridge of their nose. Cut the strips shorter if they are too long for parts of your friend's face. Don’t worry about creating layers of newspaper strips just yet. Just focus on covering these areas of your friend’s face. Be careful not to block your friend's nostrils with newspaper as you work on their nose.
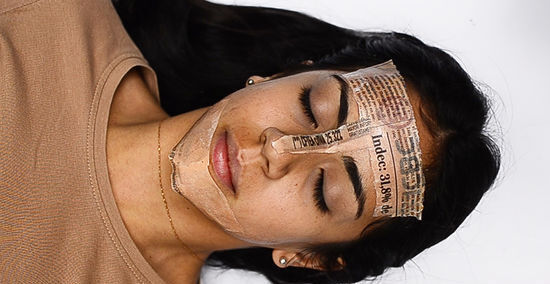
Cover your friend’s cheeks and chin with the papier mâché strips. Work on broadly covering your friends face with strips of newspaper, with each strip slightly overlapping the previous one to help the mask stick together. Connect the different areas of papier mâché on their face using more strips. Leave the areas around their eyes, nostrils, and mouth open. As long as your friend can breathe comfortably through their nose, you can cover their mouth with papier mâché too if you prefer. This means that you will be able to cut out the mouth shape when the mask is dry.
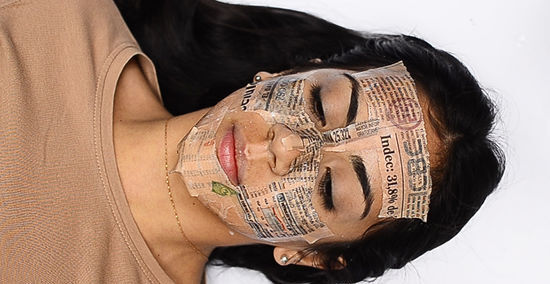
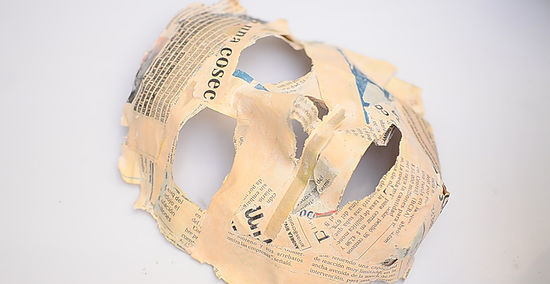
Fill in the missing sections with papier mâché. Cut the strips of newspaper slightly smaller so that they can be thin and short enough to cover areas like in between the eyebrows, across the upper lip, and down the septum. Carefully place these strips of newspaper to connect each part of the mask. Provided that your friend can safely breathe and open their eyes, it’s better to make the openings in the mask slightly too small rather than too large. This is because it’s easy to cut the openings to size once the mask has dried. Don’t worry if there are overlapping sections of papier mâché.
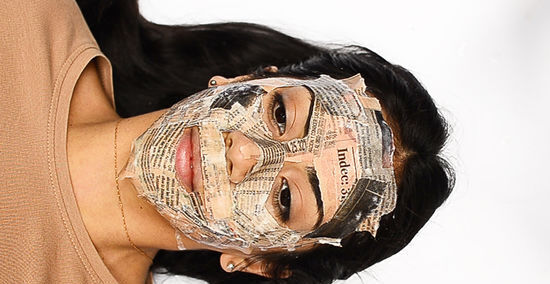
Add 2 layers of papier mâché to the mask to create a smooth finish. Use the newspaper strips to go over all of your previous work on the mask. Smooth down every strip as you apply to make sure that your mask isn’t bumpy. Ensure that every part of the mask is even and has approximately 3 layers overall.
Removing and Drying the Mask
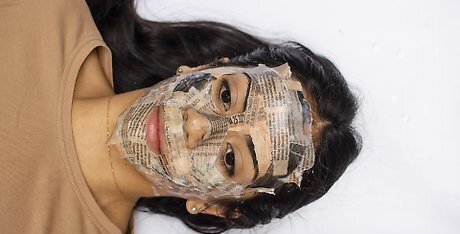
Let the mask dry on your friend's face for approximately 2-3 hours. Wait until the mask feels firm and only slightly wet. If the mask is taking too long to dry, use a blow dryer to speed up the process. The mask won’t be entirely set just yet, as it needs to dry fully overnight.
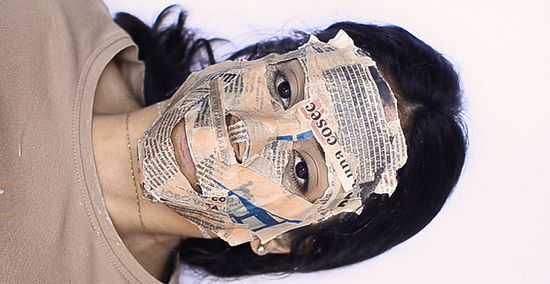
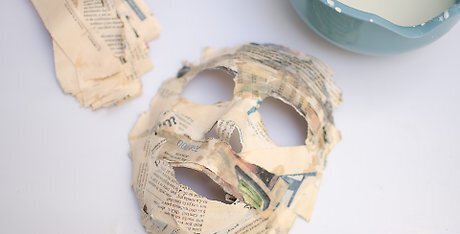
Remove the mask from your friend’s face once it feels firm. Have your friend slowly scrunch up their face. Hold your hands right in front of the mask to catch it as it comes away. If needed, gently pry the mask away from their skin at the edges, being very careful not to dent or damage the mask.

Leave the mask in a well-ventilated area to dry overnight. Rest the mask on a flat surface to dry. Make sure that the mask is completely dry before you begin shaping or decorating it. The mask may take slightly longer to dry depending on the humidity.
Adding Embellishments
Place more papier mâché on the mask to add small, extra features. Build up areas of your mask such as the cheekbones, chin, eyebrows, or lips with extra layers of newspaper and glue. This will make your mask appear less flat and more comical. This is the easiest way to add wrinkles to your mask. Once the papier mâché layers are dry, your mask should feel firm and not flimsy. Add more layers if the mask feels too weak. If your mask is just for display and is not going to be worn, you can cover the eyes and breathing holes with papier mâché if you prefer.
Create molds and papier mâché over these to form large features. Crumple up some newspaper into the shape of the feature that you are wanting to make. Use masking tape to attach this to your mask. Then, place papier mâché over the mold to make the surface smooth. Creating molds is useful when you want to add larger features to your mask such as horns, a beak, or a long nose. Wait until all of the extra layers have dried before decorating your mask further. This may take an extra 1-2 days depending on the weather and how many layers need to dry.
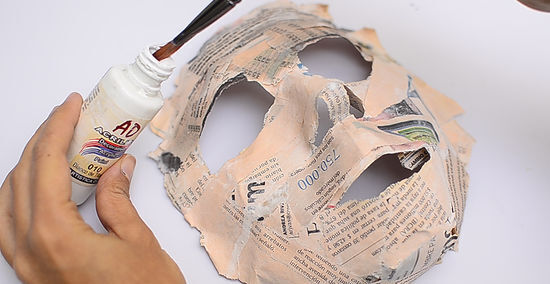
Paint your mask with acrylic paint. Pick the colors and design that you want your mask to have. Use a paintbrush to add coats of acrylic paint to your mask, letting each coat dry before adding another. Let the final coat of paint dry for at least 1 day. There are plenty of design options for painting your mask. Chose bright colors if you are making a costume mask or skin tones if you are creating a realistic mask.
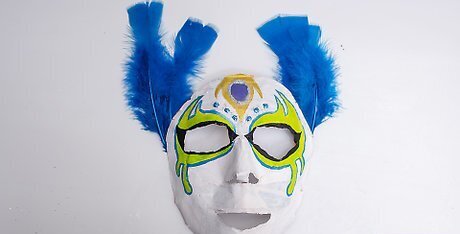
Add decorations to your mask such as wool, glitter, or feathers. Use either craft glue or a hot glue gun to attach the decorations to your mask. If you are wanting to create a costume or bird-themed mask, decorate the edges with feathers. For an animal or human mask, use wool to create hair or fur. You could also use fake teeth, a wig, ribbon, or washi tape to decorate your mask.


Comments
0 comment