views
Making the Cone Hat
Find some poster paper. Poster paper is the ideal choice for making cone hats, because it is stiff and easy to glue. You can also decorate your paper with stickers or stamps. For more ideas on what you can make your hat out of, refer to the section in this article on using other materials.
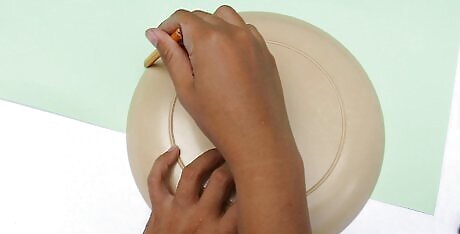
Draw a half circle on your paper. You can use a compass or even a large plate to draw the half circle. If you are using a plate, put the plate on the paper, and trace around it using a pencil. Make sure that the flat side of the half circle is along one of the edges of the paper. How big you make you hat will depend on what sort of hat you want. If you want a birthday hat, make the half circle 12 to 16 inches (30.48 to 40.64 centimeters) wide. The final hat will be 6 to 8 inches (15.24 to 20.32 centimeters) tall. If you want a clown hat, make the half circle 18 to 20 inches (45.72 to 50.80 centimeters) wide. The final hat will be 9 to 10 inches (22.86 to 25.40 centimeters) tall. If you want a princess or wizard hat, make the half circle 22 inches (55.88 centimeters) wide. The final hat will be 11 inches (27.94 centimeters) tall.
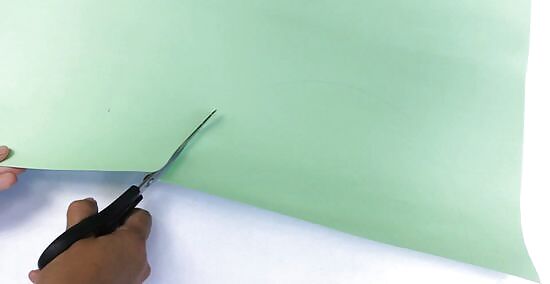
Cut the half circle out. You can use a pair of scissors or a craft knife to do this. If you are using a craft knife, be sure that you have something underneath your paper to protect the surface you are working on, such as cardboard or a craft cutting mat.
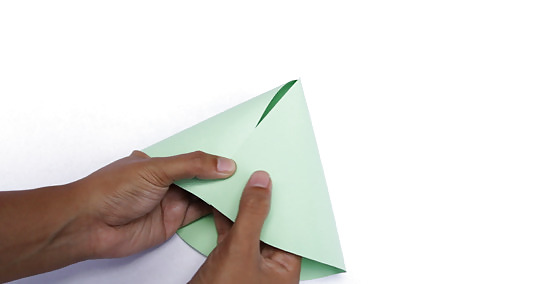
Roll the half circle into a cone. Roll the two flat edges of the half circle towards each other until they meet. The curved part of the half circle will become the brim of the hat. Put the hat on your head (or your child's head) and keep pulling the ends past each other until the hat fit.
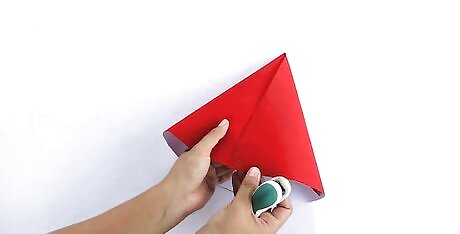
Staple the bottom edge of the seam. Once the hat fits your properly, take it off and staple the bottom edges together.
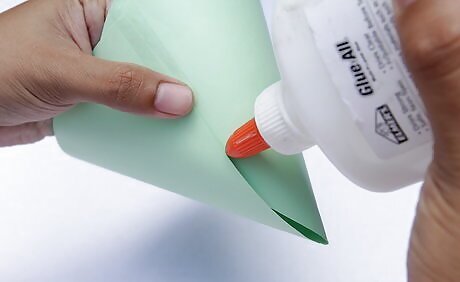
Apply glue or tape along the seam. Run a thin line of glue along the inside seam, and hold the paper together until the glue dries. You can also use double-sided sticky tape; simply cut a piece of tape that is the same height as the hat, and place it along the inside seam of the hat.
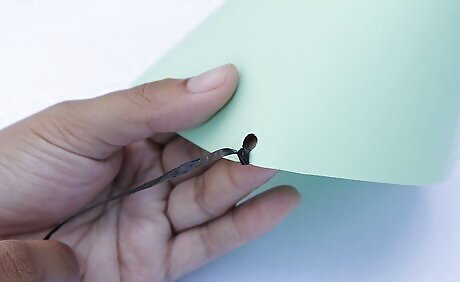
Add some elastic to make a strap. To help the hat sit more securely on your head, you will need to add some thin elastic. Poke a small hole into the hat, about ½ inch to 1 inch (1.27 to 2.54 centimeters) up from the base. Poke a second hole on the opposite side of the hat. Cut about 18 inches (45.72 centimeters) of thin elastic. Push or thread each end of the elastic through one of the holes, and tie a knot. Try the hat on and place the elastic strap under your chin. If it is too loose, take the hat off and pull one of the elastic ends further inside the hat. Tie a knot and try the hat on again. Once the hat fits, cut off any excess elastic string. Leave about 1 inch (2.54 centimeters) of string above the knot. You can make the knot more secure by putting a drop of tacky glue or hot glue over it.
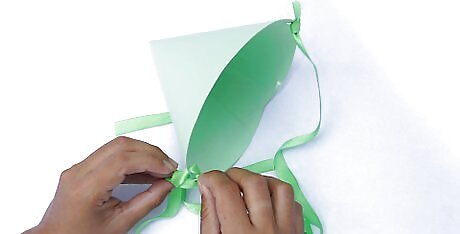
Consider adding ribbon to tie the hat on. Cut two pieces of ribbon that are about 24 inches (60.94) long each, and glue them to the inside brim of the hat. The ribbons should be facing opposite each other. This is perfect for a princess hat.Try the hat on, tie the ribbons into a bow, and trim off the ends if they are too long.
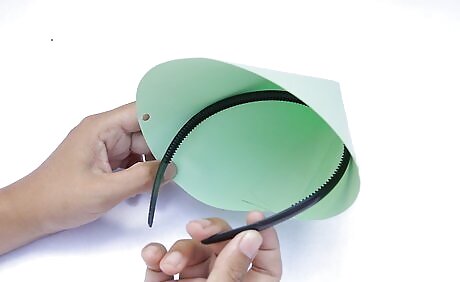
Consider hot gluing the hat to a headband. Put the hat onto a headband, and make a mark where the bottom of the hat touches the band. Take the hat off. Run a thick line of hot glue just above the marks you made. Quickly put the hat back onto the headband and hold it until the glue sets. This works better for smaller, shorter hats (such as the birthday hats) than taller hats (such as the princess or wizard hats).
Finishing and Decorating the Hat
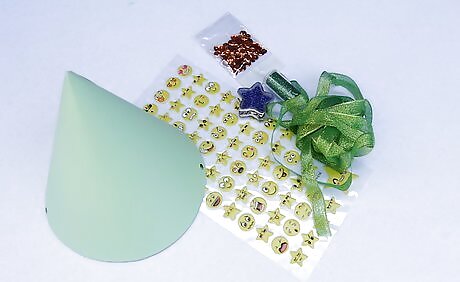
Consider decorating your hat. You can personalize your hat by adding some decorations to it, such as stickers, pompoms, and rhinestones. This section will give you some decorating tips as well as ideas on how to make a princess hat and a wizard hat.
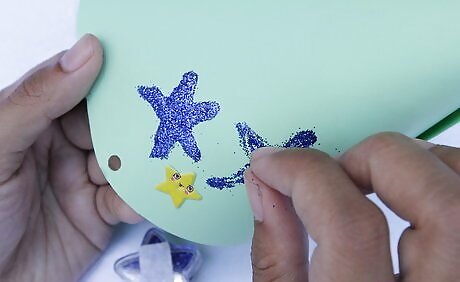
Make a cone hat fit for a wizard by adding some stars. Wizards love to study the stars, and their hats should reflect that. Make your cone hat more wizardly by adding stars to it. You can use star-shapes stickers, or you can paint on stars using star-shaped stencils. If you are painting the stars on, consider using glow-in-the-dark paint. Consider adding a star to the top of the hat. Buy a flat, wooden star (or cut one out from poster paper) and paint it with glow-in-the-dark paint. Once the paint has dried, attach the star to the top of the hat using some hot glue.
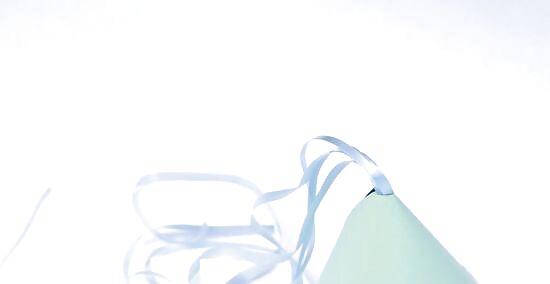
Make a cone hat fit for a princess by adding a veil. No princess hat is complete without a veil. Measure out a length of tulle fabric (it should be at least twice as long as it is wide) and cut it with a pair of scissors. Gather one of the narrow ends and tie it off using a rubber band. Cut the point off of the cone hat (no more than 1 inch) and poke the rubber-banded end of the tulle into the hole. You can secure the tulle on the inside of the hat with some hot glue. You can also use long strips of ribbon instead. Consider decorating the brim of the hat by adding some trim.
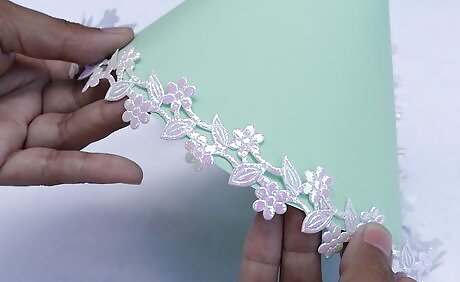
Add some trim. You can make your cone hat fancy (or a princess cone hat even fancier) by gluing some trim to the bottom rim. Take a measuring tape and measure the circumference of the hat, and remember the number. Measure out the trim according to that number and cut it. Attach the trim to the bottom rim of the hat using hot glue or tacky glue. Here are some ideas for what you can use for trim: Tinsel Marabou feather boa, or any other thin boa Rickrack or ribbon Crepe paper Pompoms Glitter
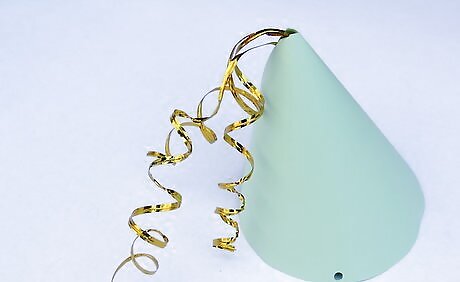
Add crepe paper and curling ribbon. You can add long strips of colorful crepe paper to the top of your hat to make a simplified princess hat. You can also add shorter lengths of crepe paper or curling ribbon along the bottom brim to mimic hair. Be sure not to add the crepe paper along the entire brim, or the wearer won't be able to see! You can make the curling ribbon (the type used on balloons) by running it along the edge of a scissor blade. Hold your thumb over one end of the ribbon, and give it a small, downward tug. Attach the crepe paper to the inside rim of your hat using tacky glue. Attach the curling ribbon to the inside rim of the hat using hot glue.
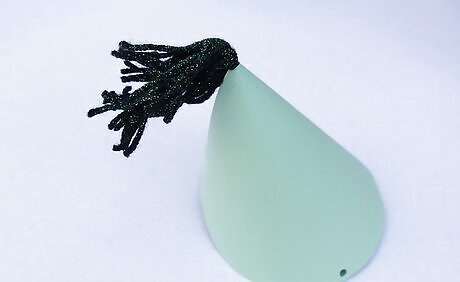
Add some pompoms. You can make your hat appear more amusing by gluing some glittery pompoms to the point. Simply snip off the tip of the hat, and then add a drop of hot glue onto the hole. Immediately place a sparkly pompom onto the glue.
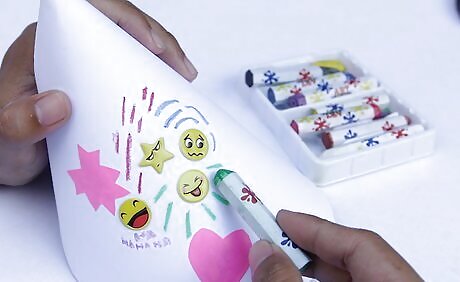
Decorate a plain hat with stickers, cut out paper shapes, or stencils. You can make a plain hat more colorful by adding shapes to it. You can do this by sticking on some stickers, cutting shapes out of paper and gluing them on, or using stencils to paint on some shapes with acrylic paint.
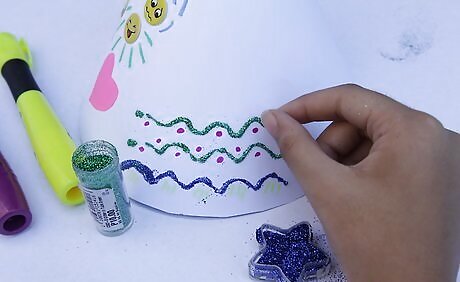
Add some glitter to the hat. Use white glue to draw some designs on the hat, then shake some glitter onto the hat. Be sure to turn the hat so that you entire design gets glittered. If you plan on using more than one color, then add the glue and glitter for the first color and let it dry before adding the glue and glitter for the next color. Draw some fun designs, such as stars, dots, zigzags, and spirals. Draw a squiggle along the brim to make a fancy trim. If you are making a bunch of hats for a party, consider making the hats more personal by writing the person's name in glue, and then using their favorite color in glitter. If you want to make the entire hat glittery, then use spray-on glitter instead. Shake the can for a few moments and hold it 6 to 8 inches (15.24 to 20.32 centimeters) away from the surface. Spray on a light, even coat and wait for it to dry completely before apply a second coat. Try working over a sheet of paper or a paper plate. That way, when you are done, you can roll the sheet of paper or the paper plate into a funnel, and pour the glitter back into its container.
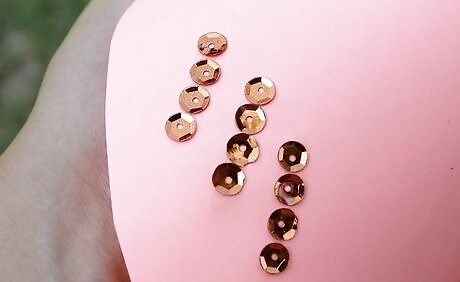
Add some rhinestones or sequins. You can give your hat some extra bling by sticking some rhinestones or sequins onto it. You can use some stick-on gems used for scrapbooking, often found in the sticker section of an arts and crafts store, or you can hot glue some craft gems or sequins onto the hat.
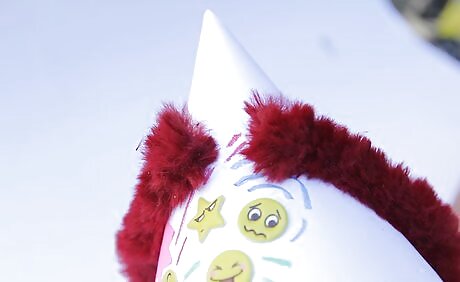
Make a hat wacky with pipe cleaners. For a fun, whimsical hat, add some pipe cleaners. Bend some pipe cleaners into random shapes, but leave the bottom inch (2.54 centimeters) or so un-bent. Snip the point of the cone hat of, and tuck the pipe cleaner ends into the hole. If necessary, secure the pipe cleaner ends from the inside using tacky glue or hot glue. You can use one pipe cleaner or a bunch of pipe cleaners. Here are some more ideas: Bend pipe cleaners into zigzag shapes. Wind a pipe cleaner around a pencil and gently pull it off, creating a springy coil. Bend the end of the pipe cleaner into a fun shape, such as a star or a swirl, while leaving the rest of the pipe cleaner straight. Wind two differently-colored pipe cleaners together for a candy cane effect. You can then use them as any other pipe cleaner. Make your pipe cleaner shapes extra wacky by hot gluing a tiny pompom to the end. This works especially well for the springy, boingy shapes.
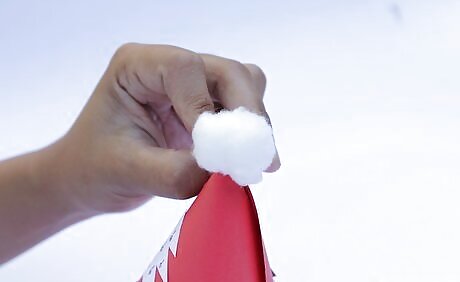
Make a Santa hat. If Christmas is right around the corner, you can turn any red cone hat into a Santa hat by gluing a white, fluffy pompom to the tip, and cotton balls or fake fur along the bottom brim.
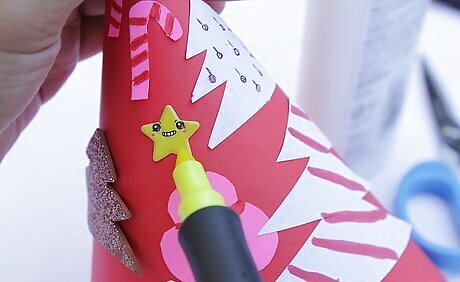
Consider decorating your hat according to the theme or season. If you are making your hat for a party, try to keep the theme or season in mind when decorating. Here are some examples and ideas to get you started: If the party has a fish theme, then make some blue hats and decorate them with fish and bubble shaped stickers. Spread some glue along the brim of the hat and sprinkle sand over it. Glue several long strips of green crepe paper to the point of the hat to mimic seaweed. If the hat is for a baby shower, and the theme is pink and white in honor of the baby girl, then make some pink party hats, and add a trim of white Marabou feather boa to the brim. Top each hat with a white pompom or feather poof. You can also use pink paper with white stripes or polka-dots instead of plain pink paper. If the hat is for a Halloween party, you can make some orange and black party hats, and add some spooky touches. Glue black tinsel along the bottom brim, and glue some plastic spiders to the point of each hat. You can also attach the plastic spiders to some string or pipe cleaners, and glue those to the point of the hat.
Using Other Materials
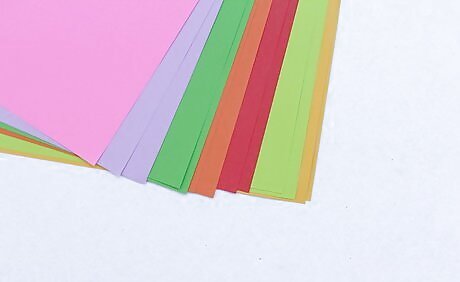
Use some construction paper. It will not be as durable, but it will be easier to find the color you want. Keep in mind, however, that construction paper will may be too small to make larger hats, such as princess or wizard hats.
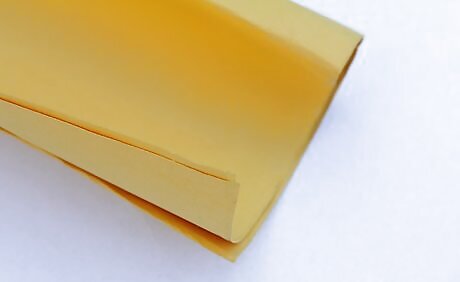
Use some cardstock or scrapbooking paper. Cardstock is sturdy and comes in many colors, but it may not be large enough to make the bigger princess and wizard hats. It usually comes in 8.5 by 11 inches (21.59 by 27.94 centimeters) or 12 by 12 inches (30.48 by 30.48 centimeters).
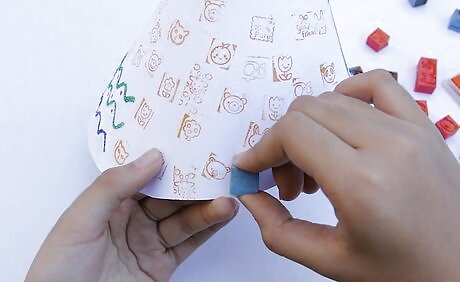
Consider adding a pattern with stamps. You can easily add a pattern to your cone hat by stamping a pattern onto it. Simply find a stamp design that you like, and an ink pad. Press the stamp into the ink pad, wriggle it a bit to make sure that everything gets coated in ink, and then press the stamp onto the paper. Keep doing this until the entire paper is covered in your new design. Keep in mind that most ink pads are made with translucent ink. This means that the original color of your paper with show through. For example, if you try to use a red stamp on a yellow poster paper, you will get an orange design. For best results use white paper and any color ink, or black ink and any color paper.
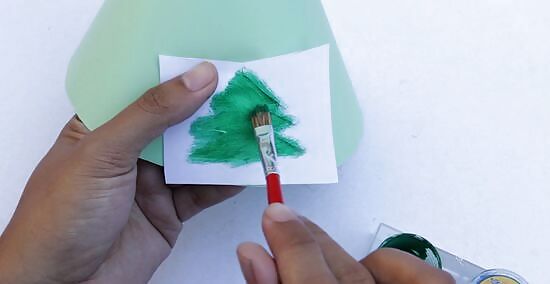
Consider adding a pattern with wrapping paper. You can make your cone hat look more interesting by covering the poster paper with wrapping paper. Simply roll out a length of wrapping paper and set it pattern side down. Apply spray on adhesive to the back/white side of the wrapping paper, then place the poster paper down on top of the adhesive. To protect the surface you are working on, consider covering it with newspaper or a plastic tablecloth.
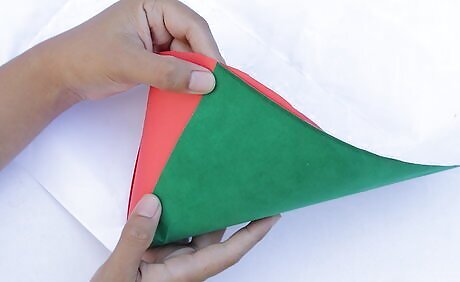
Wrap the cone with felt or fabric. You can make a cone hat fit for a princess (or wizard) by covering the poster paper with fabric or felt. Simply cut a sheet of fabric the same size as your poster paper and lay it right-side down on a flat surface. The wrong side (or the back) of the fabric should be facing you. Apply a thin, even coat of spray-on adhesive, then place the poster paper onto the fabric.
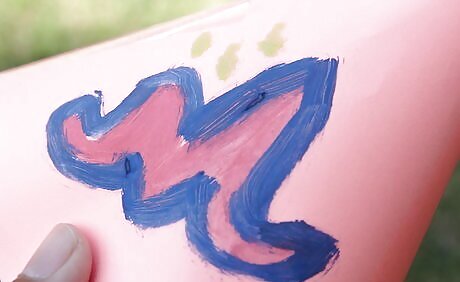
Add color to your poster paper with paint. If you simply cannot find the perfect color of poster paper, you can make your own by painting it. You can either use a large, flat brush and acrylic paint, or you can use spray paint. If you are using acrylic paint, apply the paint in a thin, even layer. Wait for the paint to dry, then apply a second layer. This reduces the brush strokes. If you are using spray paint, hold the can 6 to 8 inches (15.24 to 20.32 centimeters) away from the surface of the paper and apply a thin, even coat. If you need to apply a second coat, wait for the first one to dry, then reapply.
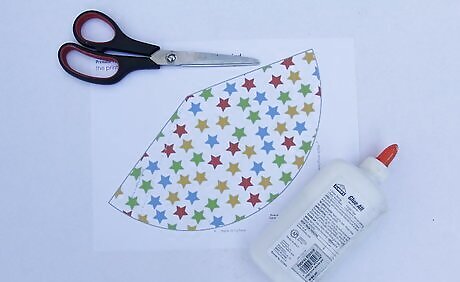
Design and print your own pattern. You can use a picture editing program to design your own pattern and then print it out on a sheet of printer paper or cardstock. You can create all sorts of designs, including zigzag, stripes, and polka-dots. Try to use bright, and contrasting colors such as neon green and red. If you are using cardstock and making multiple hats, then feed the cardstock one sheet at a time into the print so that the printer doesn't jam.
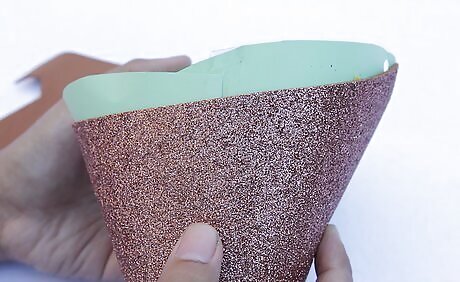
Make an extra glittery hat. If you want to make an extra glittery hat, you will have to finish making the hat first, then use spray-on glitter to cover the entire hat. If you try to add the glitter first, then you may not be able to glue or tap the hat close because of all the glitter. To apply the glitter to a finished hat, shake the spray can, then hold it 6 to 8 inches (15.24 to 20.32 centimeters) away from the surface of the hat and apply a light, even stroke. Wait until the paint has dried completely before applying a second coat.
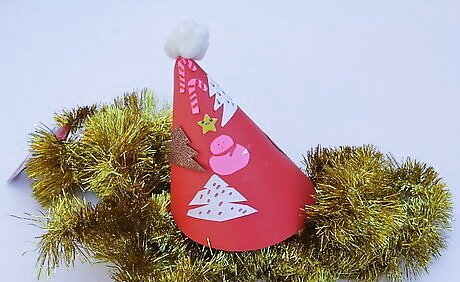
Consider matching the colors to the theme of the party. If you are making the hats for a party or an event, then try to choose colors that match the theme of your party. Here are some examples: If you are making hats for a New Year's Eve party, try using black, gold, and silver. You can also make black hats and use gold and silver trim. If you are making hats for a party whose theme colors are turquoise and white, then try making turquoise hats with white or silver trim. You can also make turquoise hats with white stripes or polka-dots.










Comments
0 comment