
- Add 2 US tbsp (30 mL) of raw honey to 2 cups (470 mL) of freshly boiled water, then wait for it to cool. Soak your cuttings for 2-3 hours, then plant.
- Or, mash up the gel from an aloe vera leaf until it forms a runny consistency. Coat the ends of your cuttings in the gel, then plant.
- Alternatively, crush an uncoated 325 mg aspirin pill and dissolve the powder in 1 cup (240 mL) of distilled water. Soak the cuttings for 2-3 hours, then plant.
Using Honey

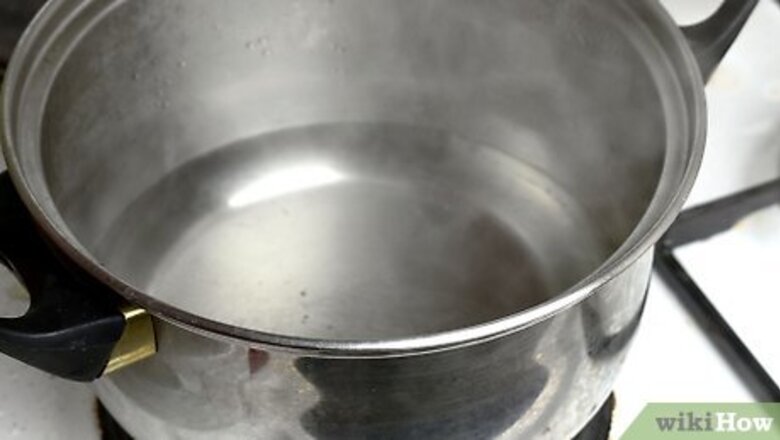
Boil about 2 cups (470 mL) of water, then reduce the heat to a simmer. Fill a pot with tap water and put it on your stove over high heat. Let the water heat up completely until it comes to a rolling boil. Then, turn the heat to low and let the water simmer. Alternatively, use purified or filtered water if you’re worried about any foreign substances in your tap water. Boiling the water kills bacteria that may interfere with your cuttings’ ability to grow roots.

Stir in 2 US tbsp (30 mL) of pure or raw honey and let the solution cool. If possible, use organic, raw, or pure honey in place of regular supermarket honey, which typically has added sugar. Scoop the honey directly into the pot of simmering water and use a mixing spoon to stir it together. As soon as the honey dissolves completely, turn off the heat and let the pot cool to room temperature. Put a lid on the pot while it cools to prevent anything from contaminating the solution. Honey contains antibacterial, antiseptic, and antifungal properties and promotes healthy root growth.
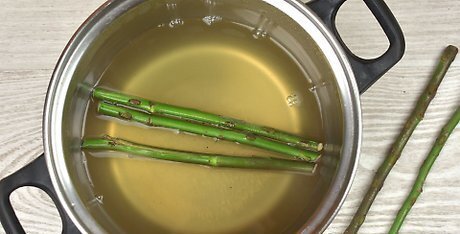
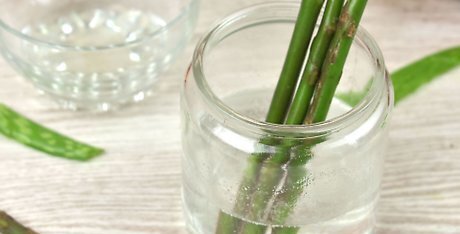
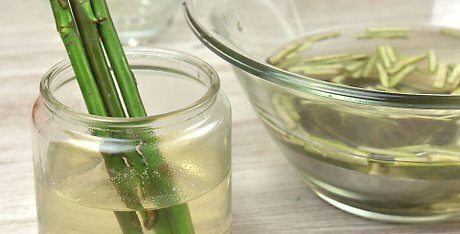
Soak your cuttings in the honey solution for 2-3 hours, then plant. Once the rooting hormone is completely cooled, put the cuttings in the pot so the bottom 1–2 inches (2.5–5.1 cm) are submerged. Let the cuttings soak for at least 2-3 hours before putting them in a rooting medium so they can absorb the solution. Optionally, try dipping the soaked ends of your cuttings in honey before planting them in the ground for an additional layer of protection from fungus and bacteria. For the best results, cut your cuttings at a 30- to 45-degree angle with a sharp knife or gardening shears. Rooting medium is lighter than soil and helps facilitate faster rooting.
Using Aloe Vera
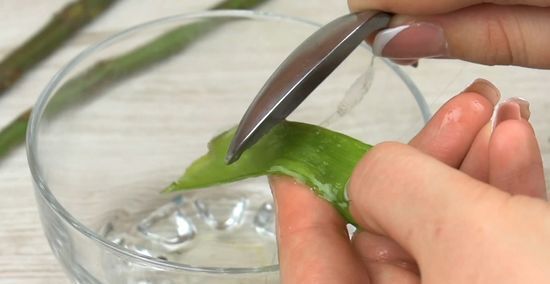
Push the gel out from an aloe vera leaf using a spoon. Cut a healthy leaf off an aloe plant with a clean, sharp knife. Lay the leaf flat on a cutting board in front of you so the pointed end faces you. Press the back of a spoon on the point of the leaf and apply firm pressure as you guide the spoon toward the cut end. The gel from inside the leaf will push out of the cut end onto your cutting board. The aloe gel protects the cutting from bacteria and fungi in the soil. Alternatively, use 100% pure organic aloe gel from the store as long as it doesn't have any other added ingredients.
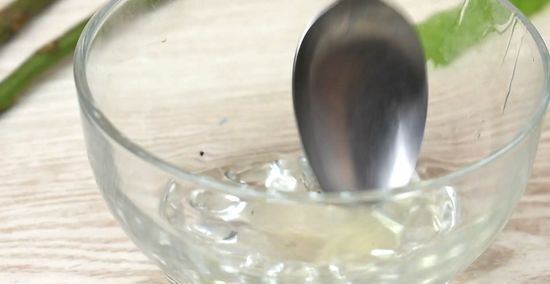
Mash the gel in a cup until it has a watery consistency. First, scoop the gel from the aloe leaf into a small cup and stir it with your spoon to break apart the larger chunks. Use the back of your spoon to smash the gel to loosen its consistency so it’s runnier. Once the gel easily moves around and flows like water, you can use it for your hormone. Add 1 tablespoon (15 mL) of water to your aloe gel if the texture doesn’t become runnier after mashing it around.

Coat the bottoms of your cuttings in the aloe gel before planting. When you’re ready to plant your cuttings, dip the cut ends into the aloe gel. Spin the cutting around so you get an even coating of the gel on the stem before putting it in your soil. The aloe gel on the cut end will help prevent any bacteria or fungi from entering the stem. For the best results, ensure the bottom 1 in (2.5 cm) is evenly coated in aloe. Plant the cuttings directly into a rooting medium in place of potting soil if possible.
Using Crushed Aspirin

Crush an uncoated aspirin pill into a fine powder. Use a standard 325mg aspirin tablet that doesn’t have any form of coating around it. Put 1 aspirin tablet inside of a pill crusher and screw the top on. Apply firm pressure to the top of the pill crusher to break the pill apart inside. Continue crushing the pill until it forms a fine powder. You can buy pill crushers from your local pharmacy. Alternatively, put the aspirin in a resealable plastic bag and break the pill apart with a hammer or your fist. Aspirin contains salicylic acid as an active ingredient, which helps prevent bacteria or fungus from forming on your cutting so it can develop roots.

Mix the ground aspirin with 1 cup (240 mL) of distilled water. Fill a glass or jar with 1 cup (240 mL) of distilled water and pour the aspirin powder into it. Use a spoon to stir the powder into the water until it completely dissolves. If some of the chunks don’t dissolve right away, then let the solution sit for about an hour before stirring and checking on it again. If you’re unable to crush the pill, put a whole aspirin in the water and wait for it to dissolve (this might take several hours longer than using a crushed pill). If you don’t have distilled water on hand, boil tap water and wait for it to cool to room temperature before mixing in the crushed aspirin. The aspirin may not dissolve as well in tap water if you live in an area with hard water.
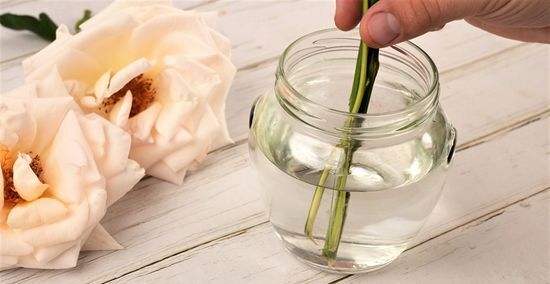
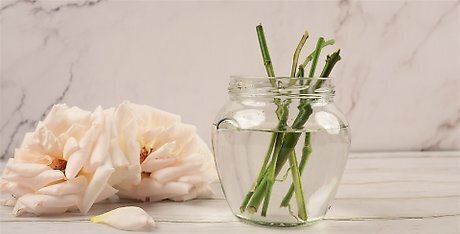
Soak your cuttings in the aspirin solution for 2-3 hours before planting. Take your fresh cuttings and submerge at least 1 in (2.5 cm) of their bottom ends. Let the cuttings absorb the aspirin solution for about 2-3 hours so they remain healthy after you plant them. Add your cuttings to a rooting medium in a small container or, if you’re rooting common houseplants like philodendrons or begonias, propagate them in a jar of water.
Using Willow Water

Collect 2 cups (256 g) of young branches from a willow tree. Collect the branches in spring when new growths are forming on the tree. Look for fresh green shoots and branches that are skinnier than a pencil. Use a pair of pruning shears or a sharp utility knife to cut the willow branches at a 45-degree angle so the tree doesn’t develop rot. Use branches from any type of willow tree or bush for your rooting hormone, such as weeping willows, white willows, pussy willows, and more. Alternatively, collect the bark from established willows if you’re able. If you use bark, collect 3 cups (384 g) instead since it contains fewer hormones. Avoid any dead branches since they won’t contain any of the natural rooting hormones.

Cut the branches into 1 in (2.5 cm) pieces. Use a sharp knife or a pair of pruning shears to cut the branches to a smaller size. Make sure each section of branch is about 1 in (2.5 cm) long so you can easily submerge them in water later on. Cut bark pieces to the same size if you used them instead of branches. Willows contain salicylic and indole butyric acids, which are natural growth hormones that will help your cutting quickly form roots once you plant it.

Soak the willow pieces in freshly boiled, hot water for 24 hours. Bring 1 US gal (3.8 L) of water to a boil over high heat on your stove. As soon as the water comes to a rolling boil, turn off the heat and pour in the willow branches so they can soak. Put a lid on the pot and leave the branches inside for 24 hours. During that time, the hormones will extract from the branches and mix with the water. Adjust the recipe to make a smaller amount of rooting hormone, but keep a ratio of 2 cups (256 g) of willow pieces to 1 US gal (3.8 L) of water (for example, if you want a half batch, use 1 cup (128 g) of willow pieces and 0.5 US gal (1.9 L) of water). If you’re unable to boil water for some reason, soak the willow pieces in distilled or filtered water for 3-5 days. The water will still extract the hormones, it will just take longer without heat.

Strain and pour the liquid from the pot into glass containers with lids. After 24 hours, carefully transfer the solution into separate containers. Pour the willow water through a strainer to catch any debris from the branches (the containers don’t need any branch particles since the liquid already absorbed their nutrients). After you fill the containers with the solution, cover them with lids and store them in your fridge for up to 2 months. Throw away or compost the willow branches once you’ve used them in your solution.
Soak your cuttings in the willow solution for 2-3 hours before planting. When you’re ready to plant your cuttings, dip the cut ends in the willow water solution and leave them to soak for at least 2 hours so they can absorb the nutrients. After they’ve soaked, put your cuttings in a rooting medium so they can start to grow. To get more use out of your homemade hormone and encourage growth, use the willow solution to water your cuttings during the first month for healthy roots and foliage. It’s safe to leave your cuttings in the willow water for up to 48 hours (they may even begin to show root growth in the solution).
Using Cinnamon
Grind fresh cinnamon sticks into a fine powder. Use a mortar and pestle to grind up whole cinnamon sticks. The exact amount depends on how many cuttings you’re planting—grind up enough cinnamon to evenly coat the bottom 1 cm (0.39 in) of each cutting (about ½ tsp (1.4 g) of cinnamon per cutting). If you use store bought cinnamon, make sure there are no added spices or other ingredients. Often, supermarket cinnamon has added sugar to make it taste sweeter. Cinnamon has antimicrobial properties that will protect your cuttings from bacteria and fungi, as well as other compounds that may help stimulate root growth.
Wet the ends of the cuttings, then dip them in the cinnamon. Dip the ends of your cuttings in distilled or filtered water to help the cinnamon cling to the plant. Then, dip the wet ends into a container of your freshly ground cinnamon and twist them around so the bottom 1 cm (0.39 in) is evenly coated. If you plan on rooting your cutting in water, dip the cinnamon-coated ends in raw or pure honey. This will bind the cinnamon to the plant so it doesn’t float away.
Move your cuttings to a rooting medium or a jar of water once coated. There’s no need to let the stems sit or soak in the cinnamon. As soon as they’re covered, they’re ready to be transferred to their container for rooting. Cinnamon is as effective as willow water or commercial rooting hormone, and you should see noticeable root growth on most cuttings by about 8 days.
Using Apple Cider Vinegar

Mix 1 tsp (5 mL) of apple cider vinegar in 6 cups (1.4 L) of filtered water. If you don’t have filtered or distilled water on hand, boil tap water and let it cool to room temperature before mixing. Stir the mixture with a spoon to make sure the apple cider vinegar is evenly distributed and diluted. Measure your apple cider vinegar carefully so the solution isn’t too vinegar-heavy. Vinegar is acidic, and too much of it can damage your cuttings. Apple cider vinegar has natural rooting hormones and antibacterial properties. It’s especially effective for boosting root growth in cuttings you plan on propagating in water.

Dip your cuttings in the vinegar solution without soaking them. When you’re ready to transfer your cuttings to their rooting container, dip the ends into the vinegar solution so the bottom 1 in (2.5 cm) is submerged. Hold the ends in the solution for a few seconds so they absorb some of the vinegar, but do not let them sit and soak for hours like you would with other homemade rooting hormones. In high quantities, apple cider vinegar acts as a kind of herbicide, which inhibits plant growth. This is why it’s important to only dip your cuttings in the solution for a moment.
Transfer your cuttings to a rooting medium or water jar after dipping. Once your cuttings are dipped, they’re ready for planting. Add them to a small pot of rooting medium or light soil, or a jar of water for water propagation.


Comments
0 comment