
Removing the Old Strings
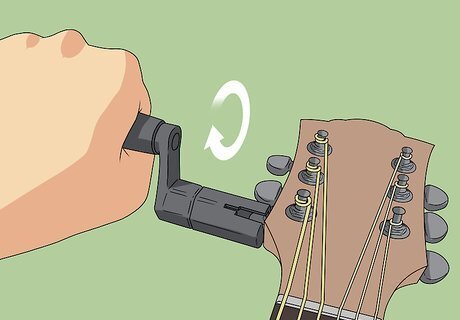
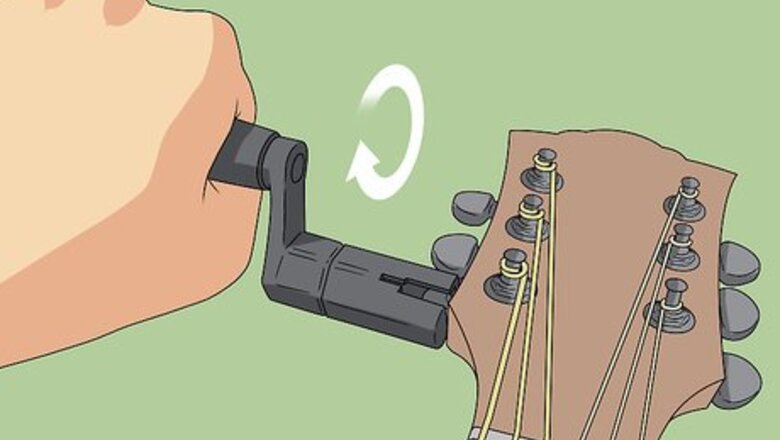
Remove the thickest string from the neck. Start with the 6th string (the thickest) because it is the easiest to work with. Slacken the string by turning the tuning nob at the neck of the guitar before you remove it. It should be so loose that it doesn’t sound like anything when you play it. When it’s totally slack, uncoil it from the tuning peg. The end of the string will be sharp, so be careful!
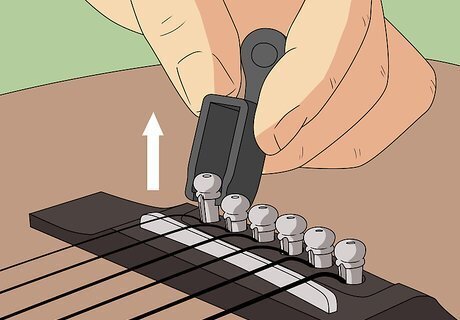
Remove the string from the bridge. If it’s an acoustic guitar, take out the bridge pin, which is a little peg that slots into the bridge hole to keep the string in place. Remove the bridge pin with pliers or a string winder. If you have a classical guitar, untie the loop connecting the string to the bridge. For an electric guitar, gently pull the strings out of the back of the guitar body. Carefully push the string through the back and then pull the strings by the metal end. Once the string is out, coil it up, while staying careful with the sharp edges.
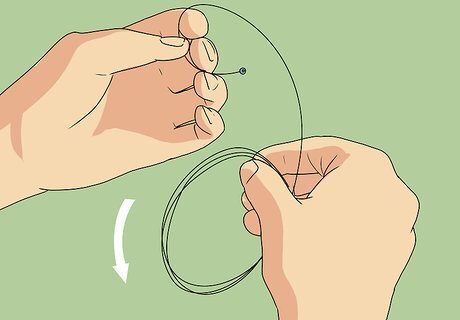
Remove the other strings working your way to the thinnest string and coil them. Wrap the strings in a circle as you take them off, so they stay neat and don’t poke you. If you are planning to reuse the strings, keep track of them with notecards. The thickest string is the low E, and the thinnest string is the high E. From low to high, the strings are EADGBE. This could be a good opportunity to get new strings on your guitar. Buy a 6-string pack of nylon or steel strings depending on your guitar. If your strings are rusty, shredded, or gummy, throw them out and get new ones.
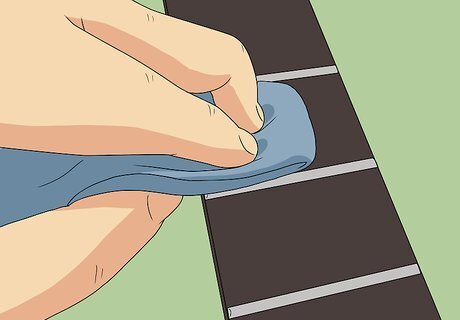
Take the opportunity to clean your guitar. It might be a while until you have an empty fretboard again. Wash your hands, and then use a fine steel wool to remove any gunk from the fretboard. If you have a maple lacquered fretboard, though, you should only use a slightly damp cloth.
Adjusting a Right-Handed Guitar
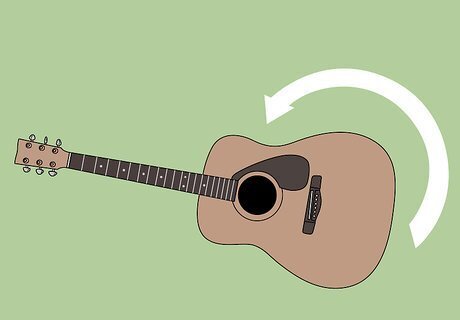
Flip the right-handed guitar over so you can put the strings on in reverse. If you want, this can be the only step you do to change your guitar. If you just restring your guitar the way it is, it will work, but the sound will be low quality. On the other hand, buying and installing left-handed specific hardware can be expensive. If you are just trying out restringing left-handed, and aren’t invested in spending a lot, skip down to restringing your guitar. You don’t have to flip it over of make adjustments if you already have a left-handed guitar!
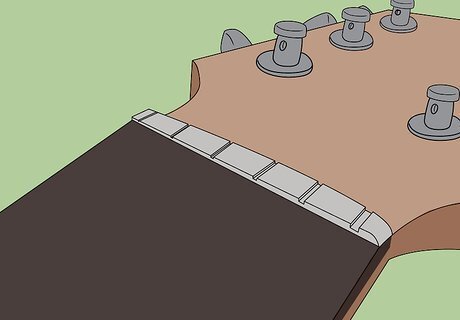
Replace the nut with a left-handed nut for better sound quality. The nut is the small piece at the end of the fingerboard that controls string spacing and height above the fret. The string slots won’t be the right size to correctly fit the strings in reverse order. If you just leave the nut the way it is, you might be able to fit the strings in, but the sound will be poor quality. Tap the nut loose with a hammer. Use a small block of wood and hold it against the nut. If the nut sits in a chanel, you may have to tap the nut sidewise or use pliers. Install the new nut. This can be tricky, so you might want to hire a guitar tech.
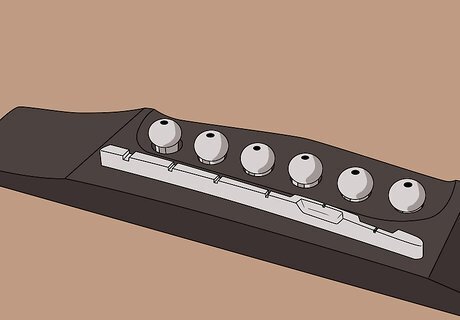
Correct the saddle slot angle if it’s an acoustic guitar so the strings fit better. Once your guitar is upside down, the angle of the saddle slot won’t be quite right and this will affect the guitar’s intonation. Filling and cutting a new slot is quite a process, so you might want to buy a new bridge. Make sure you get one that matches your guitar!
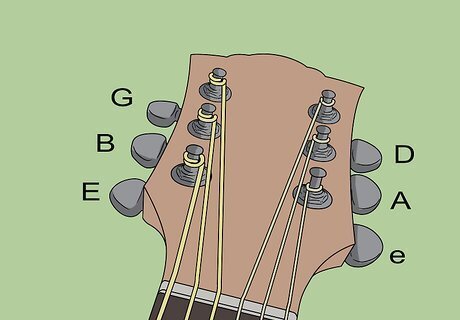
Restringing the Guitar
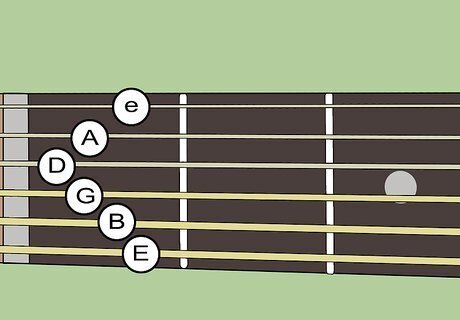
Make sure your strings are in the right order before you begin. Whether you are stringing a left-handed guitar, or a right-handed guitar that you flipped upside down and are now using for a left-handed guitar, the order of the strings is the same. The thickest string should be closest to the ground when you are playing, and the thinnest closest to you. Your low E is on the bottom, followed by B,G,D,A and then the high E. If you are converting a right-handed guitar, this means the strings will be in the opposite spots as before.
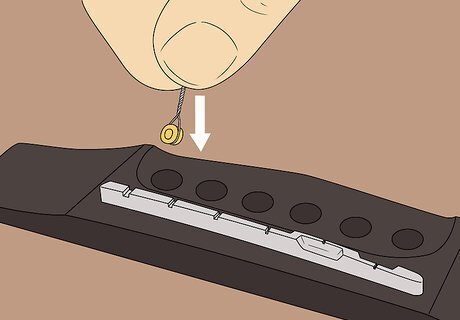
Put the string end in the bridge hole if the guitar is acoustic. The end of the string with the ball is the part that goes into the bridge hole. Once you’ve put the ball in, insert the bridge pin and pull lightly on the string until it locks into place. Repeat this process until all your strings are in the bridge. It may be helpful to bend the string slightly near the ball before you put it in the bridge hole so that it stays in better. If you have nylon strings, it won’t have a ball-end, so you’ll have to thread the string through the bridge hole and the eye.
Feed the string through the back of the body or the bridge for an electric guitar. If it’s a string-through model, you’ll need to feed each string through the back. If it’s a bridge mounted electric guitar, you can feed the string directly through the bridge. Make sure you’re feeding the string through the right hole.
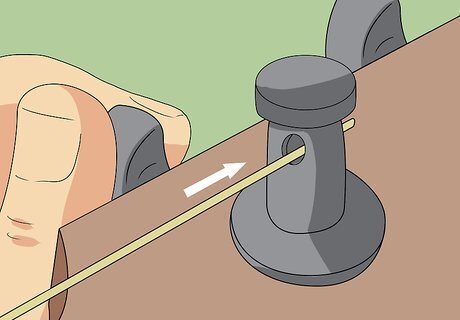
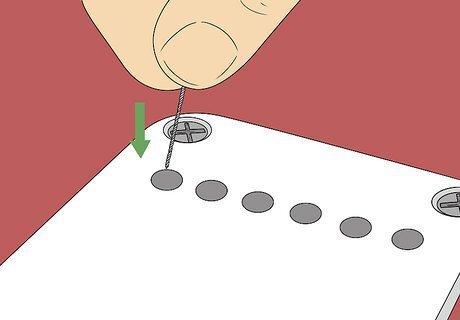
Attach the thickest string to the tuning peg. Draw it over the saddle and the nut to the tuning peg. Clip the end of the string with a wire cutter, leaving about a hand of space for winding. Pass it through the machine head from the inside to the outside and pull it tight. Then turn the machine head counter-clockwise to tighten it. Use a string winder to make the winding easier. Repeat with the other strings.
Tune the strings. Once all your strings are attached, you can tune them. Use an electric tuner and turn the machine heads until all your strings are playing the proper notes. Go one string at a time. Remember that they should go EBGDAE, from the thickest string to the thinnest. You can also tune your guitar by ear if you have a great ear for it.


Comments
0 comment