
Using an Online Compressor
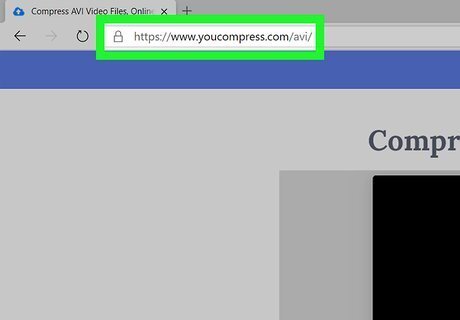
Go to https://www.youcompress.com/avi/ in a web browser. You can use any web browser on PC or Mac. This website allows you to upload an AVI file and reduce the file size of it. Alternatively, you can use https://clideo.com/compress-avi if YouCompress.com doesn't work. However, Clideo puts watermarks on your videos.
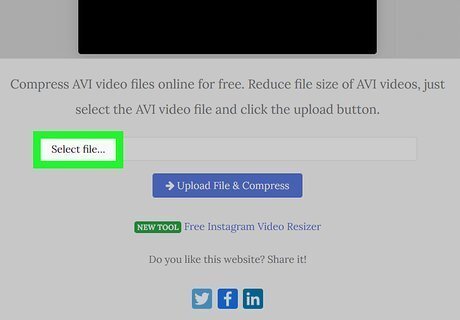
Click Select File. It's the white button to the left of the field below the banner at the top. This allows you to browse for an AVI video file.
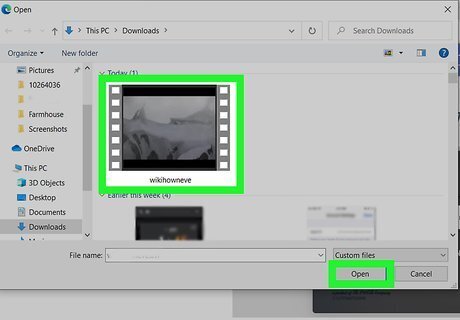
Click the AVI file you want to shrink and click Open. Use File Explorer or Finder on Mac to navigate to the folder that contains the AVI file you want to shrink. Click it to select it. Then click Open in the lower-right corner. This selects the video file to be uploaded and compressed. You will see your video file in the field next to the "Select File" button.
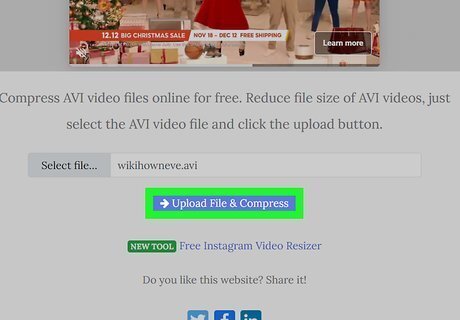
Click Upload File & Compress. It's the blue button below the field that contains your videos. This uploads your video file and compresses it. This may take several minutes. 500 MB is the maximum file size you can upload.
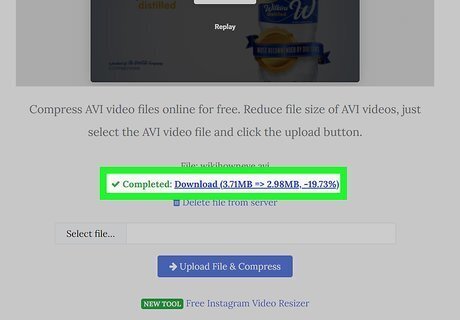
Click Download. When the file is finished compressing, you will see green text in the center of the page that says "Complete!" To the right of that text, you will see blue text that says "Download". It will also list how big the new file will be compared to the old one. Click this button to download the compressed file to your "Downloads" folder.
Using VLC
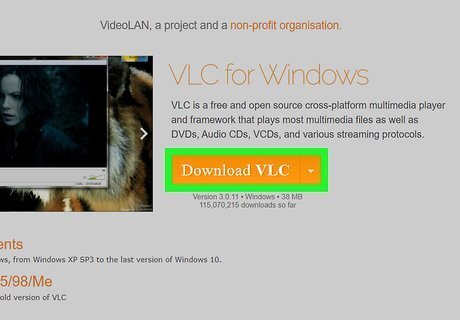
Download and install VLC. VLC is a free and open-source media player and converter. It can play and convert video files in a variety of formats. It is available for both Windows and Mac. If you haven't done so already, use the following steps to download and install VLC: Windows: Go to https://www.videolan.org/vlc/index.html in a web browser. Click Download VLC. Open the installation file in your web browser or Downloads folder and click Yes. Select a language and click Ok. Click Next. Click Next. Click Browse to select an install location (optional) and click Install. Click Finish. Mac: Go to https://www.videolan.org/vlc/index.html in a web browser. Click Download VLC. Open the installation file in your web browser or Downloads folder. Drag the VLC icon into your Applications folder.
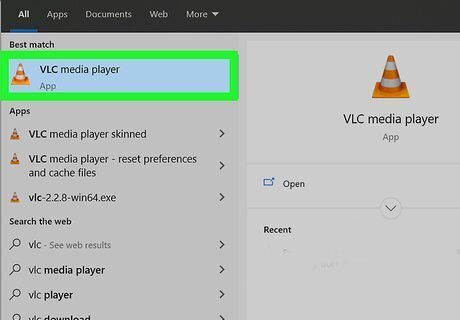
Open VLC. VLC has an icon that resembles an orange traffic cone. Click the VLC icon in your Windows Start menu, or Applications folder on Mac to open VLC.
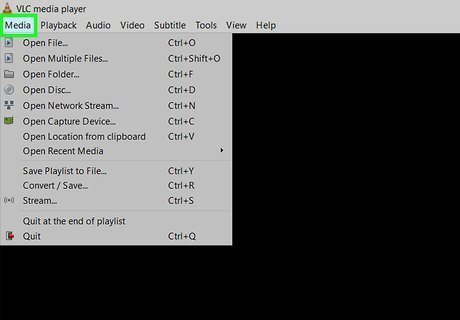
Click File or Media. It's the first option in the menu bar at the top. If you are using the Windows version, it is the menu that says "Media". If you are using VLC on Mac, it is the "File" menu.
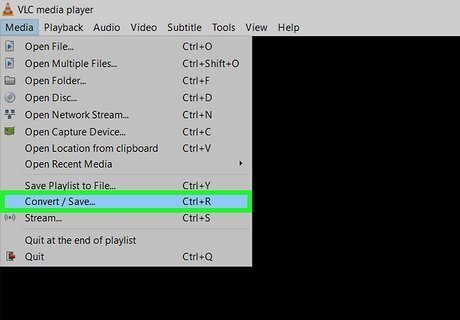
Click Convert/Stream or Convert/Save. This opens the converter. On Windows, it's the option that says "Convert/Save." On Mac, it's the option that says "Convert/Stream."
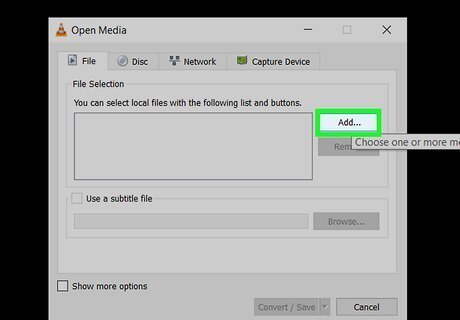
Click Add or Open Media. On Windows, click the button that says "Add" in the upper-right corner. On Mac, click the button that says "Open Media".
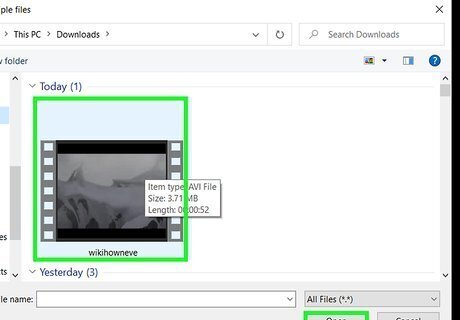
Select the AVI file you want to shrink and click Open. Use the file browser to navigate to the folder that contains the AVI file you want to shrink. Click the file you want to shrink to select it. Then click Open.
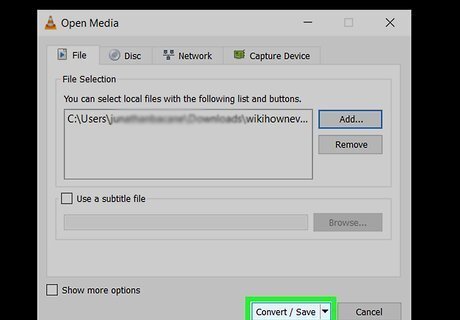
Click Convert/Save (Windows only). If you are using Windows, click Convert/Save in the lower-right corner once you have selected a file.
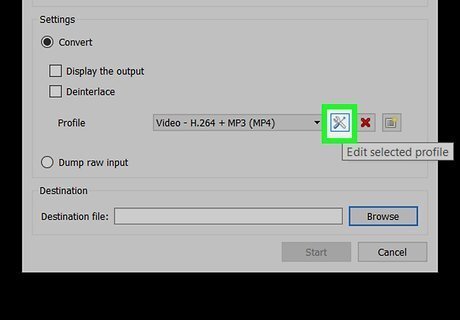
Click Customize or the icon that resembles a wrench. It's next to the drop-down menu next to "Profile". On Mac, it's a button that says "Customize". On PC, it's an icon that resembles a wrench.
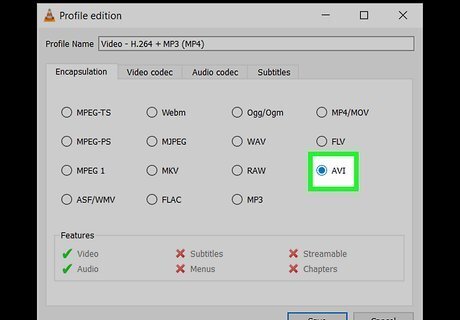
Select "AVI." This selects the video file type. If you want to keep the video in AVI format, click the radio option next to "AVI." Alternatively, you can select a different file format such as MP4. This will convert the file from AVI to a different file format. MP4 video files are much more universally used and tend to be much smaller than AVI files.
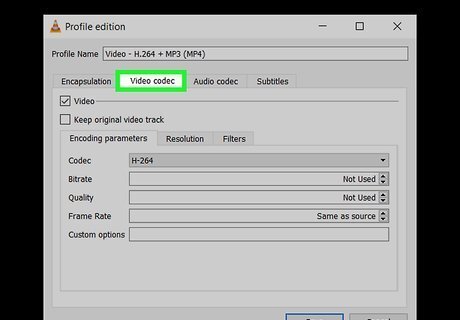
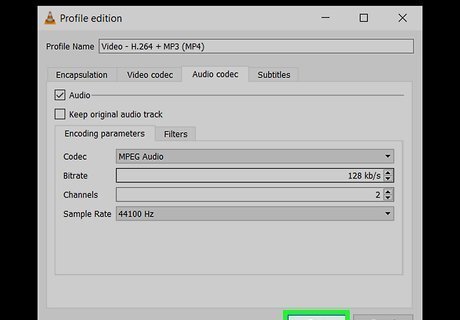
Click the Video Codec tab. It's the second tab at the top. This allows you to adjust the video codec settings.
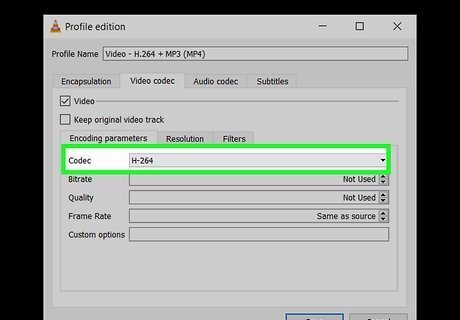
Select a video codec. Use the drop-down menu next to "Codec" to select the video codec. If you want the final video to be in AVI format, you'll need to select one of the DIVX codecs. If you don't mind converting it to a different format, you can select a different codec, such as H.264, which is ideal for high definition videos.
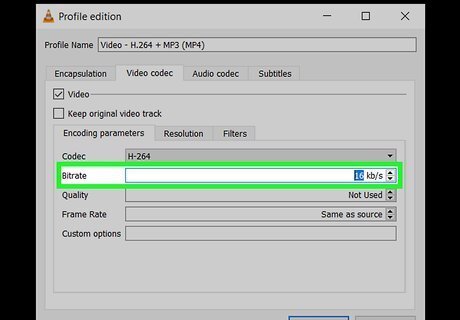
Lower the bitrate. Using a lower bitrate will produce a much smaller video. However, if the bitrate is too small, it will affect the image quality. Try a bitrate that's about 20% smaller than the original. AVI bitrates are much higher than MP4 and other file formats. If you're not sure what bitrate to use, you can try between 2000 and 5000 kbit/s. To check the bitrate of a video file in Windows, right-click the video and click Properties. Then click the Details tab. The bitrate is listed next to "Total Bitrate". On Mac, open the video file in Quicktime, then press Command + I"' to open the video inspector.
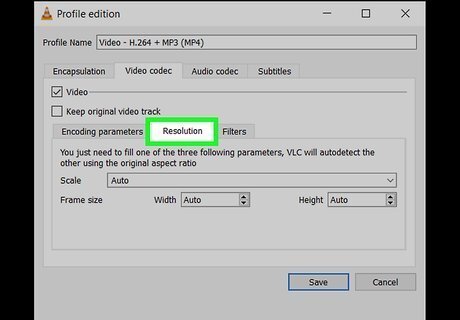
Lower the resolution (optional). Another way to reduce the video size is to reduce the scale of the image. The easiest way to do this is to click the Resolution tab (Windows only), and use the drop-down menu next to "Scale" to select either "0.75" or "0.5".
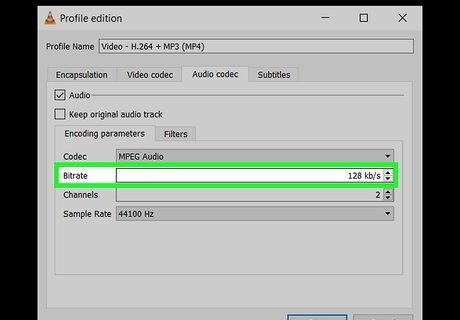
Lower the audio bitrate (optional). If your video has audio, you can lower the audio bitrate to reduce the file size. 128 is the average bitrate for most audio compression. 96 will work if you don't mind a little bit lower audio quality.
Click Apply or Save. It's in the lower-right corner of the window.
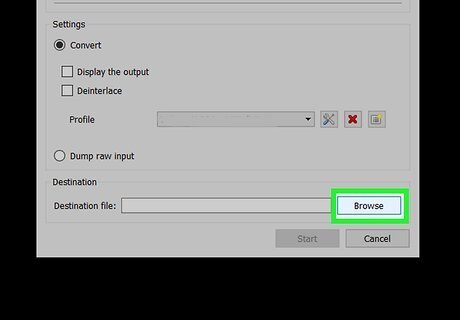
Click Browse. It's in the lower-right corner of the window. This allows you to select a destination and filename for the video file.

Select a save location and filename and click Save. Navigate to the folder you want to save the file to. Then type a name for the video in the field next to "Save As" or "File name." Click Save when you are finished.
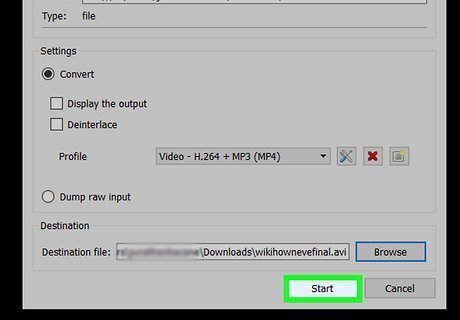
Click Save or Start. It's in the lower-right corner. This starts converting your video. This may take several minutes. When it is finished, it will produce a new video file using your specifications.


Comments
0 comment