
Workspace Setup
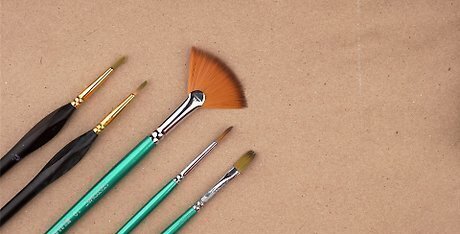
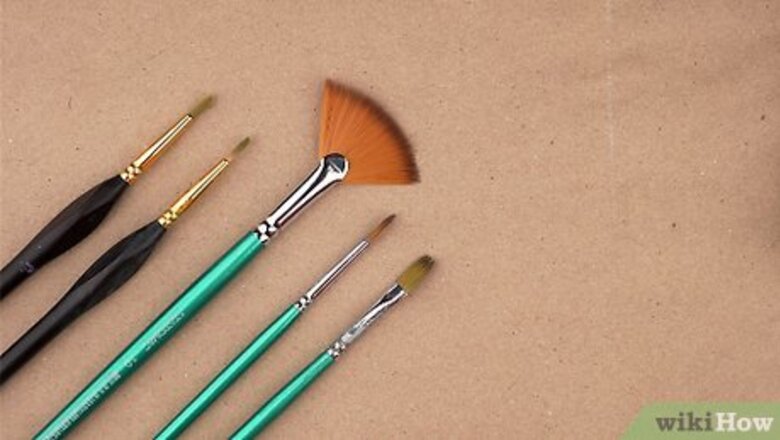
Use a variety of brushes made for acrylics. To complete a painting, you'll need a basecoat brush that is about 2 inches (5.1 cm) or so, angled brushes, a 1 inch (2.5 cm) flat or bright brush, and round brushes in various sizes. As an easy way to get what you need, choose a variety pack of paintbrushes that are of decent quality. Synthetic brushes are a better choice because they are softer than more natural brushes, making it easier to use them with acrylics. A charcoal pencil is also helpful for sketching on the canvas.
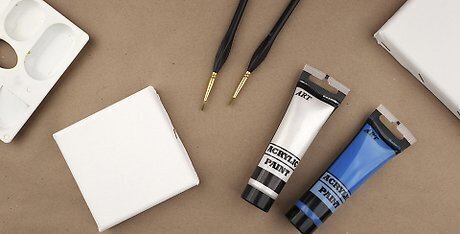
Set up a work area with your brushes, paint, and water. Protect your table with plastic, such as polyethylene, which you can get at a hardware store. Lay it out and tape it down. Have a small bucket of water nearby to clean out your paint brushes. Pick out just what you want to use each day, including your paints and brushes. If you don't want to buy polyethylene, use trash bags or newspapers.
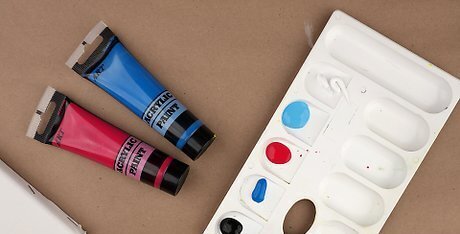
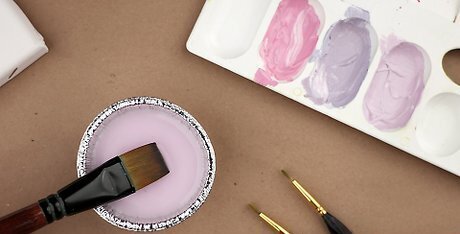
Organize your paints in a covered paint palette. When you're painting, you don't want to keep recreating colors or wasting paint each day. A covered palette keeps your paint wet, allowing you to use it again another day. Try arranging your colors according to the rainbow, so you can easily find each color. Remember ROYGBIV, or red, orange, yellow, green, blue, indigo, and violet. Don't forget to add white and black, too. Mix colors in the center of the palette using a palette knife. Try adding a gray waxed blending sheet in the middle for a neutral background. For a cheaper option, paint a piece of wood grey. When you need to leave the paints, mist both the paints and the inside of a plastic container with water. Cover the paints using the upside-down container, and place something heavy on top to seal it.
Design Creation
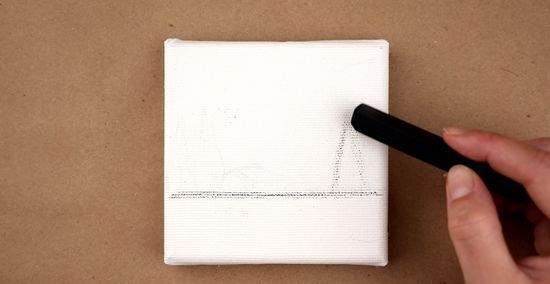
Sketch on the canvas with a charcoal pencil to establish the layout. Add the basic outlines of what you want to paint on your canvas. Don't add too many details, as they'll just be painted over in a while anyway. Just add the large shapes. Charcoal is a good choice because it will dissolve into the paint.

Mix your paints before beginning. If you want, you can just start with red, yellow, blue, and white. Place the red, yellow, and blue paints in three small dabs to form the corners of a triangle. Mix the primaries together to create secondary colors, filling in the triangle. For instance, move a little red over to the middle of the triangle side, and move a little blue to the same spot. Mix them together to make purple. Yellow and red make orange, while blue and yellow make green. Experiment to find the colors you like. For instance, you might want to mix a lot of blue with a little yellow for a bluish green. You can use a brush or a palette knife to mix paints.
Dip your brush in water before coating it in paint. Generally, you need a bit of water on your brush before you start painting. However, you don't want too much, so dab it on a paper towel before dipping it in the paint. To change colors, rinse out your brush in a cup of water. Dab off the water, so you don't end up with watery paint running down your canvas. Lightly dry the brush between colors.
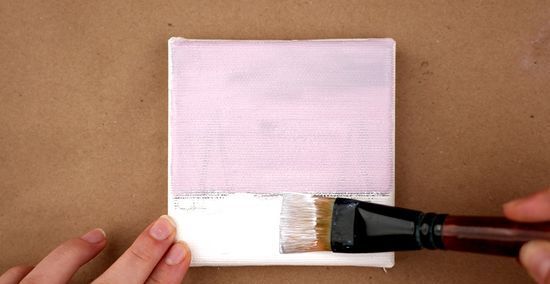
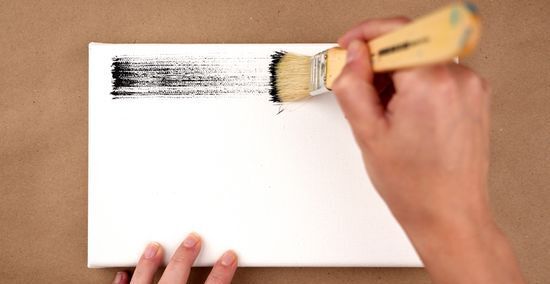
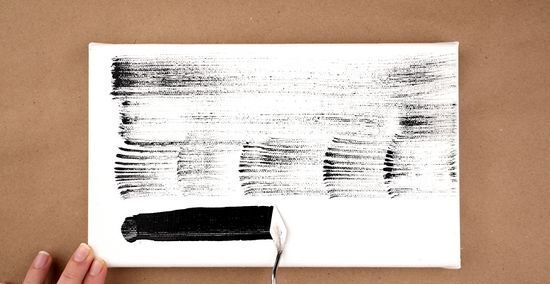
Fill in the background with a 2-inch (5.1-cm) basecoat brush. These brushes are wide, often 2 inches (5.1 cm) or so. After you dip the brush in water, apply paint to the bottom half of the bristles, and use broad strokes to fill in the background. A bigger brush can help you cover more of the canvas and incorporate brushstrokes into your painting. You can also use a bigger brush to make the large shapes of what you're painting, which gives the painting fluidity. For instance, if you're painting a flower on a background, fill in the background with a large brush. Paint the petals and any other big section of color with a medium to large paintbrush.

Use an angled brush for moving between heavy and fine lines. An angled brush is a wide brush that goes down to a fine tip. Angle it towards the wide edge, and you get a wide line. Angle it up towards the tip, and you get a fine line. Try a brush that's 0.5 inches (1.3 cm) across for most lines. Change the angle of the tip as you're painting a stroke to move from a wide line to a fine line or vice versa.
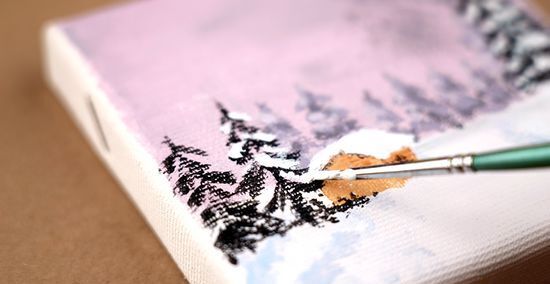
Try a round brush for finer lines. When you are adding in detail, pick a small round brush. A #8 brush will do broader lines, while a #0 will fill in very small details. Add water to the paint brush, and then dab it so it's just damp. Add paint to the tip, and then use it to paint the fine details on your canvas. These brushes come in all sizes from very small to large. If you're painting a flower, go in with a smaller brush to add things like the flower's center, veins on the leaves, the stem of the flower, and shading details on the petal.
Work quickly to keep the paint from drying out. Acrylic paint dries much faster than oil paint so you need to move fast. Start with just a little paint at a time so you're not wasting paint. When you mix colors, use the color quickly, as the mixing process will cause it to dry faster. You can slow down the drying process by placing a wet paper towel over your palette or paper plate. Then pour and mix the paint on the paper towel. Gel medium can also extend the life of your paint. Just add a little bit to the paint as you're mixing the colors.
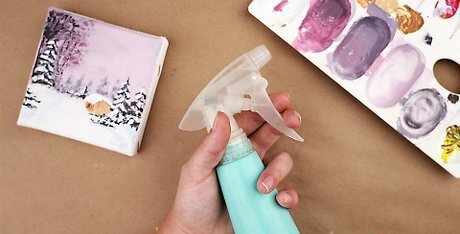
Mist the paint with water to blend dried colors. Adding a bit of water from time to time will help you blend paint that has already dried. Use a spray bottle set on "mist," and add a light layer of water to the paint as it dries out. You can also use this technique to water down the paint, making it more like watercolors. However, try not to use more than 1 part water to 2 parts paint. Thinning it out too much can cause the paint to separate.
Advanced Techniques
Try dry brushing for a feathery look. Dry brushing is a technique you can use with any brush where you start with a completely dry brush. Add a little paint to the very end of the brush, and wipe off any extra. Run the tip of the brush over the canvas lightly, which creates a feathery look. The key to this stroke is to not get too much paint on your brush.
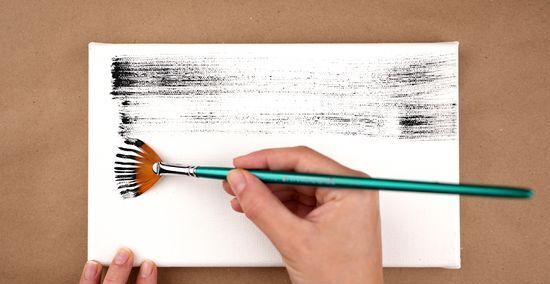
Use a fan brush to create multiple lines at once. A fan brush is spread out like a fan, so it makes it easy to create things like palm tree leaves. Use the long side to make an edge, and then use the fan part to make the line thicker, pulling it down into thin leaves or lines.
Apply paint thickly with a palette knife for texture. This technique is called impasto. Use your palette knife to pick up a blob of paint and apply it to the canvas. Don't smooth it out completely. Rather, leave some of it raised up to give the painting texture.
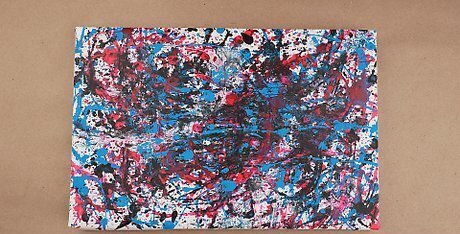
Pour or splatter the paint on the canvas for a fluid effect. This technique gives you permission to go a little crazy with your paint. Lay your canvas out flat, and then pour paint on the canvas. You can use a cup, the tube it came in, or a paint brush to drip it. For a splattering effect, hit the brush against your hand, letting the paint splatter on the canvas. For this technique, thin your paint with 1 part water to 2 parts paint.
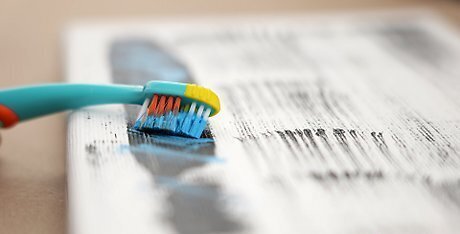
Add interesting textures with household items. You can use a wide variety of household items to paint on canvas, such as a clean toothbrush, paper towels, a sponge, a cotton swab, or a toothpick. Experiment with different items to see what effect you like. Keep in mind that acrylic paint is permanent on many surfaces once it dries so only use items you're willing to throw away afterwards.


Comments
0 comment