views
Making a Folded Paper Lantern

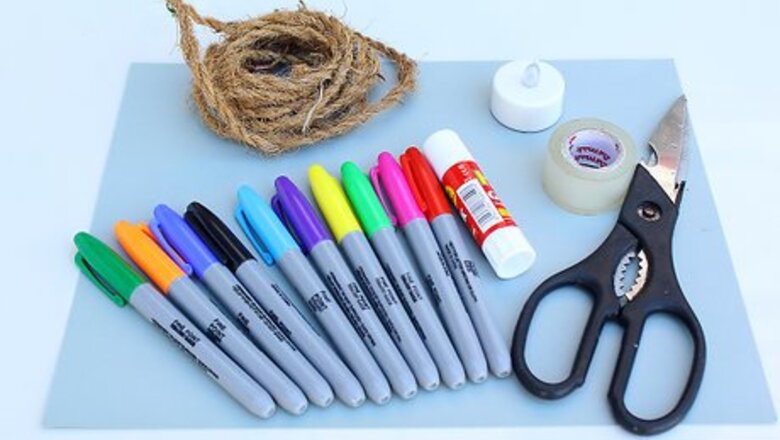
Gather your materials: Glue (stick or liquid is fine) Glue dots and/or tape Scissors Piece of blank paper Felt pens (for drawing) Thicker paper or thin cardboard for the lid and base Rope or twine (for hanging) A battery-powered tea light candle (aka an electric tea light)

Draw a design on a blank piece of paper. It can be a design of your choosing. A standard piece of white printer paper will work fine. Use felt pens — paints and pencil crayons will block the candle’s light more. If you’re feeling creative, you can use other colors of paper. Just make sure the paper’s not so thick that the candle’s light can’t shine through it. The thinner the paper is, the better, although tracing paper will be too thin — you still want it to be strong! A colorful design with strong black lines will look nice.
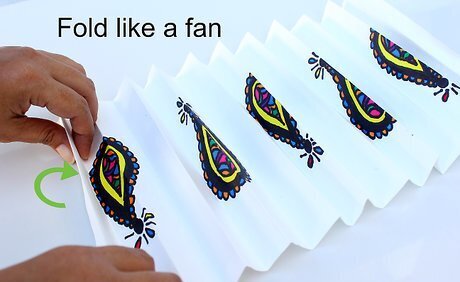
Fold the paper into vertical strips, like a fan or accordion. To do this correctly, make sure you always have your first fold sitting at the top of the stack of folds that you’re making. It shouldn’t fold under any other paper — all the other paper should fold under it. Think of it as kind of a back-and-forth motion: each time you make a new fold, the sheet of unfolded paper will be in front of or behind your folded strip. The more careful and precise you are with your folds, the better the lantern will look. Feel free to experiment with the width of the folds to see what you like best.
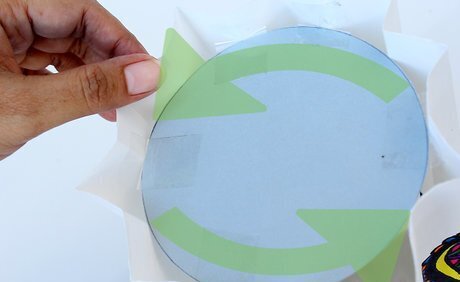
Curve the folded paper into a circle and fasten the ends together. To fasten the ends together, apply glue or tape to the last fold on one side of the paper, and place the last fold of the other side of the paper on top of it. You could use double tape on both folds so that when you overlap them, they’ll be extra secure. Be sure to hold the sides together for a moment to ensure that they’re securely fastened.
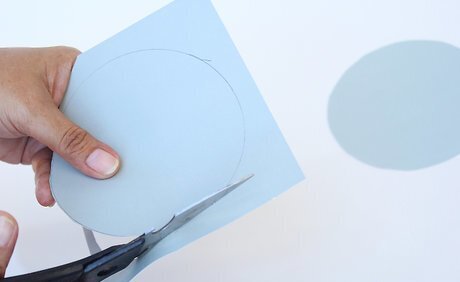
Cut 2 circles out of thicker paper for your lid and base. These should be the same size. To know how large to make them, place your lantern on top of the paper you’ll use, and lightly trace around it. Cut just inside the line you draw so that the base and lid won’t stick out from your lantern. Make sure the paper is sturdy enough to support the weight of an electric tea light and the lantern itself.
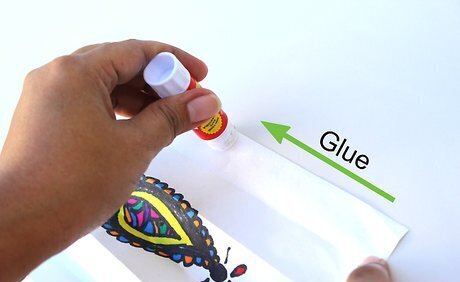
Fasten the base on to the bottom of the lantern. You can do this with a good glue or tape, or a combination of the two for added sturdiness. If you're worried about the glue being strong enough to keep the base fastened to the lantern, consider using melted glue from a hot glue gun instead. Just be careful that you don’t burn yourself!
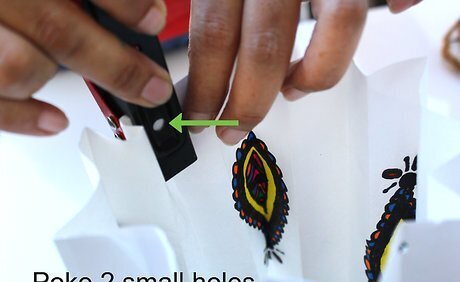
Poke 2 small holes in the lantern for rope. Use a pen, hole punch, or the tip of your scissors to poke 2 small holes near the top of the lantern (1/2 to 1 inch down from the top is good). The holes should be right across from each other so that the lantern hangs evenly. Imagine if you poked a stick straight through one side of the lantern and it came out the other. This is how you want the holes to sit.
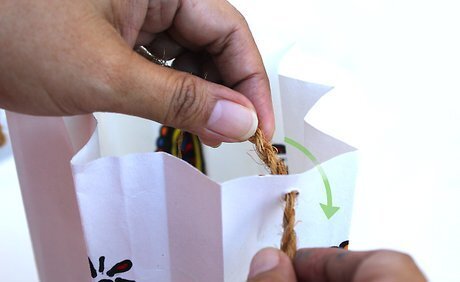
Cut the rope and fasten it to the lantern. Think of it as putting a handle on the lantern. You’ll attach the “handle” to the lantern by feeding the rope through the holes in the sides of the lantern, and then tying knots. Start on the inside of the lantern and tie knots in the rope on the outside of the hole you’ve fed it through. The length of your rope will depend on how low you want the lantern to hang, which will depend on where you want to hang it.
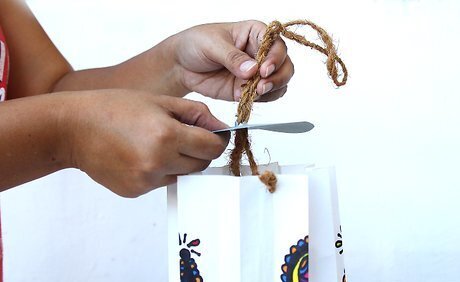
Cut a hole in the lid and feed rope through it. Cut a hole in the center of the lid and then slide it down over the rope so that it sits near the top of the lantern, just inside of it. To keep the lid from coming up too easily, you can place a couple of rubbery glue dots on the rope so that it holds on to the lid when the lid presses down on it. You do want the lid to be easily liftable as this is how you’ll access the candle, so don’t fasten it permanently to the lantern.
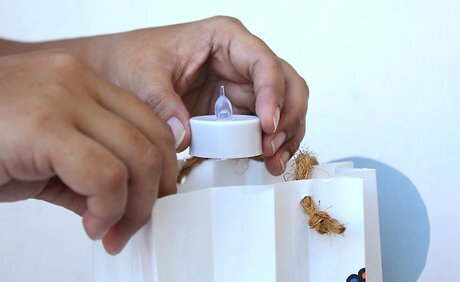
Place an electric tea light in the lantern. If you’re going to use the lantern right away, you can already turn the tea light on. Note that in the image an actual tea light is shown, but using an actual tea light is not advisable as it presents a fire hazard.
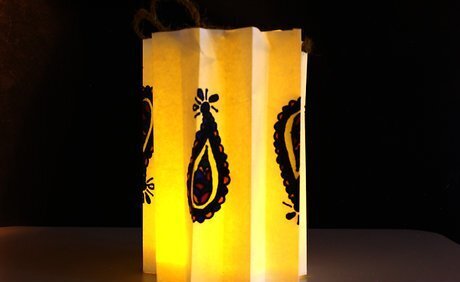
Enjoy your homemade lantern! If you do decide to use a real candle in this lantern, make sure that you don’t hang it somewhere windy; if the lantern is tilted with a real candle inside it, it could easily catch on fire.
Making a Forest-themed Mason Jar Lantern
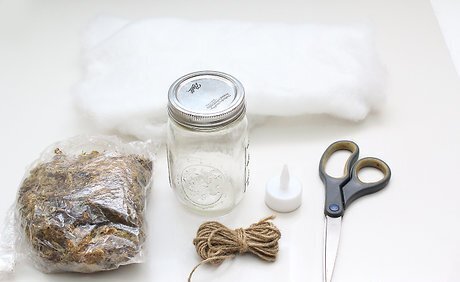
Gather your materials. You can purchase most of these things from a dollar store and a craft store: Pint-sized clear Mason jar(s) with lid(s) (wide-mouthed jars are recommended) Polyester fiber fill (toy stuffing) Moss (a variety pack in different colors would be ideal) Twine or hemp cord in a color (or colors) of your choosing Electric tea light (must be electric) Scissors Fabric to cover jar lid (optional)
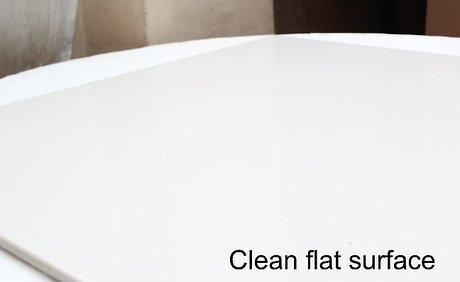
Make sure your work surface is flat, clean and smooth. This is not a project you want to do on carpet or a lacy tablecloth, as bits of moss will get everywhere and the polyester filling will pick up any crumbs, lint or other debris.

Lay out your materials. Have a few clumps of polyester filling and moss in front of you, plus your open mason jar(s), with the lid(s) nearby. You’ll also want to have your electric tea light ready.
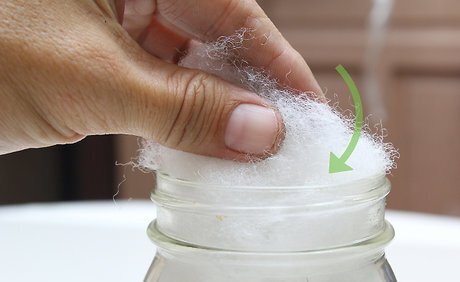
Measure how much polyester filling you need. To do this, simply grab some filling and place it inside your Mason jar. The jar will need to be well packed with filling, but you’ll need some space right in the middle to place your electric tea light.

Sprinkle some moss into the empty Mason jar. The bottom of the Mason jar will be the top of your lantern. To make sure it’s well covered with moss, sprinkle some into the jar before adding your polyester filling.
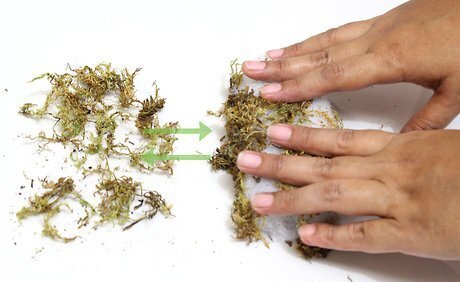
Add your moss to the outer layer of polyester filling. Decide on what moss, or combination of moss, you’ll use inside the lantern, and then place it on the polyester filling. There are a couple of ways that you can do this: Remove the polyester filling from the Mason jar and roll it around in the moss, then add additional moss and hold it on to the filling as you lower the filling into the Mason jar. From there, you can use your fingers to place any additional moss between the filling and wall of the jar, until you’re happy with how it looks. Keep the filling in the jar and, holding the jar on its side, use your fingers to gently place bits of moss between the filling and the wall of the jar, until you’re happy with how it looks. Note that you only need to place the moss on the outer layer of filling. You’ll only be able to see the moss that shows through the glass walls of the Mason jar, so don’t worry about putting moss anywhere except for between the filling and the jar’s walls.
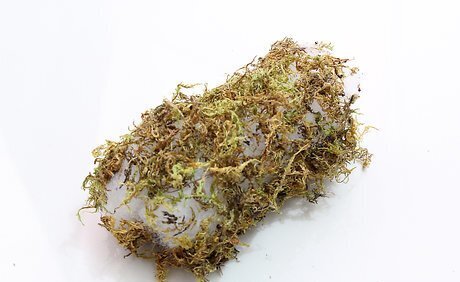
Don’t go overboard. Avoid the temptation to completely cover the walls of your Mason jar in moss. Too much moss will block the light from the electric candle. More moss may look nicer when the lights are on, but when the lights are off, the filling will simply look like a twinkling fairy light behind a lovely forest pattern.
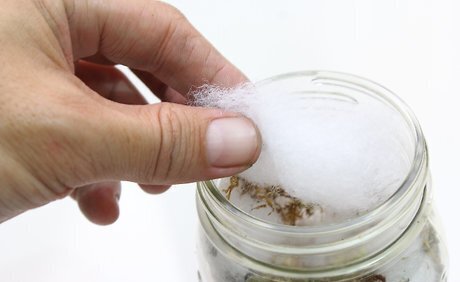
Remove some filling from the middle of the lantern. Use your fingers to carve out a core inside the lantern. This is where your tea light will sit. Be sure to leave enough filling that it firmly holds the moss against the walls of the jar. Carving out a hole slightly larger than the tea light will work fine. It may take some experimentation to see what’s perfect. After trying the lantern out, if you want the light to shine through more vibrantly, you can remove a bit more filling.
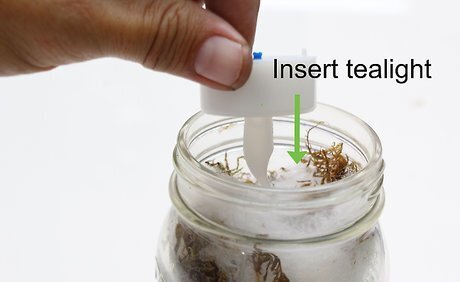
Place the tea light inside the lantern. You’ll want the “flame” to be facing the bottom of the jar, which will be the top of your lantern. Add a small amount of filling to the jar once the electric tea light is in. This will help hold it in place and keep it from jiggling around.
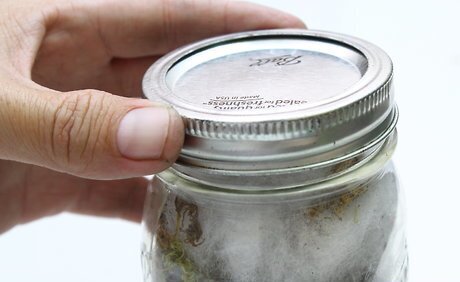
Place the lid on the jar and test the lantern. Once you place the lid on the jar, turn it upside down so that the jar is sitting on its lid. Everything should stay in place. If it doesn’t, add more filling. At this point you can also test the lantern by turning on the electric tea light and making any adjustments you want to make in order to get the look you desire.
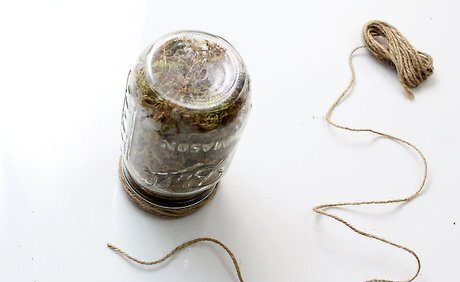
Decorate the jar. Once the lantern is done, wrap some twine around the neck of the jar (just below the ridges that you screw the lid on to) and tie it in a bow. If you don’t like the way the lid looks bare, you can glue some fabric on the lid and wrap that in twine instead. It’s recommended to use a neutral or earthy shade of twine to match the natural mossy colors of the lantern.

Enjoy your lantern! It’s not much to look at in the day, but it’s lovely in the dark. Follow these instructions to switch the lantern on and off: Stand it up (lid up), open the lid, remove the piece of filling that holds the electric tea light in place, switch on or off the tea light, then replace the filling and the lid.
Making a Lanterns Out of Old Jars
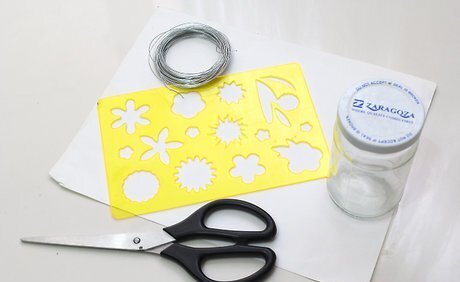
Gather your materials: Glass jars Design templates Removable adhesive paper Scissors Glass frosting/frosted glass spray Candles (votives or tea lights are recommended) Heavy wire (optional) Wire cutters (optional) Pliers (optional) Sand, sea salt or epsom salt (optional) Wire hangers (optional)

Ensure that your jar is clean and dry.

Draw designs on the non-sticky side of removable adhesive paper. You can use stencils or free-style it — just make sure your designs are easy to cut out! You can also use stickers whose shapes you like, as long as don't mind throwing them away.
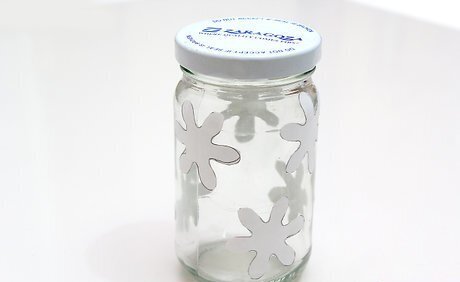
Cut out your designs and stick them to your jar. Be sure to stick them to the outside of the jar.
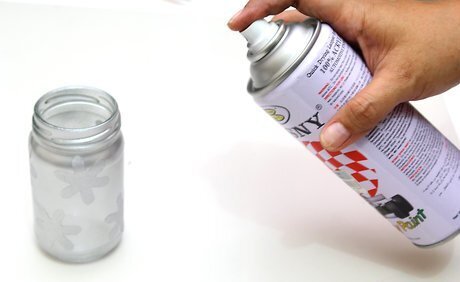
Spray the jar with glass frosting spray. Ensure that you’ve sprayed the jar evenly, and that you’ve covered the designs that you’ve stuck to the jar.

Allow the glass-frosting spray to dry. Make sure it’s completely dry before you move to the next step. It may take less than 10 minutes to dry, depending on the spray. The drying time should be clearly stated on the back of the spray can. If you’re unsure of whether the spray is dry, touch the glass. It should feel dry.
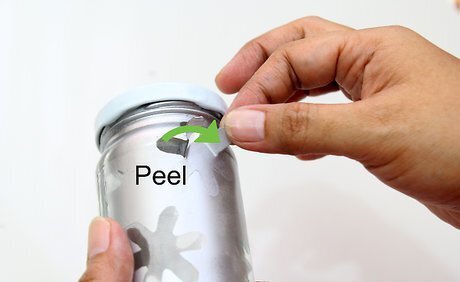
Remove the adhesive designs from the outside of the jar. Once the glass frosting spray is completely dry, you can remove the adhesive designs. This will leave you with a frosted glass lantern with clear spots where the designs were.
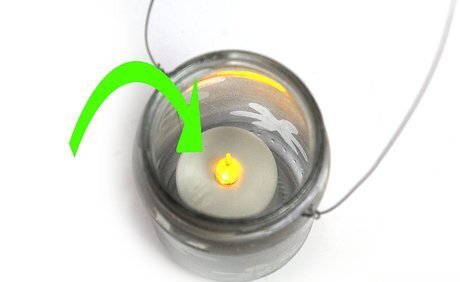
Place a candle inside your lantern. To keep the candle stationary, you can nestle it into some sand, sea salt, or epsom salt.
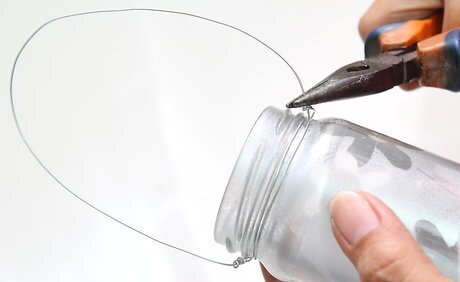
Add a handle (optional). If you want to hang your lantern, you’ll need to add a handle. To make a handle: To determine the length you need, wrap a piece of strong wire around the mouth of the jar, just beneath the ridges where the lid would screw on. Next, pull the wire upwards and loop it over the jar to the desired size of the handle that you want, then cut the wire. Wrap one end of the wire around the jar’s mouth, bend the wire up as if making a handle, and then secure the end of the wire to the start of the handle by bending it into a loop with pliers. Bend the free end of the wire into a handle and then secure it to the wire that sits around the jar’s mouth, on the other end of the jar, by using pliers to bend it into a loop around that wire.
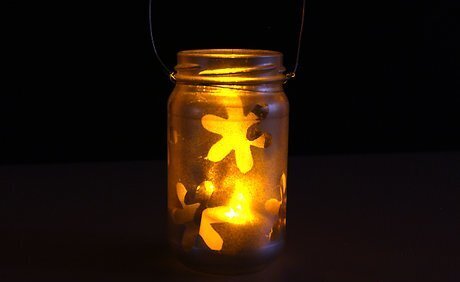
Enjoy your lantern!
Making a Thumb Tack Paper Lantern
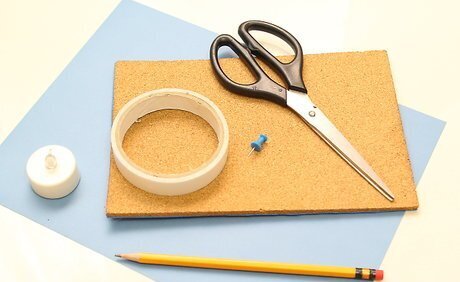
Gather your materials: Card stock paper in colors, patterns, and textures of your choosing A pencil and good-quality eraser A thumb tack Scissors or a paper cutter Double-sided tape A styrofoam or foam board (for poking holes) Design stencils (optional)

Decide on the size of your lantern. You’ll be making this lantern by drawing on a piece of card stock, poking holes in it, taping it into a tube, and placing it over a candle. Before drawing on the card stock, decide on your lantern’s size and, if necessary, cut the paper to size. You may want to choose the size of your lantern based on the candle you plan to use. You can also choose the size of the lantern based on the card stock you have or where you want to use the lantern.
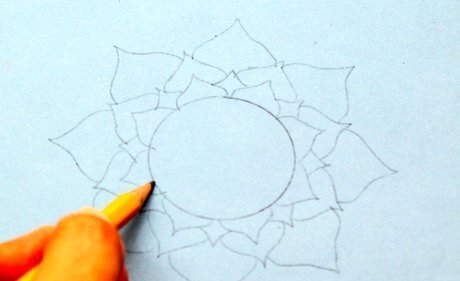
Draw your design on the card stock paper. Use a pencil to very lightly sketch in your desired design right at the center of the card stock. This will be the front of your lantern. You don’t have to limit yourself to the front of the lantern. You can also do a larger design that goes all the way around, or off to the side. It’s up to you! It may be tempting to get ambitious with your design. Just remember that the more holes you poke, the more time it’ll take you to make your lantern! Remember to sketch lightly so that it’s easier to erase the pencil markings once you’ve poked your holes.
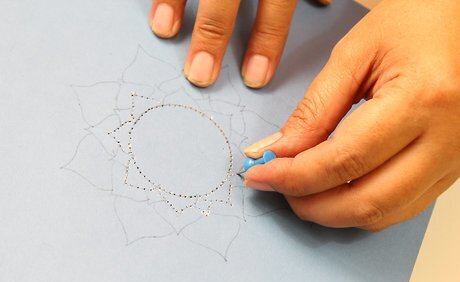
Use a thumb tack to make holes along the lines of your design. Try to keep the space between holes as even as possible. Do this until the design is complete. You’ll want to place the card stock on a piece of styrofoam or foam board for this step, so that the thumb tack has a firm surface it can fully sink into. One to two millimeters between holes would work well, but it doesn’t have to be exact — you can eye it!
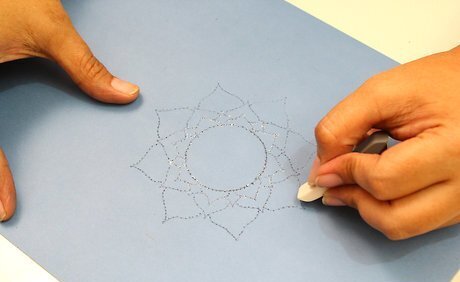
Erase the pencil marks. Use a good, soft eraser to remove the pencil marks along your designs. A thick, soft white eraser will work well. Be sure to press gently as you erase the pencil marks, and do not hold the paper against a hard surface as you erase them, otherwise the holes you’ve made may close up a bit. If the holes do close up a bit as you erase the pencil marks, it’s not a big deal — just use a thumb tack to gently push them outward again.
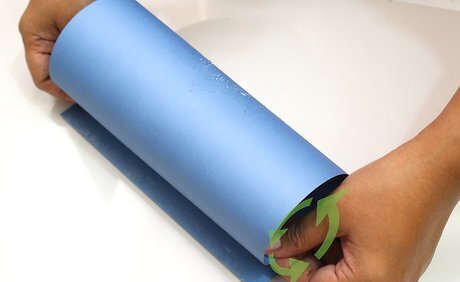
Roll the card stock into a cylinder and fasten its sides together. To fasten the sides together, place double-sided tape on the back of one side of the paper, and on the front of the other side so that when they overlap they’re extra secure. If you have a large candle, you can wrap the card stock around the candle to get the shape you want.
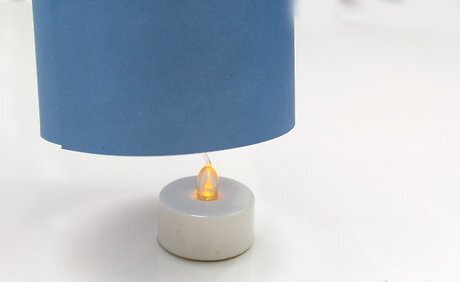
Place your paper cylinder over a lit candle. Place a votive into a glass votive holder and light it, then place the cylinder over the lit votive. To reduce the fire hazard, you can use an electric candle.

Enjoy your lantern!
Making a Paper Bag Lantern
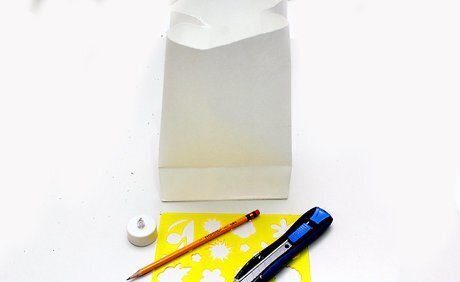
Gather your materials: White paper bags (3.5 inches by 6.5 inches recommended) A bone folder (to help fold the top of the bag down) Pencil (optional) Stencils (optional) Craft knife (also known as an X-ACTO blade, optional) Small piece of cardboard (optional) Wire for hanging (22-gauge, cut into 17-inch strips recommended) Grommets and grommet pliers Electric tea lights
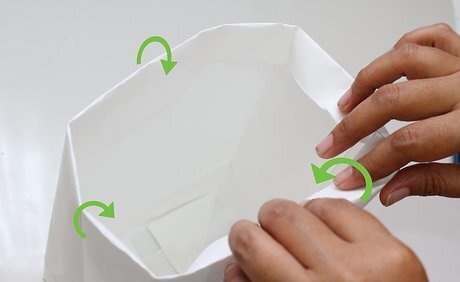
Fold over the top inch of your paper bag. To do this, fold the top of the bag over in a slow, circular motion, moving around the bag.
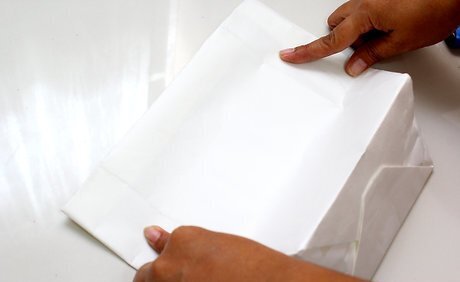
Clean up your fold. Pull out the gussets (the folded-in parts) on both sides of the bag and work the bone folder around the top fold until the fold is clean and the bag is flat (with the gussets out and flat too).

Make a design on the bag. Use a pencil to stencil in a design on the front of the bag, then cut out the shape with a craft knife. Place a piece of cardboard inside the bag as you cut to protect the back of the bag. If you don’t want to make a design on the bag, you can move down to the step in which you add grommets to the sides of the bag.
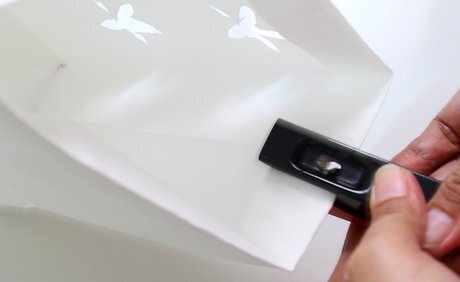
Add grommets to the sides of your bag. Place 1 grommet in the middle of each side of your bag, roughly 1/2-inch down from the top of the bag. To find the center, use the crease from the mid-line of the gusset as your guide. Note that it’s not necessary to hang your lantern. Some people simply drop a tea light into a white bag and leave it at that!
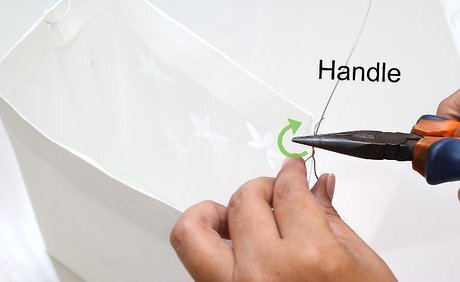
Loop wire through the grommets to form a “handle”. To fasten the wire securely to the bag, pull it through the grommet and then twist the end of the wire upwards along the rest of the wire. Before you had a tea light to the bag, make sure that the wire is securely fastened to the bag.
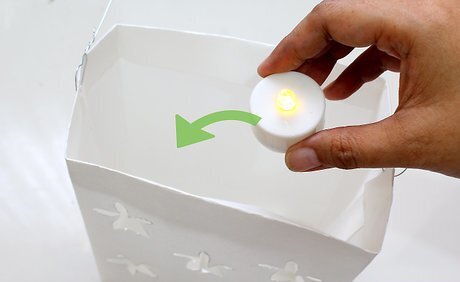
Place a tea light inside the bag. An electric tea light is highly recommended, as a regular tea light can pose a fire hazard, particularly if the lantern is hung somewhere where it might be jostled.
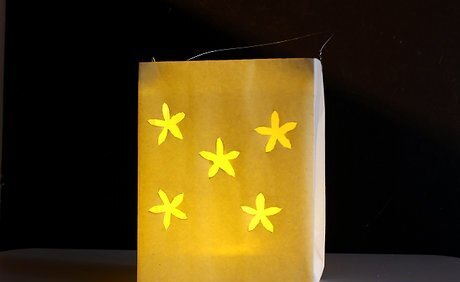
Enjoy your lantern!







Comments
0 comment