

Drying Fresh Fruit in Your Freezer

Pick out fruits with a high water content. Apples, berries, grapes, peaches, and pears are among the most popular choices for freeze-drying. However, you could also use bananas, kiwis, mango, pineapple, citrus, or just about anything else you might wish to enjoy in the future. Foods that contain lots of moisture tend to be the easiest to work with. When you freeze them, they become icy, which helps preserve their structure as the moisture slowly evaporates. Fruits are some of the simplest foods to dehydrate, which makes them a perfect place to start if you’re just getting into freeze-drying.

Wash and dry your fruit. Place your fruits in a colander or wire strainer and run them under a stream of cool water. Make an effort to remove as much dirt, debris, and waxy residue as possible. When you’re done, pat the fruit dry with a layer of folded paper towels or a clean, dry towel. It’s important to dry your fruit thoroughly before moving on. Starting with wet fruit will increase the amount of ice that has to evaporate in the freezer, causing the dehydrating process to take longer.
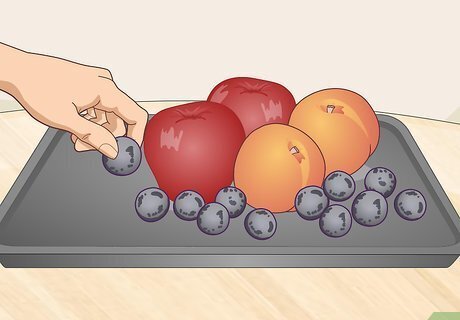
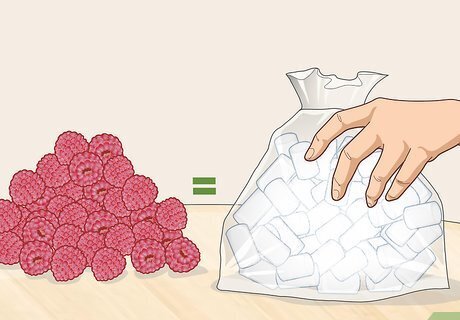
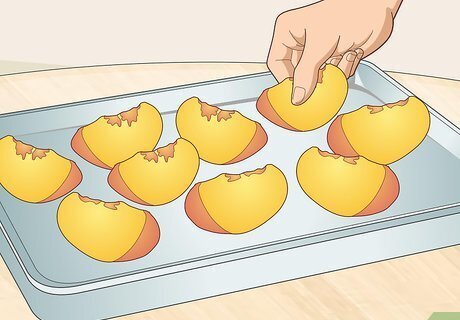
Place your fruit on a spacious baking sheet. If possible, arrange your fruit so that there’s a little bit of room between each piece. It’s alright if the edges are touching, but try not to crowd the baking sheet, as this can lead to sticking. More space means better airflow, and better airflow means shorter freezing times. Feel free to group together as many varieties as you like on a single pan. Just organize your offerings into sections to make them easier to sort and store later on. You can also lay out your fruit on a metal cooling or drying rack, as long as the pieces are large enough not to slip through the gaps.
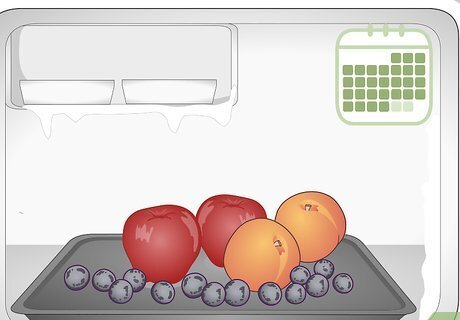
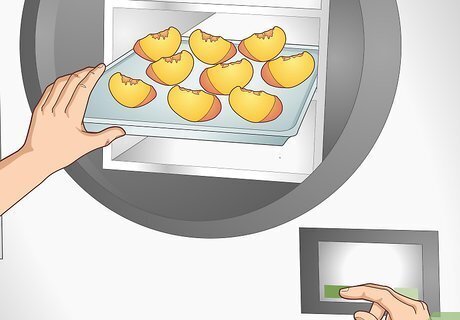
Freeze your fruit for up to 4 weeks. All that’s left to do now is place the fruit in your freezer and wait. Small batches of high-moisture fruits may dehydrate completely in as little as one week. If you’re working with drier fruits or an assortment of different varieties, be prepared to leave them for several weeks, or even as long as a month. As the fruit sits, the ice it contains will gradually turn to vapor and dissipate in a process known as “sublimation.” Avoid checking on your fruit for the first week or opening the freezer door any more than absolutely necessary. Raising the temperature in the freezer even a few degrees can add considerably to your overall processing time.Tip: To test whether your fruit is fully dehydrated, grab a piece and allow it to thaw. If it turns black as it warms up, it means there’s still moisture left inside.
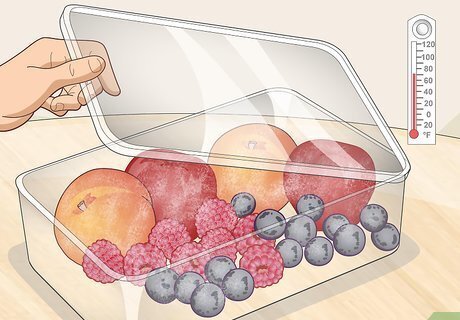
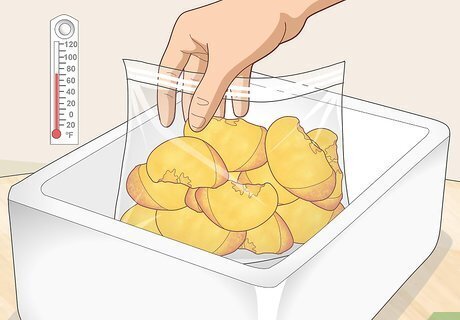
Store your fruit in an airtight container at or below room temperature. When your fruit is fully dehydrated, remove the baking sheet from the freezer. Use a spoon, spatula, or similar utensil to scoop the fruit into a series of resealable plastic bags, glass mason jars, or lidded food containers. Make room for these containers in your refrigerator or freezer or put them away on a shelf in your pantry. When stored properly and insulated from moisture, freeze-dried fruit can last for decades! Avoid letting your freeze-dried fruit sit out on your countertops. The high humidity and fluctuating temperatures in your kitchen could cause it to go bad at a much faster rate.
Preserving Your Fruit with Dry Ice
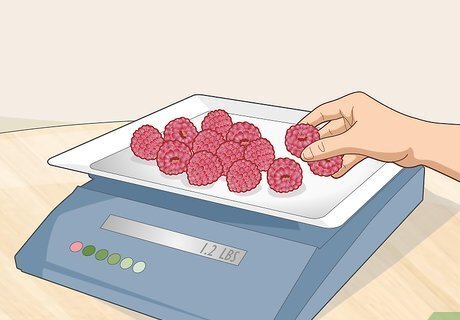
Weigh out the total amount of fruit you want to freeze-dry. Once you’ve selected your fruit or fruits of choice, transfer them to a lightweight container and set the container on a digital kitchen scale. Write down or make a mental note of the total weight, as this will tell you how much dry ice you’ll need to buy. You may be able to weigh your fruit using a standard bathroom scale if you’re going to be freeze-drying several pounds at once. For smaller batches, you’ll need the sensitivity of a kitchen scale. Don’t forget to wash and dry your fruit thoroughly prior to freeze-drying it.
Purchase a quantity of dry ice equal to the weight of your fruit. Dry ice is sold at many grocery stores, as well as ice cream shops and party supply stores. You’ll be using a 1:1 ratio of dry ice to fresh fruit for freeze-drying, so be sure to pick up as much as you need. To freeze-dry 2 pounds (0.91 kg) of fruit, you’ll need exactly 2 pounds (0.91 kg) of dry ice. You can usually get a 1 pound (450 g) block of dry ice for around $1-3.
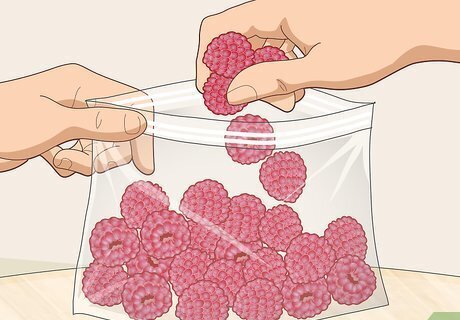
Portion your fruit into resealable plastic freezer bags. Put small items like berries and grapes in whole, and cut larger fruits like apples, bananas, and plums into slices or chunks to make them fit better. Press as much air out of the bags as possible before you close them up. Too much oxygen will increase the chances of your fruit spoiling prematurely. Zipper bags are preferable to the kind that snap closed, as they’re less likely to come open accidentally. If you're freeze-drying a variety of fruits, label each bag with a permanent marker. That way, you’ll easily be able to tell what’s inside once their contents have been dehydrated. One advantage of bagging your fruit before you freeze it is that you won’t have to bother transferring it to a separate container when you’re done.

Place your fruit bags in an insulated cooler. Add the bags to the bottom of the cooler, spreading them out so that they lie as flat as possible. If you plan on freeze-drying a large quantity of fruit at the same time, stack the bags on top of one another to make better use of your available space. If you already own a cooler but don’t like the idea of filling it full of dry ice, buy a cheap styrofoam cooler to do your freeze-drying in. One of these will get the job done just as well as a pricier model. Never put dry ice in the refrigerator or freezer. It’s much too cold even for these places, and will quickly melt without proper insulation.
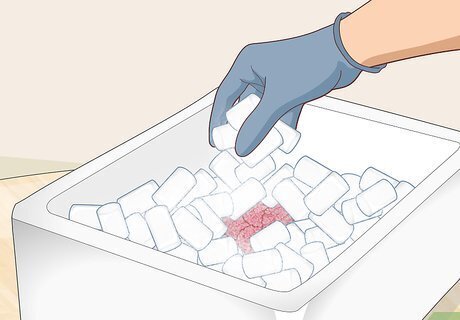
Cover the fruit completely with dry ice. Open the package of dry ice and shake it into the cooler on top of the fruit. Do your best to distribute it in an even layer. Ideally, the fruit should barely be visible underneath. If your dry ice came in a solid block, you may need to break it up before you add it to your cooler. When working with dry ice, always wear gloves and set up your materials in a well-ventilated space. It could cause burns if it comes into direct contact with your skin. Similarly, breathing the fumes could result in respiratory irritation.

Freeze your fruit for up to a full day. Since dry ice is somewhere in the ballpark of −109 °F (−78 °C), it evaporates the moisture out of food much faster than an ordinary freezer. If you’re only dehydrating 1–3 pounds (450–1,360 g) of fruit, it should be ready within about 24 hours. Especially large batches of around 5 pounds (2.3 kg) or more may take closer to 36-48 hours. You’ll know your fruit is ready to come out of the cooler when all of the dry ice has disappeared.Warning: Lower the lid of your cooler, but don’t close it. If it’s sealed, the gases released by the dry ice could build up enough to make it explode!

Store your freeze-dried fruit at room temperature or below. Carefully remove the bags from the cooler and organize them on a shelf in your pantry. You can also move them into the refrigerator or freezer to make sure they stay below 68–70 °F (20–21 °C), which is optimal for maximizing the lifespan of freeze-dried items.
Using a Freeze-Drying Machine
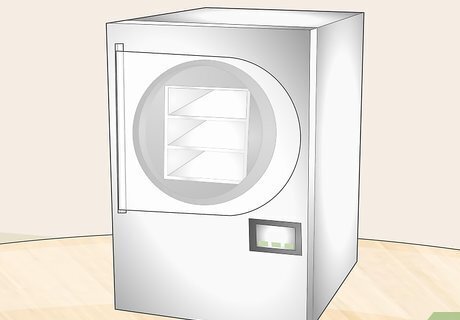
Invest in a home freeze-drying machine. Nowadays, there are many companies that sell freeze-drying machines that take the difficulty out of dehydrating various foods at home. One of these machines could make a welcome addition to your kitchen if freeze-drying is a common part of your food prep routine. Freeze-drying machines come with a pretty steep price tag—they can range from $1,700 for a basic unit to around $4,000 for high-end models. When deciding whether or not to make the investment, consider how much time and labor you’re likely to save by using a freeze-drying machine in place of other, less efficient methods.
Lay out your fruit on the provided freezing trays. Cut large fruits into chunks, slices, or wedges to ensure that they’ll fit comfortably and dehydrate properly. Separate the individual pieces of fruit to prevent them from sticking together. Designate a tray for each of the fruits you’ll be freeze-drying, or group different selections together on the same tray to save time.Tip: Make sure none of your pieces are taller than the sides of the trays. Oddly-shaped or overly bulky items could impact freezing times.
Load the trays into the machine and press start. It’s that simple! Most freeze-drying machines only have one main freezing mode, so there’s no need to mess with a lot of complicated settings. Once you start the machine, the door will lock and a timer will appear displaying how long your items have left. Depending on the model you’re using, you may need to run through a short checklist of preliminary tasks before you can activate the machine. This might include securing a removable insulation pad and closing the built-in drain valve.
Keep your freeze-dried fruit at room temperature or cooler. When your fruit is ready to come out, unlock and open the door of the machine, remove the trays, and transfer the fruit to resealable plastic bags or lidded jars or storage containers. Stash the containers in your refrigerator or freezer, or situate them on a shelf in your pantry until you’re ready to put them to use. Consider spending a little extra on a vacuum-sealer to keep your freeze-dried fruit good for longer. One of these devices will help protect it from atmospheric moisture while it’s in storage.


Comments
0 comment