
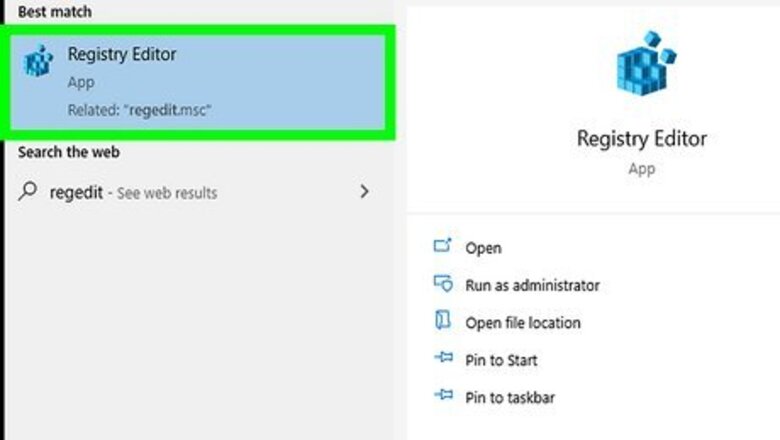

Open the Registry Editor. You can do this by clicking the Start Menu icon or pressing the Win key to open your Start Menu. Then search "Regedit" in the search bar and click the executable app result. Click Yes when prompted. Before the app runs, you'll get a pop-up asking if the program "Registry Editor" can make changes to your device. You'll need to allow this by pressing Yes to continue.
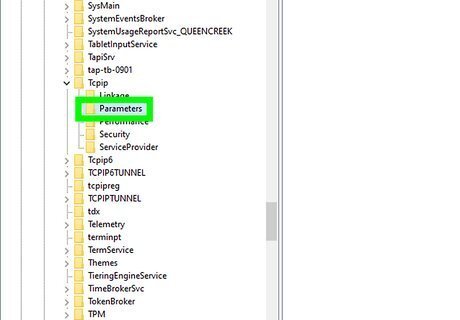
Navigate to "HKEY_LOCAL_MACHINE\SYSTEM\CurrentControlSet\Services\Tcpip\Parameters." Do this by clicking the downwards-pointing arrow next to each location to see more options. Click the "Parameters" folder to see the files listed inside it.
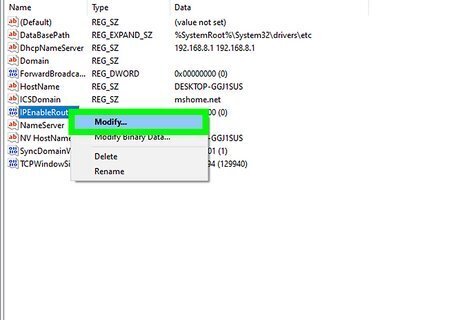
Right-click "IP Enable Router" and click Modify. When you right-click the file, a menu will pop up at your cursor. When you select Modify, a window will appear.
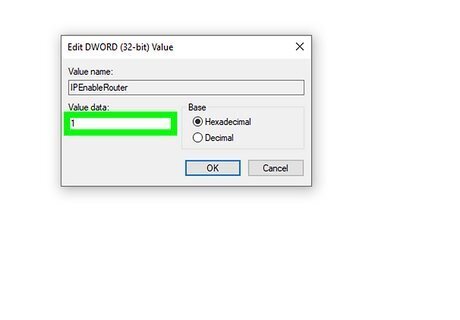
Change the "Value Data" field from "0" to "1." The 1 will enable your IP routing capabilities in Windows 10.
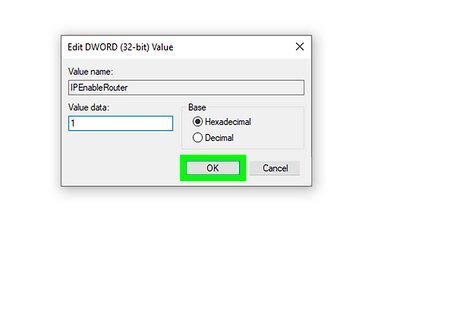
Click Ok, close the Registry Editor, and restart your computer. You'll need to restart your computer to apply the changes you've made.
Once your computer restarts, open Command Prompt and enter netsh interface ipv4 show interface


Comments
0 comment