views
- Push the red button on the dustbin once to empty it and a second time to remove it. Then, wipe out the bin with a damp microfiber cloth and let it dry.
- Dust the cyclone shroud with the Dyson combination brush tool or another soft brush. Then, pry off the shroud with a screwdriver and brush the cyclone.
- Pull out the filter on top of the cyclone and rinse and squeeze it under cold water until the water runs clear. Then, let the filter air dry for 24 hours.
Cleaning the Dustbin and Cyclone
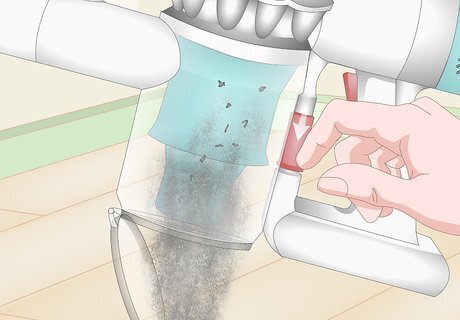
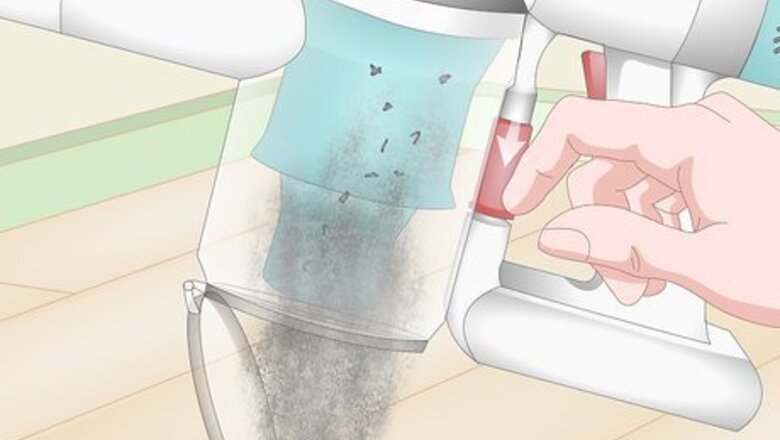
Push the red button on the dustbin to empty it. The dustbin is the clear cylindrical container that captures debris you vacuum up which is attached to the vacuum's handle. Simply hold the bin over a trashcan and press the red button on the vacuum’s handle to release the debris into the trash. Note: Make sure your vacuum is turned off and disconnected from the charger before cleaning it. Shake the vacuum over the trashcan to knock loose as much dust and debris inside the dustbin as possible. Make sure to position the dustbin over a trashcan or empty bag. If you don’t, you’ll likely end up with a mess on the floor!
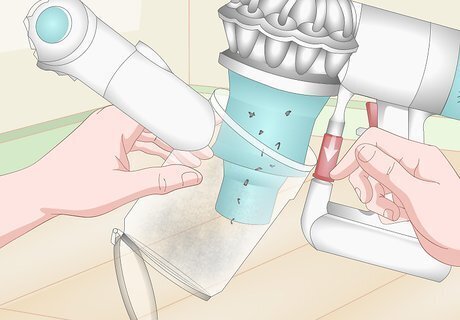
Press the red button again to remove the dustbin from the vacuum. Pushing the red handle button twice unlocks the dustbin from the vacuum. Just grab the container and gently wiggle and pull it to completely take it off of the colorful cyclone piece. Empty out any dust still left in the bin. Turn it over inside a trash can or garbage bag and shake out as much as you can.
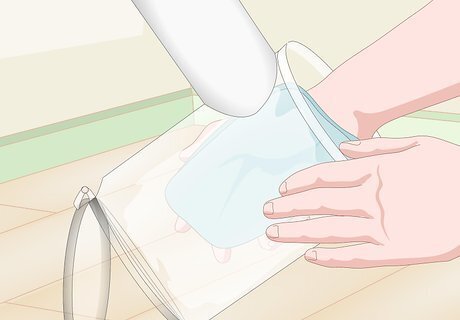
Wipe the bin with a damp microfiber cloth. Wet a clean, soft microfiber cloth with lukewarm water. Then, squeeze out the excess moisture so the cloth is damp and not dripping wet. Simply wipe the interior and exterior of the dustbin with the cloth to remove stubborn, leftover debris. Do not clean the bin in the dishwasher, as the water is too hot and rough. Always clean the bin by hand. If the bin is full of loose dust and debris, you might only need a dry cloth to wipe it out. Dyson does not recommend using any soaps or cleaners to clean the dustbin.
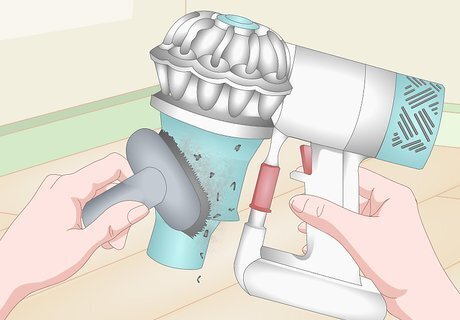
Clear dust off of the cyclone shroud with a dust brush. Find the combination brush tool that came with your vacuum, which is half-brush and half-vacuum nozzle. Then, hold the vacuum over a trash can. Simply sweep the brush over the shroud to loosen stuck-on dirt and debris. The cyclone and shroud are the colorful pieces attached to the vacuum handle that the dustbin hangs from. If you can’t find the combination brush tool, use any soft brush to remove dust and dirt on the cyclone and shroud, like an old paintbrush or toothbrush. Only use a dry brush to avoid getting any moisture inside the cyclone and the motor.
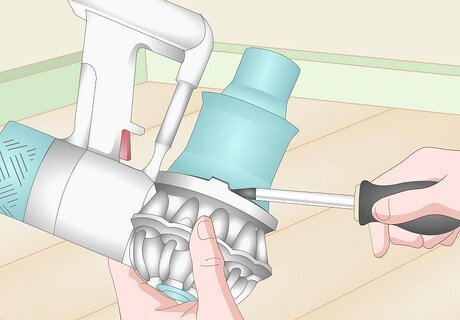
Use a flathead screwdriver to pry the shroud off of the cyclone. Look for the clip that connects the shroud piece to the cyclone. Then, push a flathead screwdriver into the clip and work it back and forth to separate the shroud from the cyclone. Keep inserting the screwdriver at different points between the shroud and cyclone to fully remove the shroud. Take off the shroud outside or over a trash can or bag, as the inside of the shroud and cyclone are likely full of dust. If you don’t have a screwdriver, use a butter knife or another sturdy, flat tool.
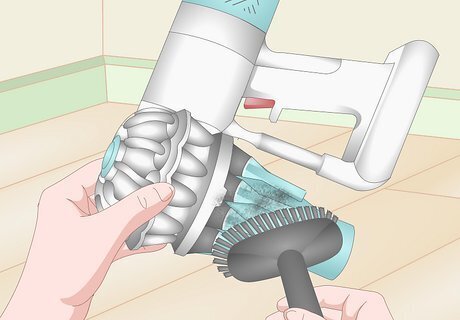
Clean the cyclone and the inside of the shroud with a brush. Hold the cyclone over a trash can and use your vacuum’s combination brush tool to wipe the exterior free of dust. Then, grab the shroud piece and brush the inside free of debris. Use a dry cotton swab or compressed air to clean out any tiny crevices on each part. As an extra cleaning step, use a Torx T8 screwdriver to remove the screws on the cyclone and pull it off of the vacuum. Then, brush the inside of the cyclone and the piece it covered free of dust.
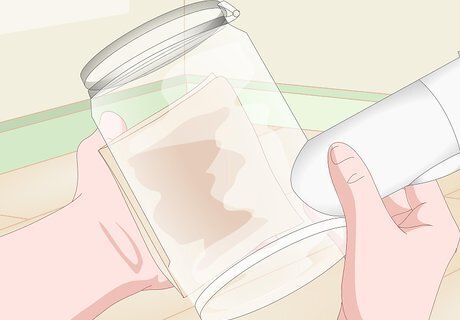
Dry the bin with a clean towel. To keep your vacuum in working order, make sure the dustbin is completely dry before reassembling it. Just take a clean, microfiber cloth or a paper towel and wipe the inside and outside of the bin dry.
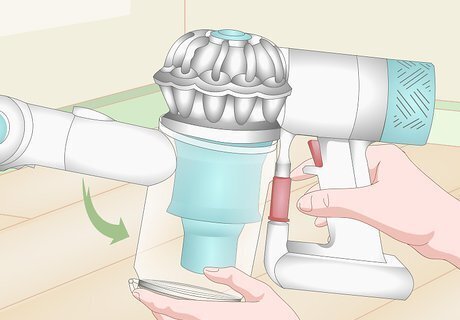
Click the shroud and bin back in place over the cyclone. Line up the notch on the shroud with the clip on the cyclone and snap the shroud back onto the cyclone. To put the bin back on, look for a small tab on the front of the cyclone and near the bottom edge. The bin has a slot on its front edge that fits on that tab. Just line up the slot and raise the bin until it clicks in place. Tilt the bin slightly and attach the vacuum end first to make reassembly easier. Make sure the bin is completely dry before reinstalling it or else moisture could get into the vacuum and damage it.
Cleaning the Filters
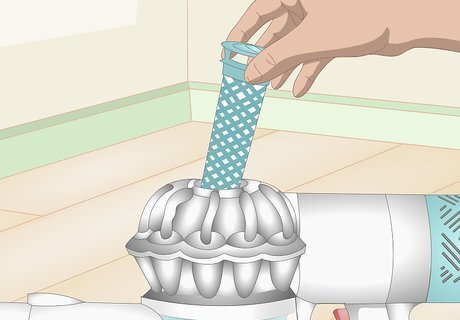
Lift the pre-filter out of its casing on the top of the vacuum. The filter is located inside the cyclone above the transparent dustbin. Look for a plastic cap colored purple or blue on the very top of the cyclone that has a little tab in the center of it. Just pull on the tab to slide the stick-shaped filter out of its chamber. Note: Turn your vacuum off and disconnect it from the charger before cleaning the filter. Check the filter for damage. If it looks worn out, it might be time to replace it. Look for a new filter on Dyson’s website or at your local general or hardware store. Dyson recommends cleaning the filter at least once a month. You may need to wash it more frequently if you vacuum up heavy amounts of debris or your machine isn’t working as usual.
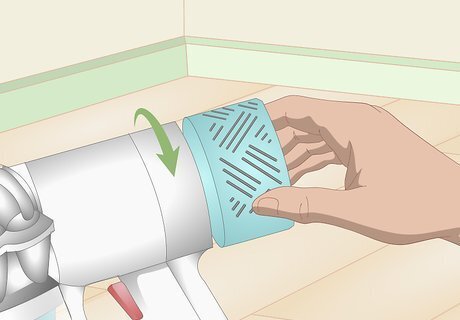
Twist the post-filter off of the end of the vacuum if you have one. Some V6 vacuum models have a HEPA filter that looks like a purple or blue plastic cap above the vacuum’s handle. Simply turn the filter clockwise to detach it from the vacuum. If you’re unsure whether or not your vacuum has a second filter, check the owner’s manual. It will show you where the filters are located.
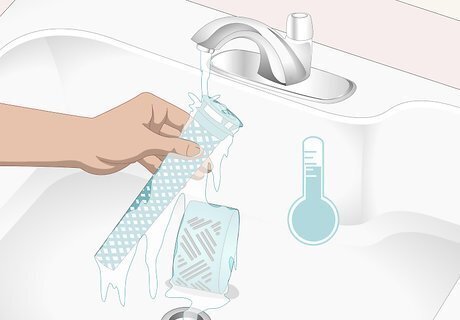
Rinse the filter with cold running water. Cleaning specialist Alessandra Mendes says “the best way to clean dust out of a Dyson filter is to rinse it with cold water until the water runs clear.” Just hold your filter under the running water and gently squeeze it to force out trapped dust and debris. Keep rinsing and squeezing the filter until you see nothing but clear water coming out of it. If you have a HEPA filter, clean it under cold running water, too. Do not use soap and other cleaners to clean your filters, as they can damage them. The filters are too delicate to wash in a dishwasher or washing machine.
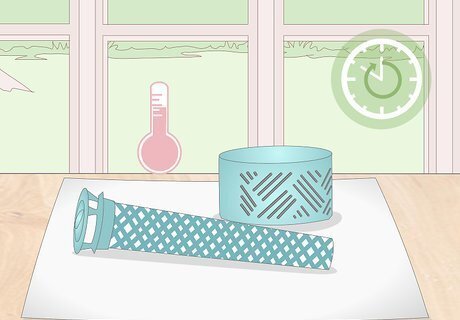
Set the filter(s) in a warm spot to dry for at least 24 hours. Lay your filter on a cloth or paper towel to help absorb excess moisture and set it in a spot that’s away from direct sunlight and heat sources. Then, leave the filter to dry for about 24 hours. If it still feels wet after 24 hours, give it more time to dry. Do not put a wet filter back in the vacuum, as this can damage it. Let the filter dry naturally in open air. If you try to speed up the process, such as by using a dryer, microwave, or flame, you might damage it.
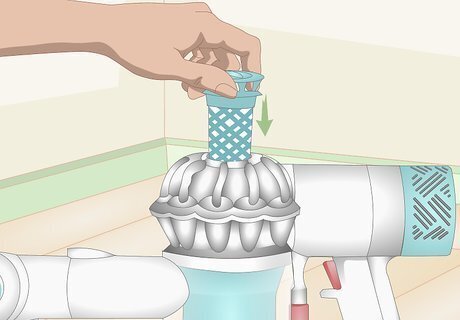
Slide the dry filters back into the cyclone. When your pre-filter is clean and dry, simply lower it into the top of the cyclone. Then, push it down until the plastic cap is level with the top of the filter housing. If your vacuum has a HEPA post-filter, just twist it clockwise onto the end of the vacuum until you hear it click into place.
Cleaning the Brush Bar
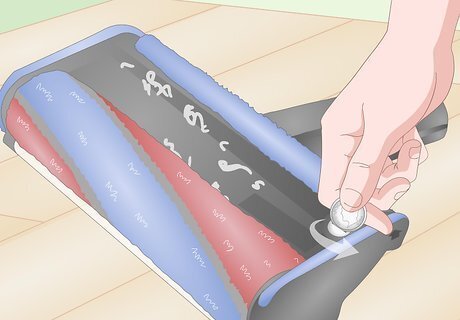
Twist a coin into the side of the brush attachment to open it up. The plastic casing covering the brush bars unlocks through a big, circular fastener with a slot in the center. Just look for the fastener at the end of the brush and on the side. Then, insert a coin into the slot and twist it counterclockwise to unlock the brush. Note: Unplug and turn off your vacuum before cleaning the brush bars and attachment. If you don’t have a coin handy, use a flat, blunt object like a screwdriver or butter knife.
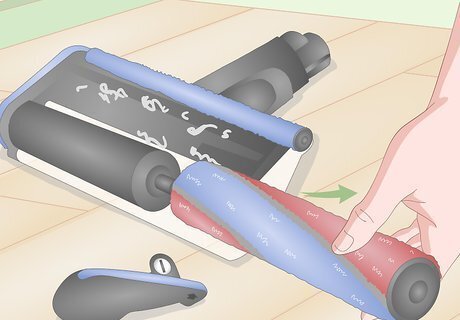
Pull out the brush bar and use your fingers to remove debris. The brush bar is attached to the fastener you just unlocked. Hold the attachment steady and use your other hand to pull out the brush bar. Simply use your fingers to pull off clumps of hair and other big bits of debris. Wiggle and rotate the bar as you pull it out to help prevent it from getting stuck. Use scissors or a razor to cut any hair tightly wound around the brush. Clean the brush bar about once a month to prevent clogs from forming. If you pick up a lot of hair, you may need to clean it out more often.
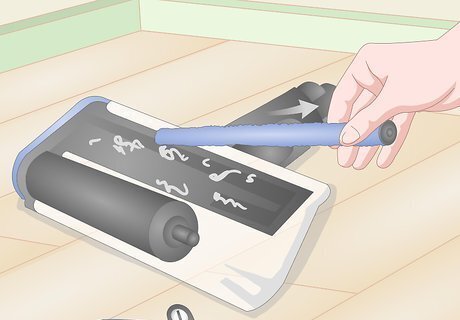
Remove and clean the second brush bar if your vacuum has one. Take a look inside the brush attachment’s casing for a smaller brush bar. Depending on your model, it might be next to the main brush bar. Simply lift it out of the casing and pull off any debris with your fingers. Not all models of the V6 have a second bar, so don’t worry if you can’t find one.
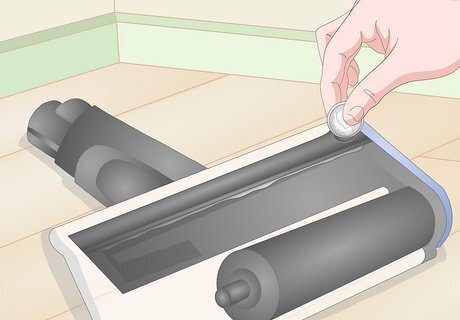
Use a coin to open the compartment on the bottom of the attachment. Look for a small circular fastener with a slot in the center on the bottom of the brush attachment. Then, twist a coin counterclockwise in the slot and lift up the piece to remove it. This exposes more of the inside of the attachment, making it easier to clean.
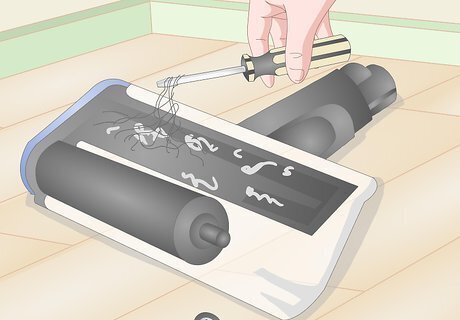
Use a screwdriver to scrape debris out of the inside of the attachment. Slide a screwdriver, butter knife, or other blunt object into all the nooks and crannies in the attachment. This helps you remove all the dust, hair, and other debris tucked away inside the brush’s casing. Hidden debris inside the brush attachment can cause the brush bars to stop turning. Most V6s have a little pocket at the back of the attachment where dirt and hair get trapped.
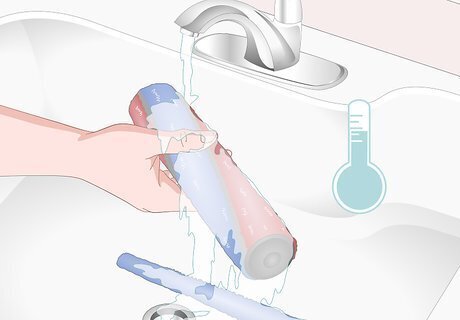
Rinse fluffy brush bars off under cold water. If you’re using a fluffy brush bar in your brush attachment, take it to your sink. Turn on the cold water and gently rub the brush with your fingers to loosen any stubborn dust and dirt. If the brush bars aren’t noticeably dirty, skip washing them. Remove any noticeable debris by hand and then put them back in the vacuum.
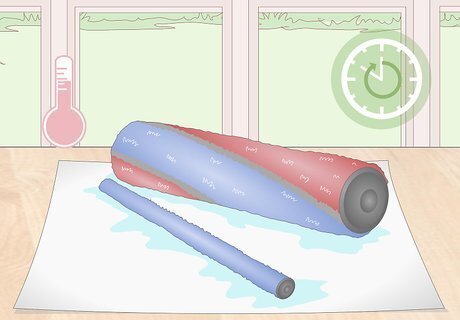
Leave the wet brush bars to dry in a warm spot for 24 hours. Lay out a cloth or paper towel in an open area away from direct sunlight or heat. Place the fluffy brush bar on the towel and let it sit for at least 24 hours to dry completely. Dryers and other heat sources can damage the brush bars.
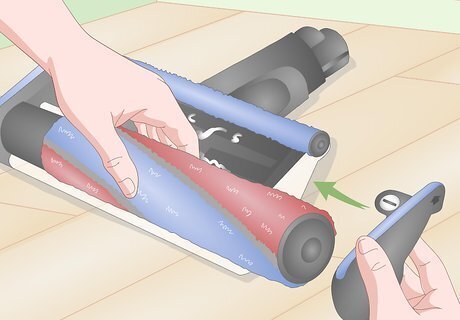
Put the small piece back on the vacuum and insert the brush bar. Lay the small piece you removed over the bottom of the brush attachment and use a coin to twist the small circular fastener clockwise. Then, push the brush back into its housing. Just twist a coin clockwise into the slot on the circular fastener to lock it in place. If your brush attachment has a second brush bar, push in the smaller brush before reinserting the bigger brush.




Comments
0 comment