views
X
Research source
Begin by clearing the building zone and digging a trench around the planned structure’s perimeter. Then stack bricks or stones at least 1.5 feet (0.46 m) above the ground level. After this, you can continue building your foundation and structure.
Measuring and Creating the Perimeter
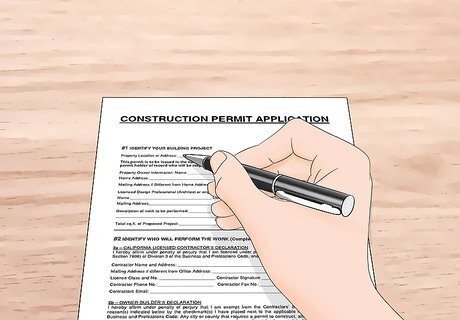
Obtain any necessary construction permits. Building a wall this size is a potentially significant construction project, and some localities will require a permit. Investigate local laws and see if you need a permit for this project. If so, go through all the steps of obtaining the permit before starting construction to avoid fines or other legal trouble. Checking with your local building department is a good place to start. If you know a local contractor or engineer, they are likely aware of regulations in your area. You can also ask them if there are certain regulations you have to meet.
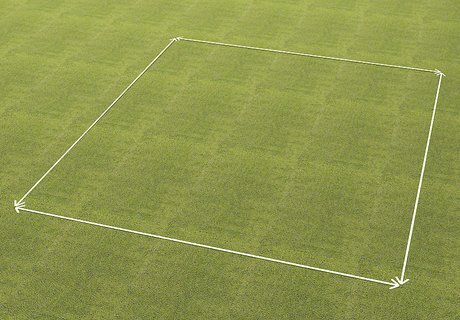
Measure and mark the perimeter of your structure. The stem wall should form part of the foundation on your structure, so build it along the planned structure perimeter. Start by measuring out that perimeter. Then mark that border on the ground. If you’re planning a 10 feet (3.0 m) x 10 feet (3.0 m) shed, measure out these dimensions and mark them in the ground. Plan on starting your stem wall on this perimeter.
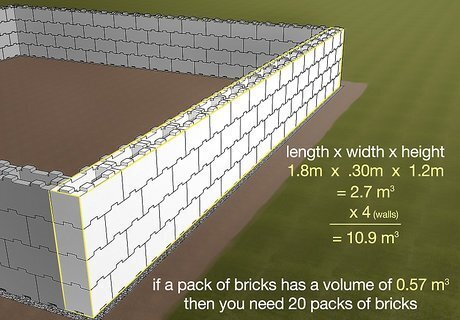
Calculate how many bricks you need. After you've planned the perimeter for your wall, you can calculate the amount of materials you need. First, calculate the cubic feet of the wall you’re planning. The formula for cubic feet is length x width x height. Use this formula for each section of your stem wall. Then, find out the volume of the brick type you plan on using. Divide the volume of each pack of bricks into the volume of your wall to find out how many packs you need. For example, if you’re building a rectangle structure and your wall will be 6 feet (1.8 m) long, 1 foot (0.30 m) thick, and 4 feet (1.2 m) high, you need 96 cubic feet (2.7 m) of material for that section. Then multiply that by 4 to get 384 cubic feet (10.9 m) for the whole wall. Use a different formula if you are calculating the volume of a circular structure. If a pack of bricks has a volume of 20 cubic feet (0.57 m) and the total volume for your wall is 384 cubic feet (10.9 m), then you need 20 packs of bricks. If you’re having the stones delivered, ask the drivers to place the stones as close to your building site as possible so you don’t have to carry them long distances.
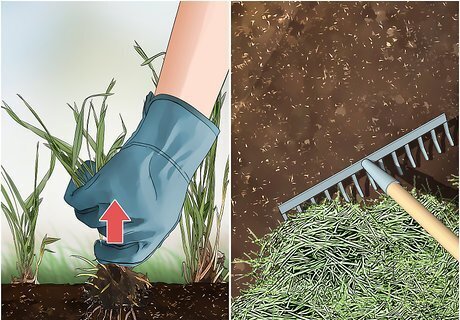
Clear the building site. Remove any grass, bushes, trees, or other natural obstructions inside the planned perimeter of the structure. Pull up grass until you expose the dirt underneath.
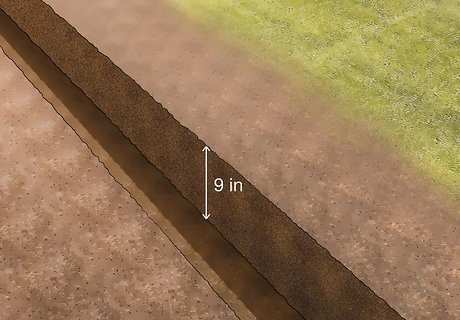
Dig a 9 in (23 cm) deep trench around the perimeter of your structure. This trench should follow the planned outer walls. It forms the rubble layer that you’ll stack the stem wall on top of. Make the bottom of this trench as level as possible. If you encounter any stones or obstructions, remove them to they don’t get in the way of your wall.
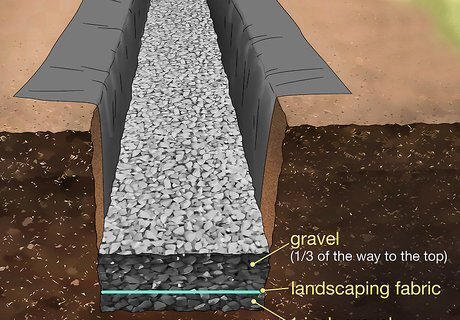
Fill the trench with 2 layers of drain-grade gravel with landscape fabric in between. Gravel forms the foundation for the stem wall and assists with drainage. Cover the bottom of the trench with 1 inch (2.5 cm) of gravel. Push the gravel down with your foot or a shovel to make sure it’s tightly packed. Then, lay out landscaping fabric so it covers the gravel and both sides of the trench. Leave some fabric remaining at the top so you can wrap the fabric around the top of the drainage system. Finally, pour gravel into the trench until it fills 1/3 of the way to the top. You can buy bags of drain-grade gravel at a local hardware or garden supply store.
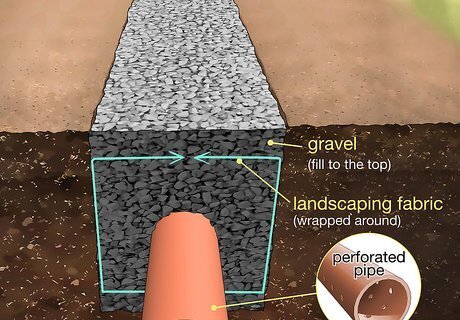
Install a drainage pipe in the trench. To prevent water from settling in your foundation, you can build a simple drainage system. First, dig a path extending from the wall's trench to a drainage area. Lay a perforated pipe in the trench and extend it into the drainage path. Then wrap the remaining landscaping fabric over the pipe. Fill the trench with gravel until it is 6 inches (15 cm) from the top. If you plan on connecting your drainage pipe to a local storm drain or sewer, make sure you receive permission from the local government. If you have water on your property, you can extend the drainage ditch so it empties here.
Stacking the Wall
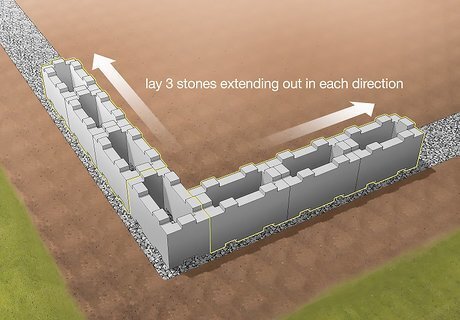
Lay a cornerstone in each corner. Load-bearing dry stack walls should be started at the corners. Begin constructing corners by laying 1 stone in the corner of the trench. Then lay 3 stones extending out in each direction. This forms the corner joint. If the wall is more than 1 stone thick, lay more stones parallel to the first ones. Act as if each section represents one stone.
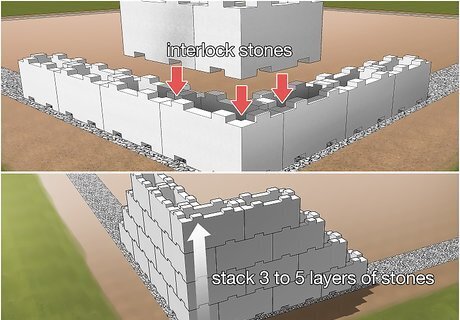
Construct the corners by interlocking stones. Construction bricks are designed to interlock at corners. The 4 stones you laid from each direction forms the first layer of cornerstones. For the second layer, overlap the first stone by laying another on top of it. Continue interlocking the stones as you build upward, alternating which side lays over the other. The interlocking stone structure should look like a zipper going up. Stack 3 to 5 layers of stones at the corner before filling in the rest of the wall. Then if you need to go higher, stack more layers at the corners.
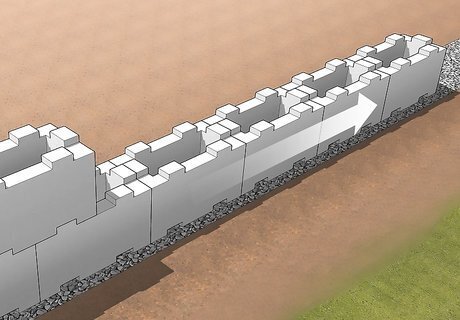
Lay the stones down for the first layer of your wall. After constructing the corners, extend outward from here and fill in the rest of the trench. Interlocking bricks have shapes cut into them that line up with the other bricks. Fit the bricks together as you lay them in place. Place the bricks in the trench all along the perimeter to form the first layer. Make sure each rock you place is secure. Push it down to lock it in place snugly. Pound them down gently with a rubber mallet if you have to. Always stack a complete layer around the whole perimeter before starting another layer.
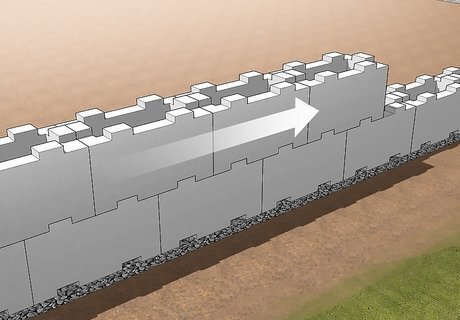
Stagger the rocks as you start new layers. When starting a new layer, each rock should overlap the joint between the rocks below it. This helps make your wall more stable. Continue this pattern as you stack more layers. If your bricks are smaller and you need to use more than one to cover the width of the trench, make sure the stones nearby touch each other. Otherwise, the wall won’t be able to support much weight.
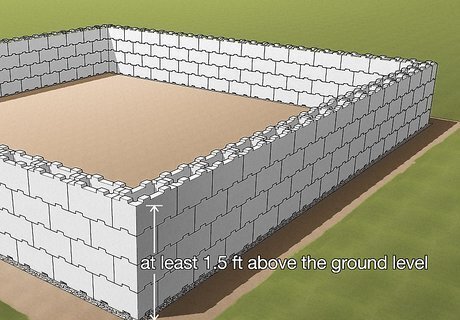
Stack your wall at least 1.5 feet (0.46 m) above the ground level. Part of the reason you need a stem wall is to keep ground moisture away from the structure you’re building. Stacking the wall at least 1.5 feet (0.46 m) above ground level helps keep your structure dry and avoids water damage. Do not build the stem wall higher than 8 feet (2.4 m). A wall higher than this requires extra reinforcement. Many localities even ban stem walls higher than 4 feet (1.2 m) for safety reasons.
Finishing the Wall
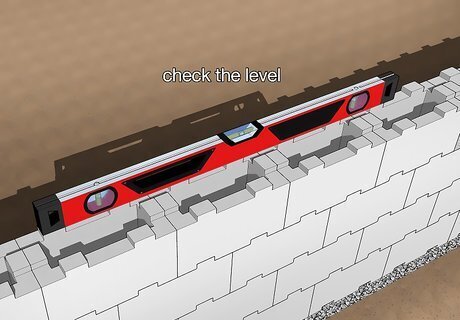
Check that your wall is level when it’s complete. The stem wall must be level to support a structure. Place a level on top of the wall and adjust the bricks if necessary. Check the wall in multiple locations to confirm that it’s level across its whole perimeter.
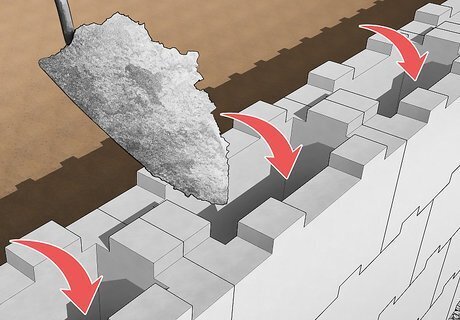
Continue building your foundation. The stem wall only forms a part of your foundation. If you intend on building a structure, you need additional foundation. This usually requires pouring cement into the section that the stem wall surrounds. Pouring this much cement is a big job. Consider contacting a contractor to do this step for you. You can also build a foundation with large rocks or bricks. This is only for a smaller structure.
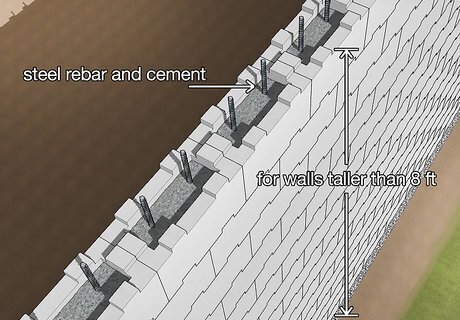
Use extra reinforcement for walls taller than 8 ft (2.4 m). The dry stack technique is only intended for walls less than 8 ft (2.4 m). Taller walls need extra reinforcement like steel rebar and cement. This is a different and much larger project that requires a professional contractor.


Comments
0 comment