
- If your computer can't connect (or won't stay connected) to your Wi-Fi router, disabling and re-enabling the Wi-Fi adapter can help.
- If your Wi-Fi problems are persistent no matter which access point you connect to, you might need to uninstall and reinstall your Wi-Fi drivers.
- For tougher internet connection issues, you can manually reset all of your network settings from the command prompt or in Network Connections.
Disabling & Reenabling the Adapter
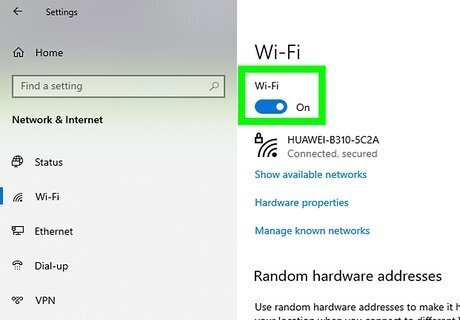
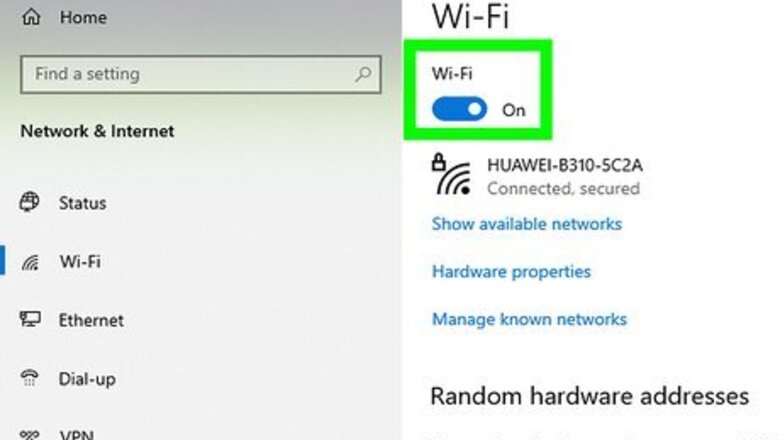
Make sure Wi-Fi is enabled first. If you're resetting your wireless adapter because you can't access your wireless network, first make sure you haven't accidentally disabled Wi-Fi. To check, open your Windows Settings, click Network and Internet, and toggle on the Wi-Fi switch. Toggling Wi-Fi on and off may be all you need to do to fix your connection issues.
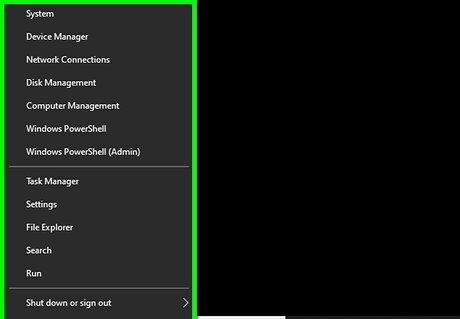
Right-click the Start Windows Start button. This brings up a menu if you're using Windows 10. If you're using Windows 8, 7, or Vista, follow these steps instead: Click the Start menu and select Control panel. Click Network and Sharing Center. If you don't see it, click Network and Internet. You should find the Network and Sharing Center there. Click Change adapter settings in the left panel. Skip to Step 4.

Click Network Connections. It's near the middle of the menu.
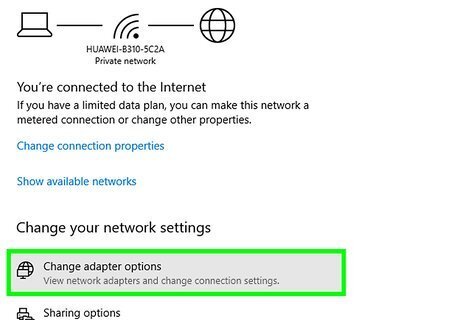
Click Change adapter options or More network adapter options. You'll see Change adapter options in Windows 10, and More network adapter options in Windows 11. A list of your connections will appear.
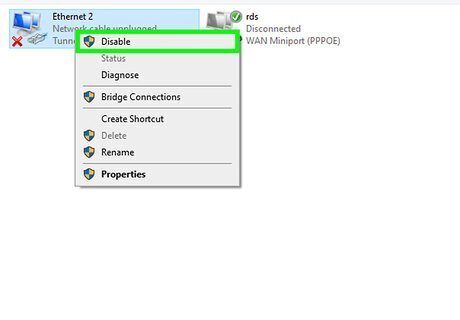
Right-click the Wi-Fi adapter and select Disable. This turns off the wireless adapter.
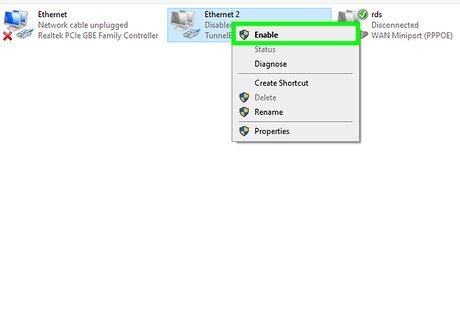
Right-click the Wi-Fi adapter and select Enable. The adapter will restart and attempt to connect to your default Wi-Fi network. If you're still having trouble with your connection, try connecting to a different wireless access point. If that works, the issue may be with your internet provider or Wi-Fi router.
Resetting TCP/IP and DNS
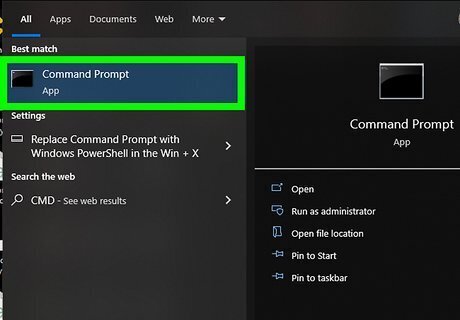
Press the Windows key and type cmd. If you're still having internet issues after resetting the adapter, you can try resetting the TCP/IP stack, release and renew the IP address, and flush and reset your DNS cache from the command line. When you type cmd, you'll see some search results appear. This method will delete all of your computer's network connections and settings, including the wireless adapter, and then reinstall them. If you’ve already tried disabling and re-enabling the wireless adapter and it didn't solve your problem, use this method on any version of Windows.
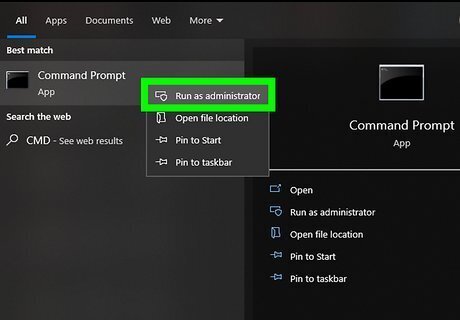
Right-click "Command prompt" and select Run as administrator. This gives you an elevated command prompt that allows you to perform administrative tasks.
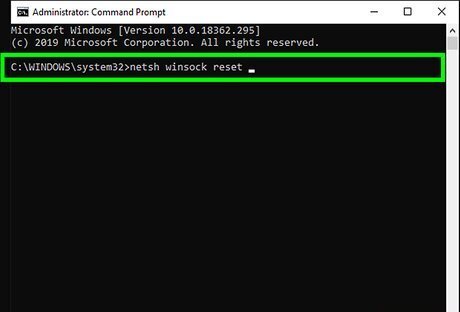
Type netsh winsock reset and press ↵ Enter. This command resets your TCP/IP settings, which can help resolve internet issues.
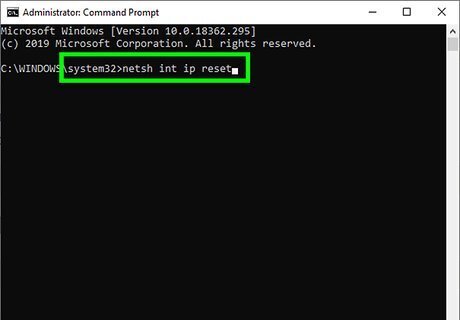
Type netsh int ip reset and press ↵ Enter. This essentially removes and re-adds TCP/IP by overwriting registry keys.
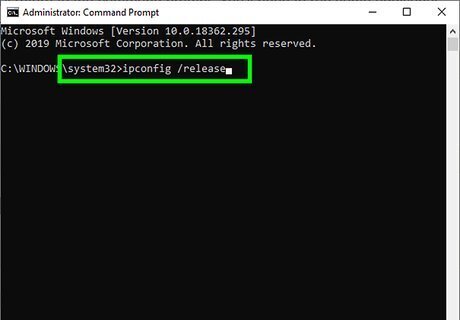
Type ipconfig /release and press ↵ Enter. This command releases the IP address that was assigned to you by the router.
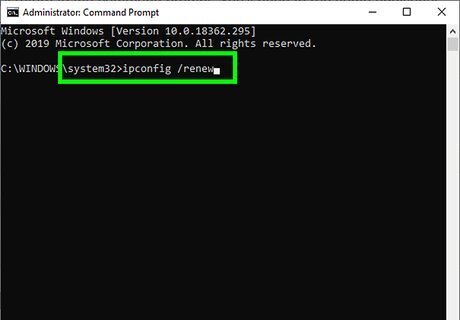
Type ipconfig /renew and press ↵ Enter. This command attempts to reconnect to the router to acquire a new IP address.

Type ipconfig /flushdns and press ↵ Enter. This final command purges any cached IP addresses and domain names.
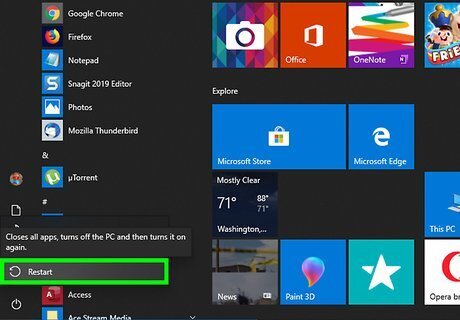
Restart your PC. Once your PC comes back up, you'll need to reconnect to your Wi-Fi network, which includes re-entering the password (if applicable). If you're still having trouble with your connection, try connecting to a different wireless access point. If that works, the issue may be with your internet provider.
Uninstalling & Reinstalling the Driver

Download the correct drivers for your Wi-Fi adapter from the manufacturer. If you're still having trouble after resetting your Wi-Fi adapter, you can try removing and reinstalling the wireless card drivers. But before uninstalling, you'll want to make sure you have the correct Wi-Fi adapter drivers saved to your PC. To make sure you're downloading the correct driver, visit your PC manufacturer's support website and choose your exact PC model. If you're not sure of the model, press Windows key + Pause at the same time, or go to Settings > System > About. If you don't have internet access, you can download the drivers on another computer, save them to a USB flash drive, and then copy them to PC that's having problems. In some cases, your Wi-Fi adapter can use a generic driver that comes preinstalled with Windows. If you don't download a driver, you may be able to use the generic driver to get back online after uninstalling. Sometimes using the default driver can even resolve internet issues! But to be on the safe side, download your manufacturer's drivers—there's always a chance your card isn't compatible with the generic drivers.

Right-click the Start menu and select Device Manager. This opens the Device Manager, which allows you to add and remove hardware drivers.
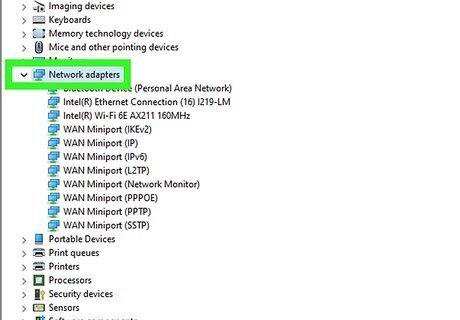
Click the arrow next to "Network adapters." This displays all of the network adapters connected to your PC, including your Wi-Fi adapter.
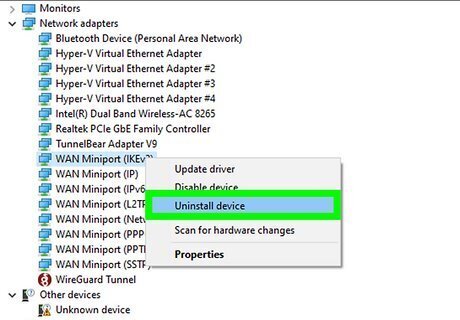
Right-click your Wi-Fi adapter and select Uninstall device. A confirmation message will appear.
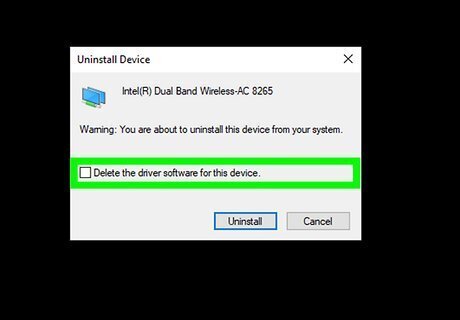
Click the checkbox next to "Attempt to remove the driver software for this device." This ensures that the driver is actually removed.
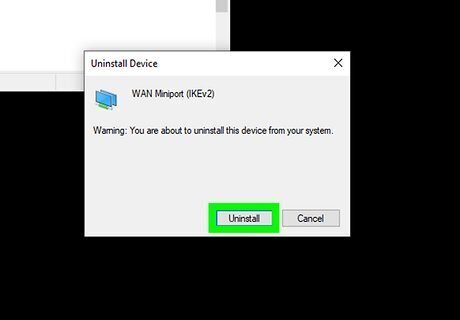
Click Uninstall to confirm. The previous driver is now removed.

Reboot your PC. Once your computer shuts down and restarts, Windows will attempt to install the best driver for your network card automatically. If prompted, allow the drivers to install. After the drivers are installed, try connecting to Wi-Fi. If you're connected, great! If not, continue with this method to manually reinstall the drivers.
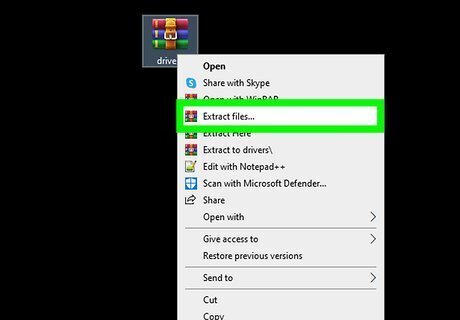
Install the drivers you downloaded. If you downloaded a file that ends with .exe, double-click the file and follow the on-screen instructions to install. This will automatically install the drivers for your Wi-Fi card. If the file ends with .zip, you'll need to unzip the file first. Right-click the file, select Extract all, select a folder you'll remember, and then click Extract. If there's no file ending in .exe or you weren't able to download drivers, continue to the next step.
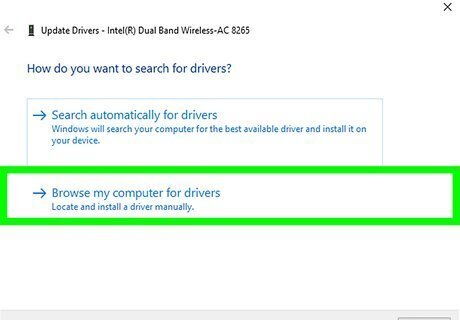
Install the new drivers manually. Here's how: Right-click the Start button and select Device manager. Click the arrow next to "Network Adapters." Right-click the Wi-Fi adapter and select Update driver. Click Browse my computer for drivers. Click Browse and select the location of your drivers. Click Next and follow the on-screen instructions.
Resetting All Network Adapters

Right-click the Start Windows Start button. If you're still having trouble, you can use this method to reset all of your network adapters and settings at once. This should be your last resort, as it clears all settings—including saved Wi-Fi networks, passwords, and VPN settings. If you're having connection issues after upgrading to Windows 11 or can't connect to shared network drives, this method may resolve those issues.
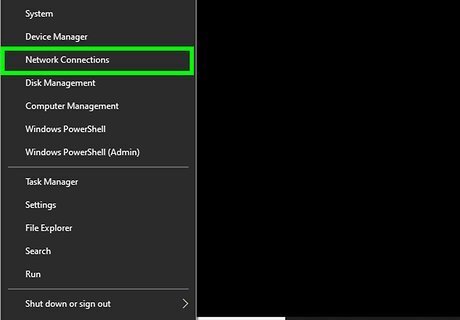
Click Network Connections. It's near the middle of the menu.
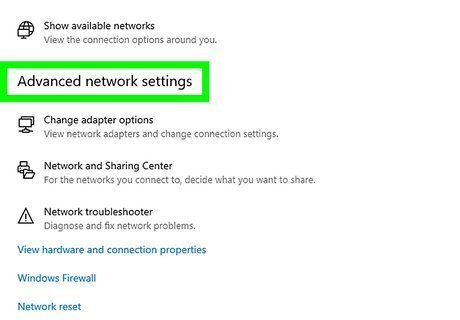
Click Advanced network settings (Windows 11 only). If you have Windows 10, you can skip this step. For Windows 11, click this option at the bottom of the right panel.
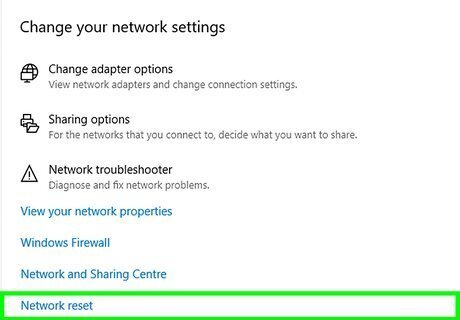
Click Network reset. You'll see this near the bottom of the right panel on both Windows 10 and Windows 11. Once you click this link, you'll see a message telling you that your network adapters will be removed and reinstalled and that you'll have to reconnect to the internet afterward. You may have to reinstall any VPN software you're currently running after the reset is complete.
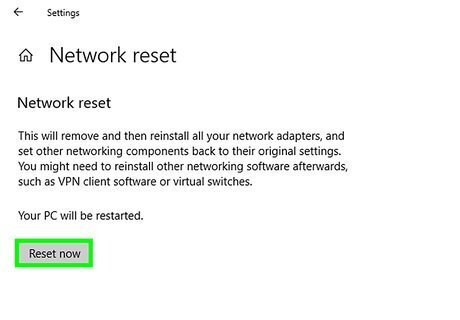
Click Reset now and then Yes to confirm. This begins the full network adapter reset process. When the network adapters are uninstalled, your computer will restart and then re-install the adapters on its own. Once your PC restarts, you'll need to reconnect to your Wi-Fi and other networks.


Comments
0 comment