
Preparing
Make sure your Minecraft server is set up. If you haven't yet installed and configured a Minecraft server on your computer, click one of the following links for instructions on doing so for your specific operating system: Windows Mac
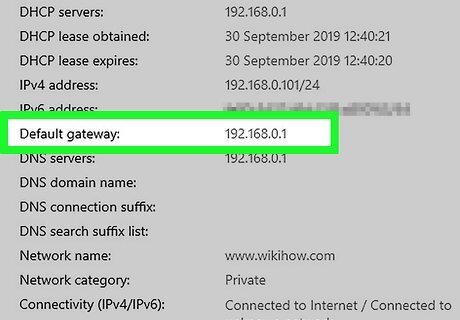
Find your router's IP address. In order to access your router's page, you'll need to know the router address as specified by your computer's settings: Windows — Open Start Windows Start, click Settings Windows Settings, click Network & Internet, click View your network properties, scroll down to the "Wi-Fi" heading, and note the address next to the "Default gateway" section. Mac — Open the Apple menu Mac Apple, click System Preferences..., click Network, click your Wi-Fi connection on the left side, click Advanced..., click the TCP/IP tab, and note the address next to the "Router" heading. Linux — Open a terminal and type in "ip r". The last set of numbers is the router's IP address.
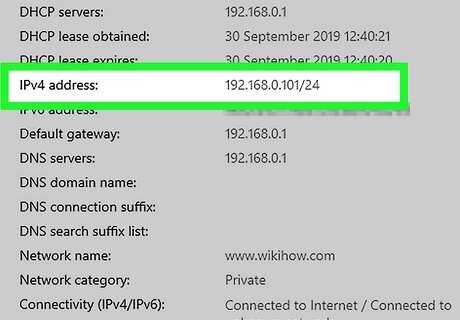
Find your computer's IP address. You should see this to the right of the "IPv4" heading in the menu in which you found your router's IP address. This is the address which identifies your computer. If you see a slash and another number at the end of the IP address (e.g., 192.168.1.12/32), your computer may be identified by two addresses (e.g., 192.168.1.12 and 192.168.1.32).
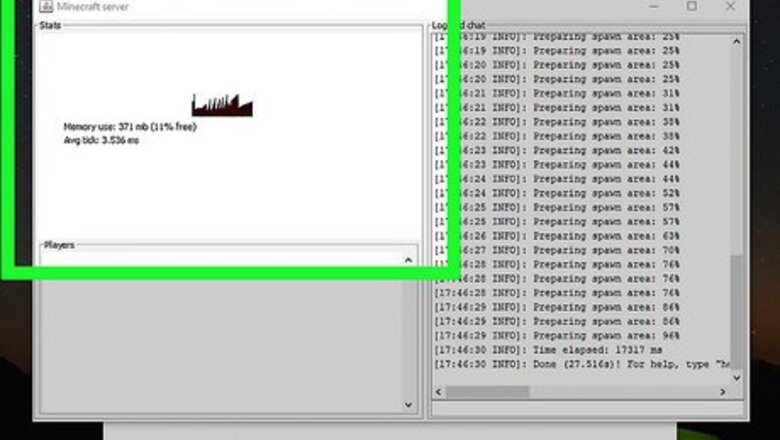
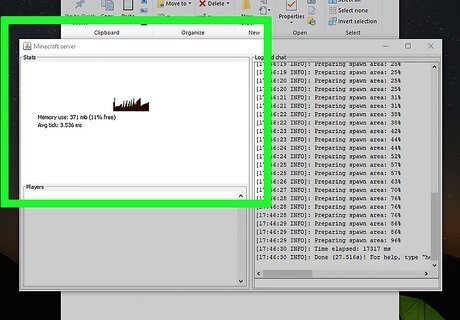
Close your Minecraft server if it's open. In order to forward your port correctly, the port shouldn't be in use. This means you'll need to close the server. While doing this isn't strictly necessary, it can help prevent errors down the road.
Close Minecraft. Once both Minecraft and your server are turned off, you can proceed with accessing your router's page.
Accessing Your Router Page
Open a web browser. Click or double-click the app icon for your preferred web browser to do so.
Click the address bar. It's at the top of the web browser window. If there's any text in the address bar, remove it before proceeding.
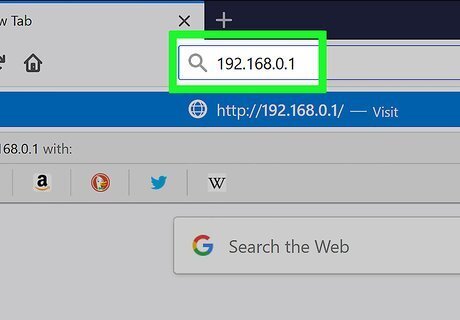
Enter your router's address. Type in the address you found next to the "Default gateway" (Windows), "Router" (Mac), or the "ip r" ending numbers (Linux). For example, you might type something like 192.168.1.1 here.
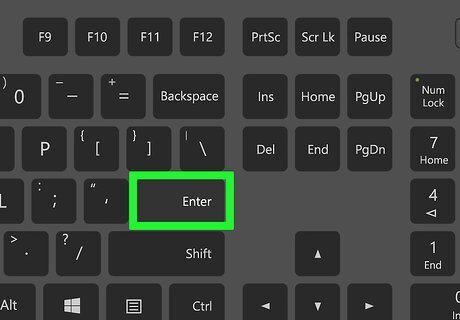
Press ↵ Enter. Doing so takes you to your router's page if the router is online.
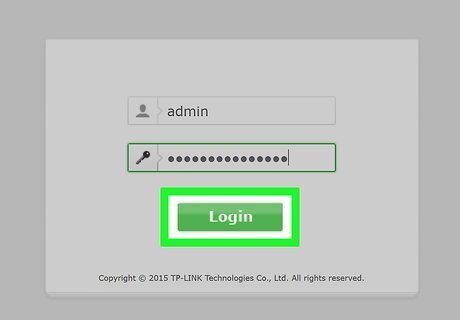
Log into your router's page. Type in the username if asked, then type in the password and press ↵ Enter. If you don't know the login information, don't panic—most routers require you to log in using factory-default credentials (e.g., "admin" for the username and "password" for the password). You can usually find these credentials on the back/side of the router or in the router's manual. If you can't find the router's sticker or its manual, you can check the router's model number online to see what common login credentials are.
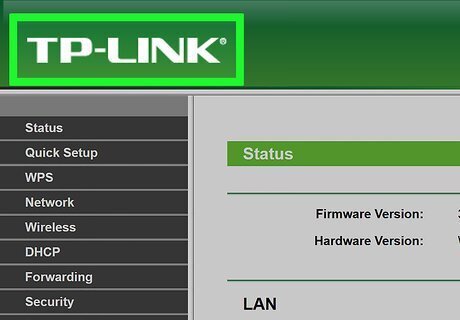
Wait for your router's page to load. Especially if this is your first time accessing your router's page, it may take a few seconds for the page to finish loading. Once you're logged in, you can assign a static IP address to your computer. You may need to navigate through some on-screen setup prompts or a tutorial if this is your first time opening the router's page.
Assigning a Static IP Address

Understand that each router's page looks different. While it's possible to approximate the location of menu items on your router's page, what you see will vary heavily depending on your router.

Know why you need to assign a static IP address. Assigning a static (instead of a dynamic) IP address to your computer will prevent the IP address from changing if your computer ever loses its connection to the router. This means that you won't have to update your IP address in the server's settings each time you turn back on your computer.
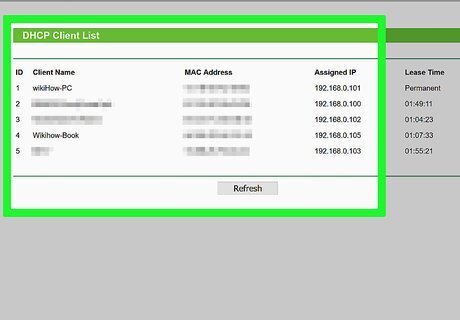
Find your router's list of connected items. This list's location will vary, so try looking in the following places or menus: Connected Devices Settings Advanced Settings Network Devices Parental Controls
Find your computer's IP address. Scroll through the list of connected items until you find the IP address that matches your computer. This should be the "IPv4" address you found in the same menu as the router's address.

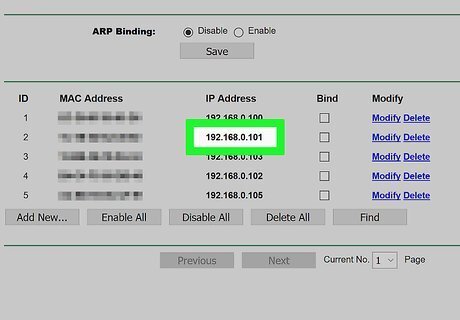
Lock the IP address. Again, this will vary depending on your router page. You may need to click a lock icon next to your IP address, click a settings gear icon and then click Reserve next to the address, or check a "Reserve" box near the address. For specific instructions regarding setting a static IP address on your model of router, read the router's manual or online documentation.
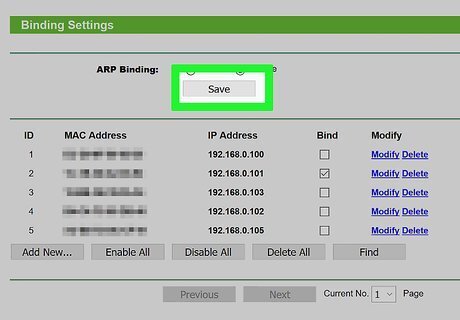
Save your changes. Click the Save or Apply button to do so. Now that your computer's IP address is reserved, you can finally forward the Minecraft port. Your router may need to reboot before you can proceed. If so, it will reboot automatically.
Forwarding Your Minecraft Port
Know which port to forward. The default Minecraft port number is 25565. Unless you've somehow changed this number in your computer's Firewall settings, the default port number is the number you'll use.
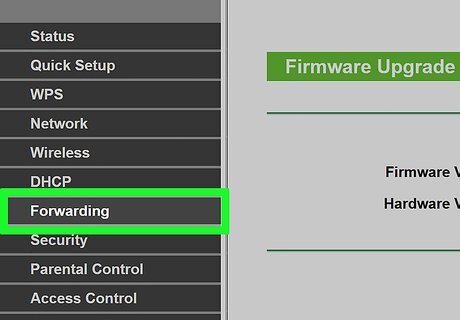
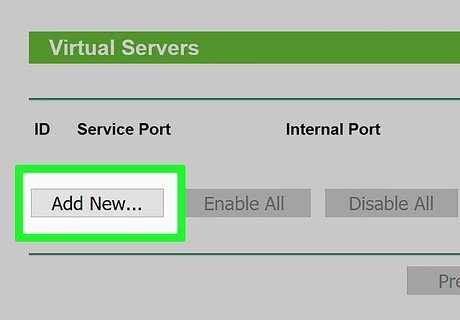
Find and open your router's "Port Forwarding" section. On most routers, this section should be referred to as "Port Forwarding", and it should be a main tab or menu item on the router's home page. If you don't see the "Port Forwarding" section on the main page, look in the Settings or Advanced Settings section. Once again, you can consult your router's specific documentation for the proper instructions on using your router's port forwarding feature.
Enter a name for your rule. In the "Name" or "Rule" text box, type in a title (e.g, "Minecraft") that describes the port forward rule. Optionally, type in a description.
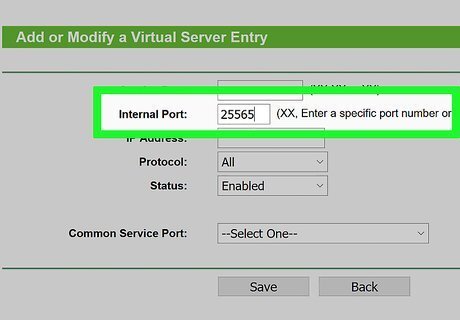
Enter the Minecraft port number into the "Inbound" text box. Type 25565 into this text field.
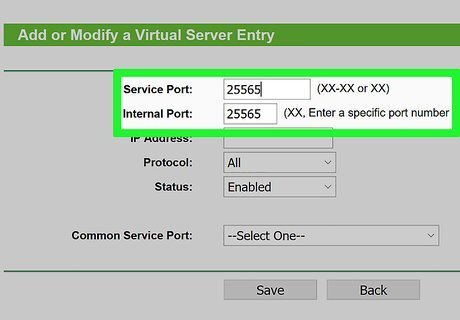
Add the port number to the "Outbound" textbox. Again, you'll just type in 25565 here. This indicates to your router that only port 25565 should be forwarded in this rule. If you don't see this option, just look for a second "Port" text field on the right side of the list.
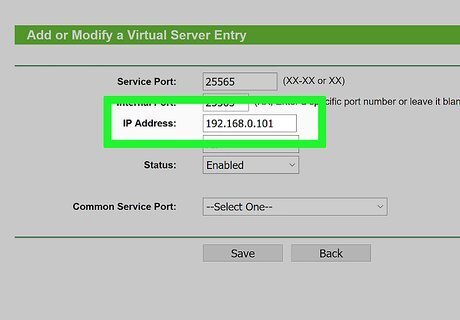
Enter your computer's static IP address. In the "Address" text box, type in the static IP address you set for your computer.
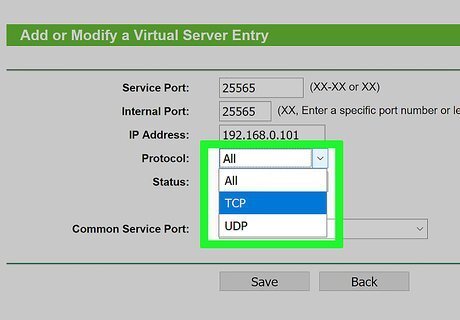
Select a type of port. Click the drop-down box in the "Type" column, then click TCP in the drop-down menu. Then, also enable UDP in the same menu. You may instead need to check a box (e.g., click the "TCP" checkbox). If the "Type" drop-down box already has TCP in it, skip this step.
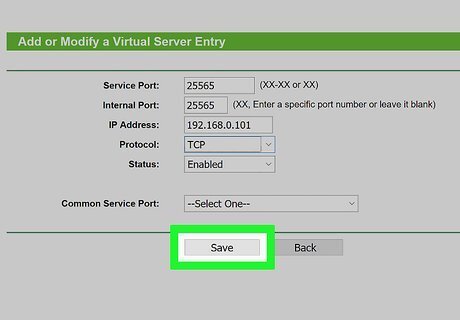
Save your changes. Click the Save or Apply button to do so. At this point, your port should be forwarded, meaning that you should be able to invite friends to use port 25565 on your computer's public IP address in order to access your Minecraft server. Your router may need to reboot before you can proceed. If so, it will reboot automatically. If that doesn't work, wait a few minutes for the router to refresh.


Comments
0 comment