
X
Research source
Steam gave way to the gunpowder tubes of the Chinese, then to the liquid-fueled rockets envisioned by Konstanin Tsiolkovsky and devised by Robert Goddard. This article describes five ways you can build your own rocket, from simple to more complex; at the end is an additional section that explains some of the principles guiding rocket construction.
The Balloon Rocket
Tie one end of a length of string or fishing line to a support. Possible supports include a chair back or doorknob.
Thread the line through a drinking straw. The string and straw will service as the guidance system to control the path of the balloon rocket. Model rocket kits often use a similar length of straw attached to the rocket body. This straw is threaded through a metal rod on the launching pad to keep the rocket upright before launch.
Tie the other end of the line to another support. Be sure to draw the line tight before tying it.
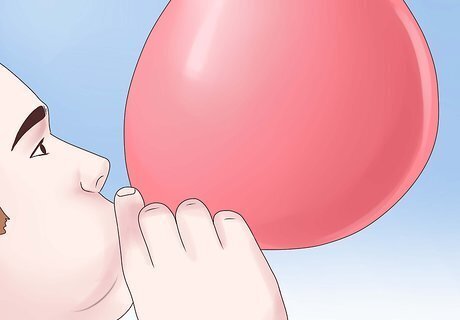
Inflate the balloon. Pinch off the end of the balloon to keep the air from escaping. You can use your fingers, a paper clip, or clothespin.
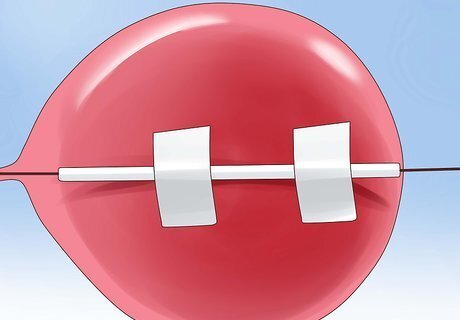
Tape the balloon to the drinking straw.
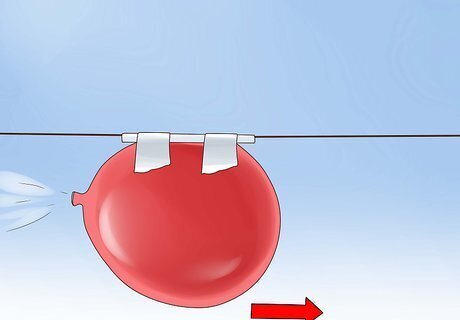
Release the air from the balloon. Your rocket will travel along the guideline from one end to the other. You can try to make the balloon rocket with a round balloon instead of a long one, as well as various straw lengths to see how well they guide the balloon rocket. You can also raise the angle at which the balloon rocket flies to see how it affects the distance the rocket travels. A related device you can make is a jet boat: Cut a milk carton in half lengthwise. Make a hole in the bottom end and thread the end of a balloon through it. Inflate the balloon, then put the boat into a partially filled tub of water and release the air.
The Drinking Straw-Launched Rocket
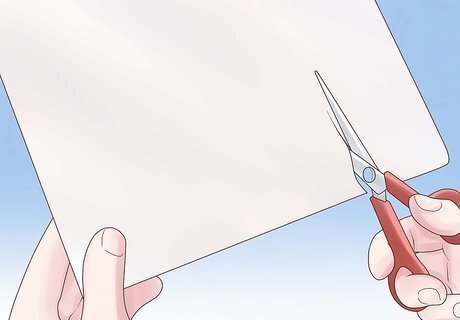
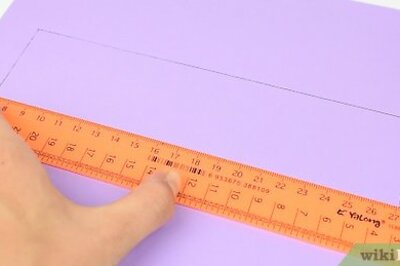
Cut out a rectangular paper strip. The strip should be about three times as long as it is wide: suggested dimensions are 4.5 inches (11.43 cm) by 1.5 inches (3.81 cm).
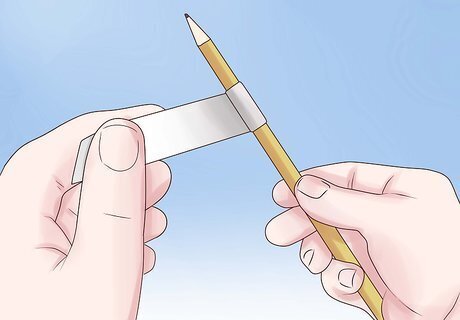
Wind the strip tightly around a pencil or dowel. Wind the strip near the end or point instead of at the center. Part of the strip should hang over the pencil point or dowel end. Be sure to use a pencil or dowel slightly thicker than a drinking straw, but not much thicker.
Tape the edge of the strip to prevent unwinding. Tape lengthwise along the entire length of the strip.
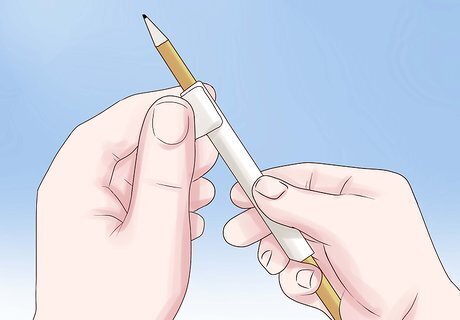
Fold the overhanging end into a point or cone. Tape up the nose cone so it holds its shape.
Remove the pencil or dowel.
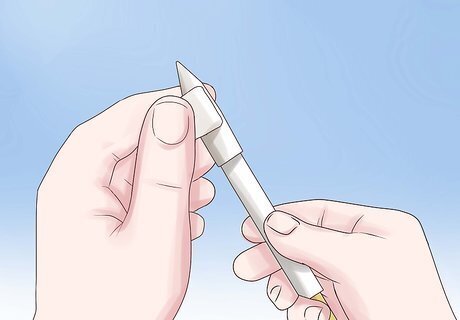
Test for air leaks. Blow gently into the open end of the paper rocket. Listen for a rustle of air escaping along the side or nose cone and feel along the side seam and nose for a gentle stream of air. Tape over any leaks and test again until you can no longer detect any leakage.
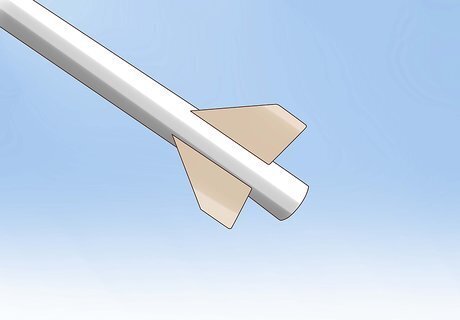
Add tail fins to the open end of the paper rocket. Because the paper rocket is narrow, you may want to cut attached pairs of fins that will be easier to tape onto the rocket’s end than three or four separate fins.
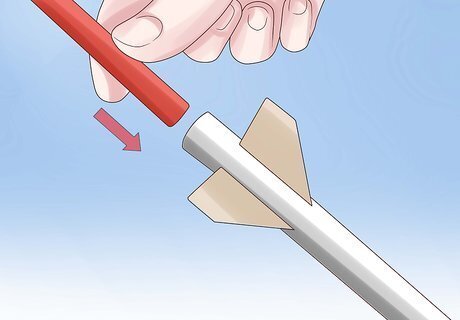
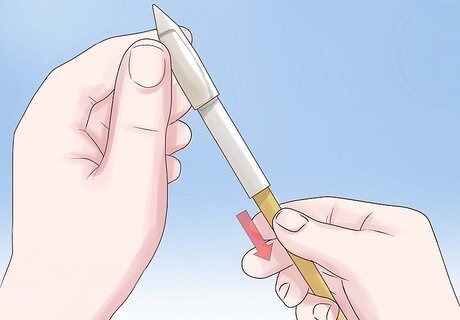
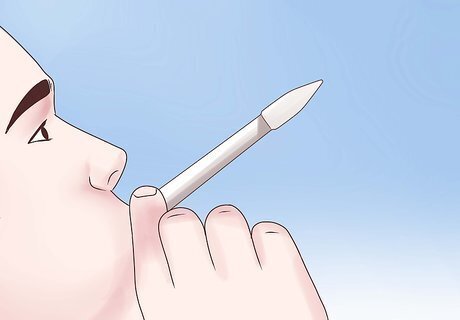
Insert a drinking straw into the open end of the rocket. Be sure the straw extends far enough out of the rocket that you can grip it with your fingers.
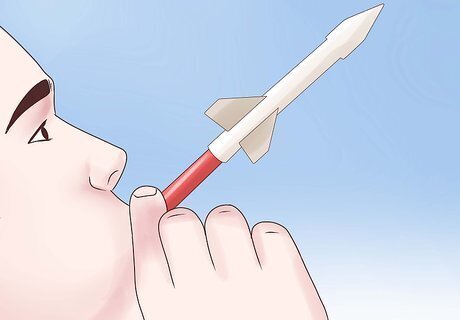
Exhale sharply into the straw. Your rocket will fly into the air, propelled by the force of your breath. Always point the straw and rocket upward, not toward anybody when launching. Vary how you build the rocket to see how the modifications affect its flight. Also, vary how sharply you exhale into the straw to see how it affects the distance your rocket flies. A toy similar to the paper rocket consisted of a stick with a plastic cone attached to one end and a plastic parachute attached to the other. The parachute was folded over the stick, which was then inserted into a cardboard blow-tube. When blown into, the plastic cone would catch the air and launch the stick. When it reached maximum height, the stick would fall, deploying the parachute.
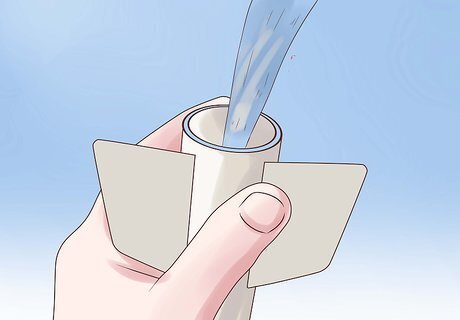
The Film Canister Rocket
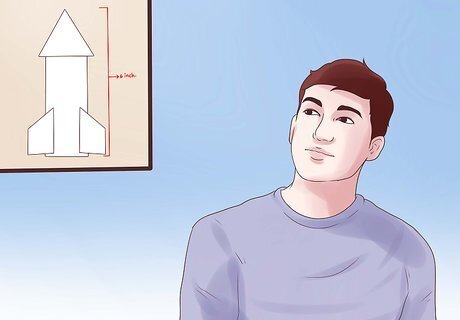
Decide how long/tall you want to make your rocket. A good length/height is 6 inches (15 cm), but you can make the rocket longer or shorter if you wish. A good diameter is 1.5 inches (3.75 cm), but the actual diameter will be determined by the diameter of the rocket’s combustion chamber.
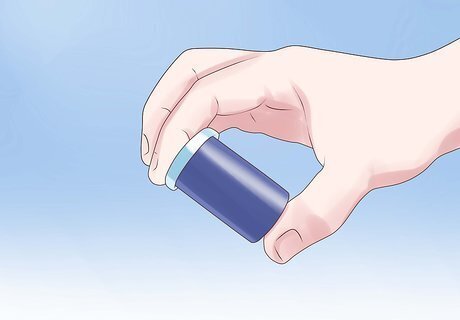
Obtain a film canister. The canister will serve as the combustion chamber for your rocket. You can obtain one from a photography studio that still uses film. Look for a film canister whose lid has a stopper-like projection that goes inside the mouth of the canister instead of being held in place by a lip on the outside of the canister mouth. If you can’t find a film canister, you can use an empty prescription medicine bottle with a snap-on lid. If you can’t find a bottle with a snap-on lid, you can whittle a cork stopper that will fit tightly into the bottle mouth.
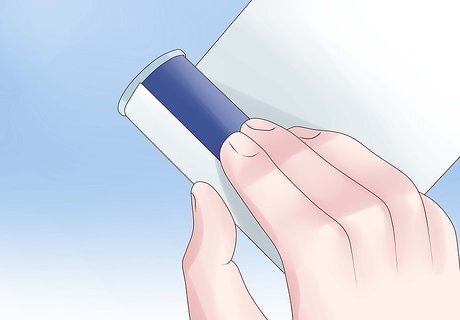
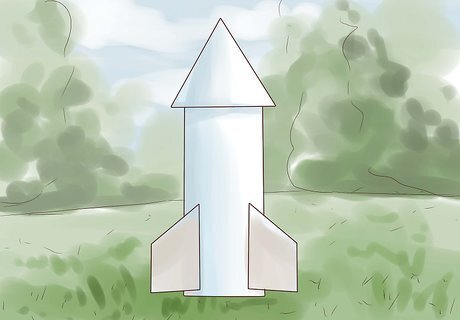
Assemble the rocket. The easiest way to make the rocket body is to wrap a strip of paper around the film canister as with the pencil or dowel when making the drinking straw-launched rocket. Because the canister will launch the rocket, you may wish to tape or glue the paper onto the canister before wrapping it around the container. Be sure to have the mouth of the canister or pill bottle pointing out when you attach the rocket frame to it. The mouth will serve as the rocket nozzle. Instead of folding the end of the rocket body away from the canister into a nose cone, you can make a separate nose cone by cutting a paper circle, cutting from the edge just to the center, and folding the cut circle into a cone. You can affix the cone with either tape or glue. Add fins. Because this rocket is thicker in diameter than the paper rocket you launch with a drinking straw, you may want to cut individual fins to attach. You may also want to have three fins instead of four.
Decide where you want to launch the rocket from. An open, outdoor location is recommended, as the rocket can reach a considerable height when launched.
Fill the canister 1/3 full of water. If your water source isn’t near your launching pad, you may have to carry the rocket upside down or carry the water separately and fill the canister at the launch site.
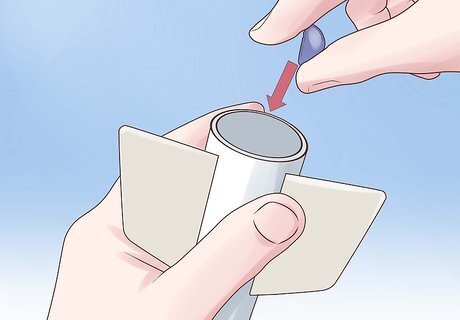
Break an effervescent tablet in half and drop half the tablet into the water.
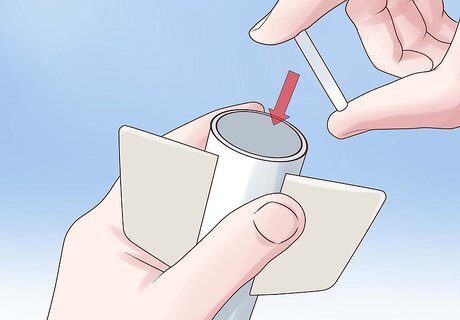
Cap the canister and turn the rocket upright on the launching pad.
Get back to a safe distance. As it dissolves, the tablet will release carbon dioxide. The pressure will build until it pops the lid off the canister, launching the rocket. Instead of using water, you can instead fill the canister about half full of vinegar. In place of the effervescent tablet, you can use 1 teaspoon (0.18 ounce or 5 g) of baking soda. Vinegar, an acid (acetic acid), reacts with baking soda, a base, to produce water and carbon dioxide. Vinegar and baking soda are more volatile than water and effervescent tablets, however, so you need to get out of the rocket’s way a lot faster – and using too much of either chemical may rupture the canister.
The Matchstick Rocket
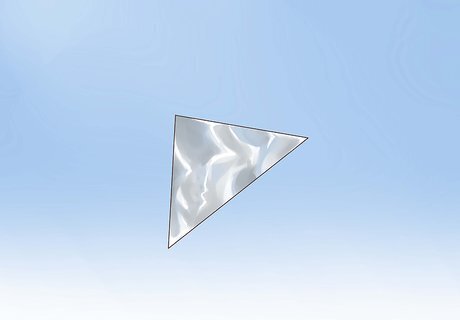
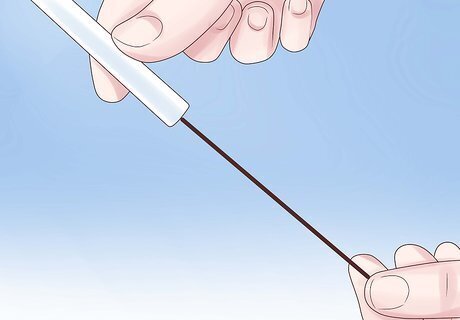
Cut a small triangle of aluminum foil. The triangle should be an isosceles triangle approximately 1 inch (2.5 cm) at the base and 2 inches (5 cm) from the center of the base to the apex.
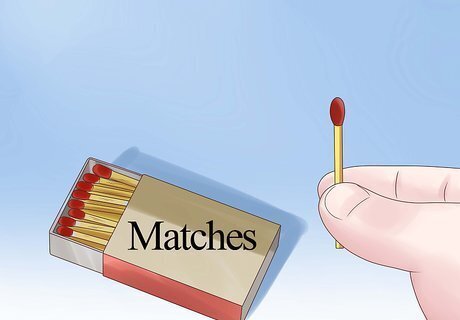
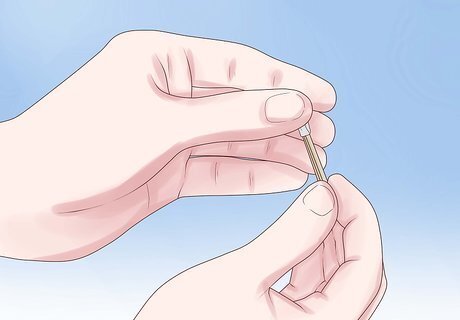
Take a match from a book of matches.
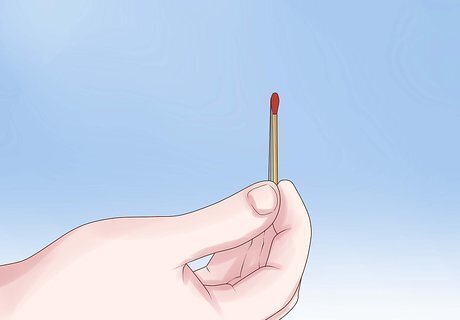
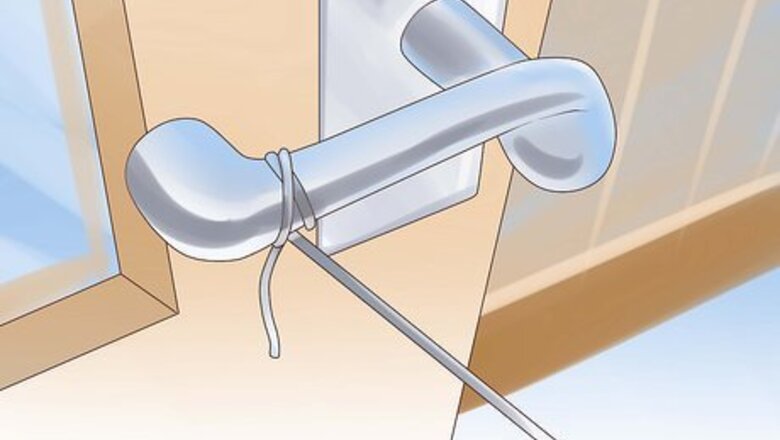
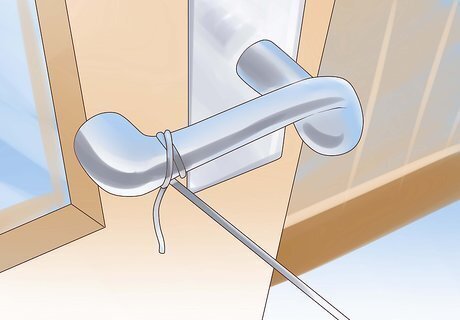
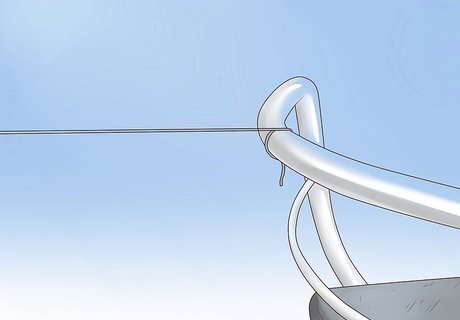
Line the match up against a straight pin. Place the match and pin so that the pinpoint touches the match head no higher than the thickest part of the head.
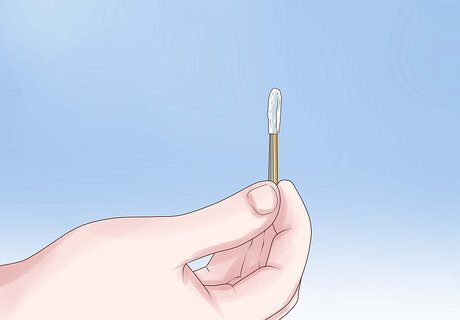
Wrap the foil triangle, apex first, around the match head. Wrap the foil as tightly around the match head as you can without disturbing the pin. When you’re finished, the wrapping should extend about 1/4 inch (6.25 mm) below the match head.
Crease the foil wrapping around the pin head with your thumbnails. This will push the wrapping closer to the match head and also better define the channel formed by the pin under the wrapping

Slide the pin carefully out from the wrapping. Be careful not to tear the foil when you do this.

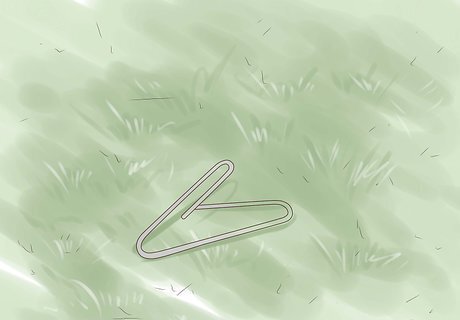
Bend a paper clip into a launching pad. Bend the outer bend to a 60-degree angle. This will form the base of the launching pad. Bend the inner bend upward, then around to form an open-ended triangle. This is where you will rest the foil-wrapped match head.
Place your launching pad at the launch site. Again, an open, outdoor location is strongly recommended, as the matchstick rocket can travel a considerable distance. Avoid locations that are exceptionally dry, as the matchstick rocket could start a fire. Be sure the surrounding area is clear before launching the rocket.
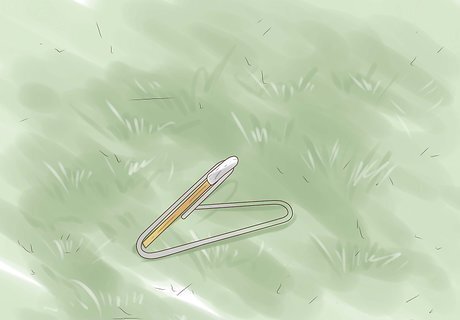
Place the matchstick rocket in the launching pad, tip up. The rocket should rest at least at a 60-degree angle. If it rests any lower, you may have to bend the paper clip until it does.
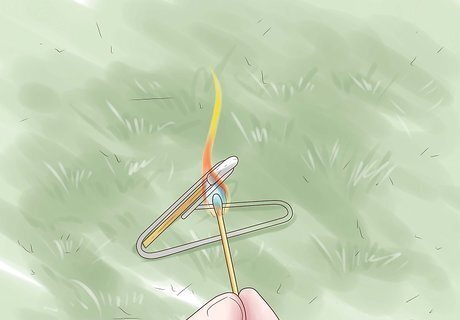
Launch the rocket. Light a match and put its flame directly under the wrapped match head. When the phosphorus in the wrapped match head ignites, the matchstick rocket should lift off. Have a pail of water handy to dunk spent matchstick rockets in to ensure they are completely extinguished. If a matchstick rocket should land on you, stop moving, drop to the ground, and roll until any flames are extinguished.
The Water Rocket
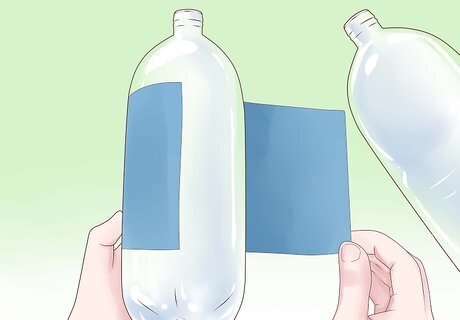
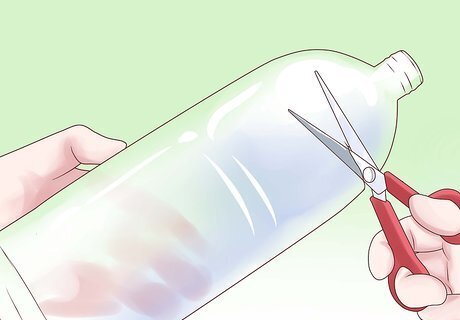
Prepare an empty 2-liter soda bottle to serve as the rocket pressure chamber. Because bottles are used to make this rocket, it is sometimes called a bottle rocket. It should not be confused with the firecracker known as a bottle rocket, which is so named because it is often shot from inside a bottle. That form of bottle rocket is illegal to launch in many areas; the water rocket is legal in most areas. Remove the bottle label by cutting where it isn’t glued to the bottle. Be careful not to scrape or poke the bottle surface when doing this, as a scratch or cut will weaken it. Reinforce the bottle by wrapping it with strapping tape. New bottles can withstand pressures of up to 100 pounds per square inch (689.48 kilopascals), but repeated launching will reduce the amount of pressure the bottle can handle without rupturing. You can wrap several bands of tape around the center of the bottle or wrap the bottle around its center and halfway from there to either end. Each band should go around the bottle twice. Mark out the places where you want to attach fins to the body with a marking pen. If you plan to have four fins, draw lines 90 degrees apart. If you plan to have three fins, draw lines 120 degrees apart. You may want to wrap a strip of paper around the bottle and make your markings on it first, then transfer the markings to the bottle.
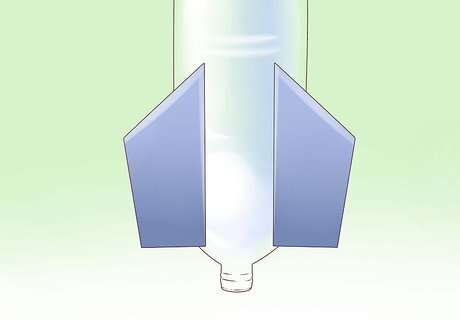
Construct the fins. Because the plastic rocket body is relatively durable, even though you’ve had to reinforce it, you’ll need fins at least as durable. Stiff cardboard may work for a while, but a better material is plastic of the kind used in pocket folders or three-ring binders. First, you’ll need to design your fins and create a paper template to serve as a cutting guide. However you design your fins, they should be designed so that the actual fin will be folded over (doubled) for extra strength and will reach to at least the point where the bottle narrows. Cut out the template and use it as a guide to cut into the fin material. Fold the fins into shape and attach them to the rocket body with strapping tape. Depending on the design of your launcher, you may not want to have the fins extend below the mouth of the bottle/the rocket nozzle.
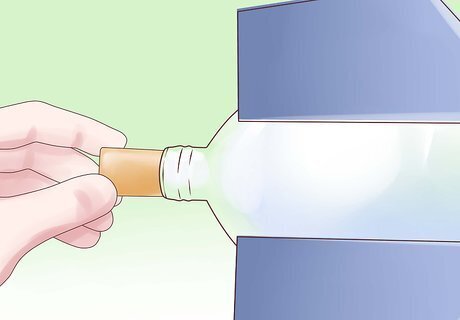
Create the nose cone and payload section. You’ll need a second 2-liter bottle for this. Cut the bottom out of the bottle. Place a payload in the upper section of the cut bottle. This can be a piece of modeling clay or a wad of rubber bands. Place the bottom section of the cut bottle inside the upper section, with the bottom toward the mouth of the upper section. Tape it in place, then tape the modified bottle onto the bottom of the bottle serving as the pressure chamber. Your nose cone can be anything from a 2-liter bottle cap to a length of PVC pipe to a plastic cone. Once you decide on the nose cone and assemble it, it should be permanently attached to the upper section of the cut bottle.

Test-balance the assembled rocket. Balance the rocket on your index finger. It should balance somewhere above the top of the pressure chamber (the bottom of the first bottle). If it doesn’t, take the payload section off and adjust the weight. After you’ve found the center of mass, weigh the rocket. It should weigh from 7 to 8.5 ounces (200 to 240 g).
Make the launcher/stopper. There are several devices you can make to launch your water rocket. The simplest is a valve and stopper that fits in the mouth of the pressure chamber bottle. Find a cork that fits snugly in the mouth of the bottle. You may have to shave the edge slightly. Get a valve system of the kind used in an automobile tire or bicycle inner tube. Measure its diameter. Drill a hole in the center of the cork with a bit of the same diameter as the valve. Clean the valve stem and put a piece of tape over its threaded portion and opening. Thread the valve through the hole in the cork, then seal it in place with a silicone or urethane sealant. Let the sealant dry completely before removing the tape. Test the valve to make sure air passes freely through it. Test the stopper by putting a small amount of water in the rocket pressure chamber, then put the stopper in place and stand the rocket upright. If you find any leaks, reseal the valve and test again. Once you have determined there are no leaks, test again to find the pressure at which air forces the stopper out of the bottle. For instructions to build a more sophisticated launching system, see http://www.sciencetoymaker.org/waterRocket/buildWaterRocketLauncher.htm.
Choose a launch site for your rocket. As with the film canister and matchstick rockets, an open outdoor location is strongly recommended. Because the water rocket is larger than the other rockets, you’ll need a larger open area than when launching either of the other rockets, and it also has to be flatter and more level than for the other rockets. An elevated surface such as a picnic table is a good idea when small children are present.
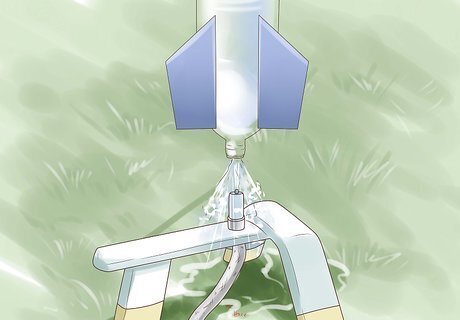
Launch your rocket. Fill the pressure chamber 1/3 to 1/2-full of water. (You may want to add some food coloring to the water to produce a more colorful “exhaust” when the rocket launches.) It is also possible to launch the rocket without putting any water into the pressure chamber, although the target pressure may be different than that when the chamber has water in it. Insert the launcher/stopper into the mouth of the pressure chamber. Connect the hose of a bicycle pump to the launcher valve. Stand the rocket upright. Pump air until you reach the pressure at which the plug should be forced out. There may be a slight delay before the plug is forced out and the rocket launches.


Comments
0 comment