
Sizing Your Materials
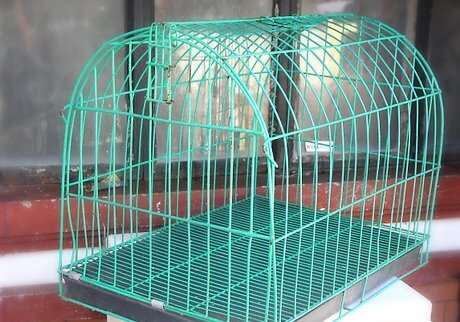
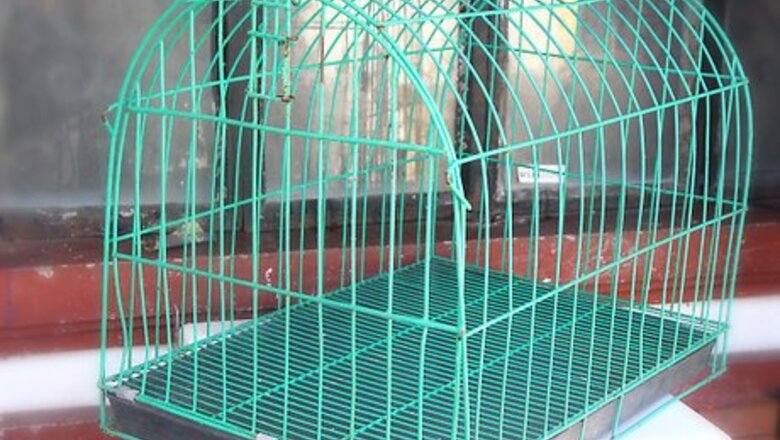
Choose a crate suitable for your dog. To ensure that you're getting the right size, pick out a crate with your puppy's specific breed in mind. The idea is to start off with a crate large enough for your dog to grow into. As they get bigger, you'll gradually move the divider to increase the size of their sleeping area. If you own a Labrador puppy, for example, you'll want to get a crate that can accommodate a full-grown lab. Take your puppy's measurements or place them in the crate you're looking at to see if it's a proper fit.
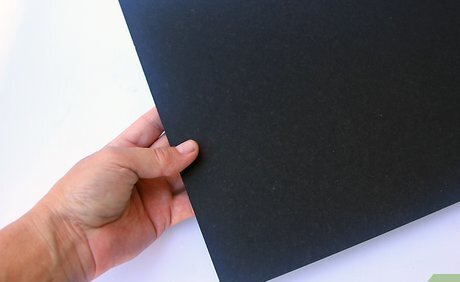
Make a basic cardboard divider panel if you're on a budget. This will be the most economical option for crate-training puppies from infancy. What the material lacks in strength, it makes up for in price and availability. There's a good chance you'll even be able to find some just lying around in your attic or behind area businesses. When one divider wears out, you can simply cut out a new one in minutes. The cardboard you use should be free of folds or wrinkles. A determined puppy might be able to knock a weak divider out of place.
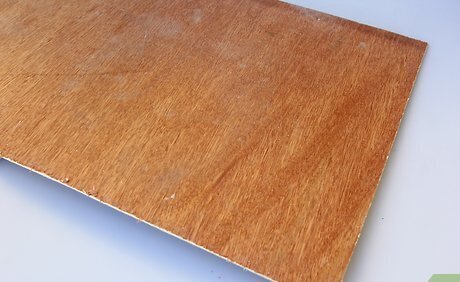
Use plywood for a sturdier divider. If the puppy you're training is a little older they've entered their teething phase, it's possible for them to chew right through a cardboard divider. In this case, a sheet of thin plywood will be your best bet. Due to its solid construction, plywood will require a little bit more labor to work with, but it will be durable enough to ensure that you only have to make one. A sheet of plywood typically only costs a few dollars at home improvement centers. You might even be able to get them to cut it to your exact specifications.
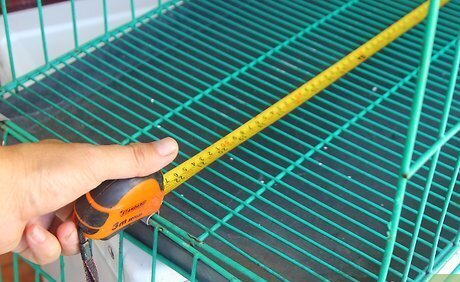
Measure the inside of the crate. Find the height and width of the inner portion of the crate with a tape measure. Write these dimensions down on a notepad and keep it handy—you'll be using them to create a custom divider that fits your crate perfectly. Round off to the nearest centimeter to come up with standardized measurements for your other materials.
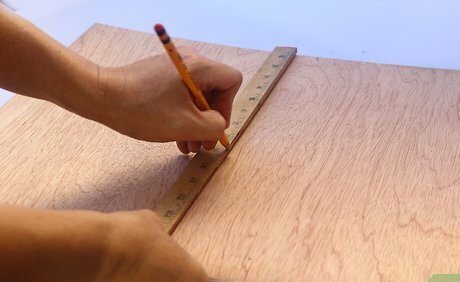
Mark the crate measurements on your panel material. Subtract roughly half an inch (1.27cm) from the height and width measurements you just took. Then, using a ruler and a pencil or felt-tipped marker, trace the dimensions onto your blank piece of cardboard or plywood. Making the divider slightly smaller will ensure that it can slide in and out of the crate with ease while still serving as an effective barricade. Avoid leaving big gaps between the divider and the side of the crate that a paw, snout or tail might get stuck in.
Fashioning the Divider Panel
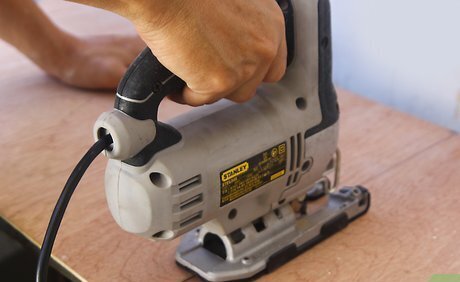
Cut out the divider panel. Cut along the lines you just drew so that you're left with a square matching the interior area of the crate. For a cardboard divider, you can simply use a pair of scissors. Plywood will need to be sawed by hand. A box cutter can help you achieve straighter, more precise edges when cutting cardboard.
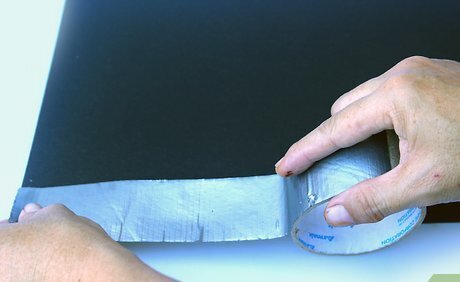
Reinforce the edges of a cardboard divider with duct tape. Fold a strip of tape around each side of the cut cardboard. Covering the raw edges will prevent them from tearing or fraying with continued use. You could also use pre-cut foam cardboard corners. These are available at most hardware and office supply stores. If you'd prefer a more attractive look for your divider panel, shop around for tapes in bold colors or dazzling patterns.
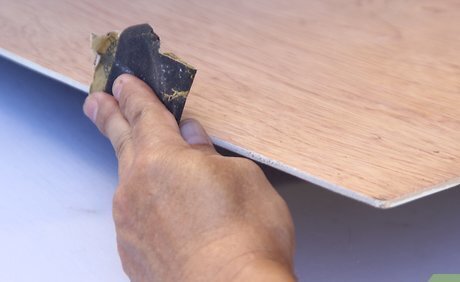
Sand a wooden divider to wear down rough spots. Smooth the edges of plywood panels with a sheet of high-grit sandpaper. Pay particular attention to sharp corners, wood burrs and splinters. Your puppy may accidentally hurt itself if it brushes up against these surfaces. Be sure to scan the face of the plywood for potentially dangerous defects, as well.
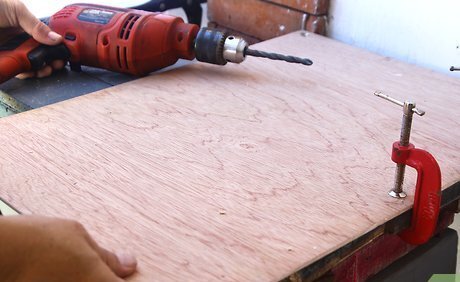
Punch a hole in each corner of the panel. A hole punch will create an opening of just the right size in a cardboard divider. Use an electric drill or hammer and nail to open up holes in plywood. To avoid breakage, place each hole about ½” to 1” (1.27-2.5cm) from the corner. For the sake of your own safety as well as the success of your project, do your drilling or nailing on a flat, stable work surface. These holes will be used to wire the divider in place.
Installing the Divider
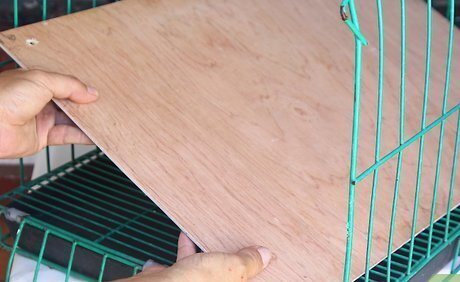
Slide the divider into the crate. Insert the panel through the front door of the crate. You may have to tilt it at an angle to get it to clear the opening. Once you've got the divider inside, stand it up so that it divides the crate into two separate compartments. Should you discover that your divider panel doesn't quite fit, it may be necessary to scrap it and start over with new materials. Wait until you've finished setting up the divider to put your puppy in the crate.
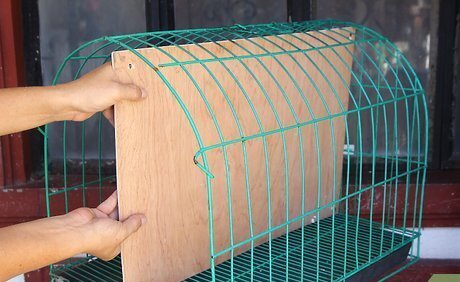
Set the divider to the correct position. Moving the panel forward or backward in the crate will allow you to change the size of your puppy's sleeping area. There should be enough room inside for it to be able to stand up, stretch out and turn around without difficulty. Let your puppy into the crate and observe it as it explores. This will give you a more accurate sense of where to position the divider. If the crate is too small, your puppy will be cramped. If it's too spacious, it might try to use the bathroom on one end and sleep on the other.

Secure the divider. When you're satisfied with the placement of the divider, thread a plastic zip tie through each hole from the outside of the crate. Pull the ties tight so they don't budge. Test the sturdiness of the divider by pressing on it lightly. Alternatively, you could use a few lengths or metal wire or cable. Whatever fastener you choose should be strong enough to hold the divider panel in place without coming undone. Snip off the sharp ends of the ties or twist them around so that they're facing outside the crate.
Introduce your puppy to their crate. Place its bedding and a small toy or two in the new sleeping area and encourage it to come inside and feel it out for itself. Get in the habit of crating it at night or whenever you're out of the house. Start with a couple hours at a time and increase the time gradually from there. Dogs instinctively know not to relieve themselves in the same place they sleep. As a result, shrinking the size of your puppy's crate will teach it to hold its bladder until it can be trusted to alert you when it needs to go out. Don't use force or trickery to get your puppy inside the crate—this will only make it anxious and teach it to resent its sleeping space.
Adjust the divider as needed. As your puppy gets bigger, it will soon outgrow the small space you have sectioned off for it. When this happens, you can simply detach the divider, move it down a few inches and fasten it again. By the time your dog reaches full size, you'll no longer need the divider, and you can simply throw it away and give it the run of the crate! Remember to only allow enough room for your puppy to get in and out of the crate comfortably. While a crate can take the headache out of house training, you're free to stop crating your dog as soon as it gets the hang of things.


Comments
0 comment