
Smoothing Your Beard for Trimming
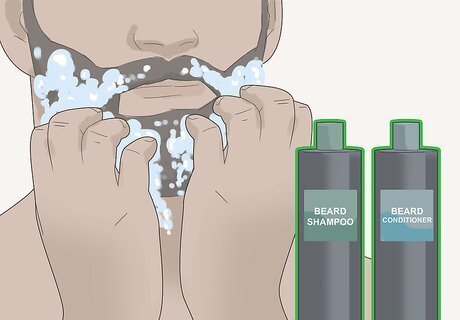
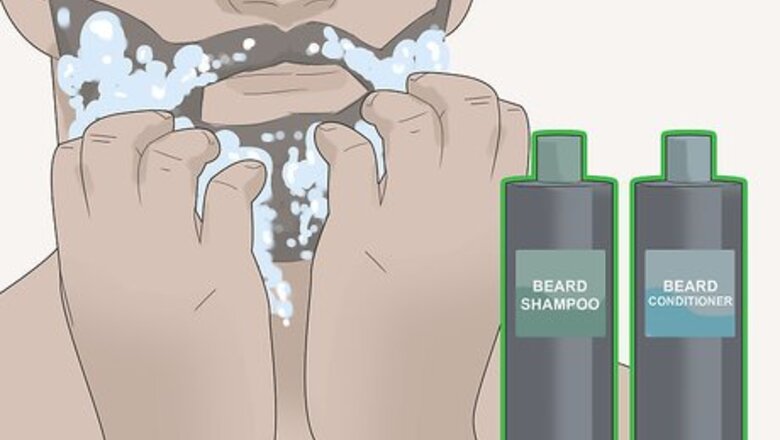
Shampoo and condition your beard. Starting with a clean, soft beard will help you achieve clean beard lines. Use a mild shampoo, then follow up with a conditioner made specifically for beard hair. Rinse thoroughly and pat your face dry with a clean towel.
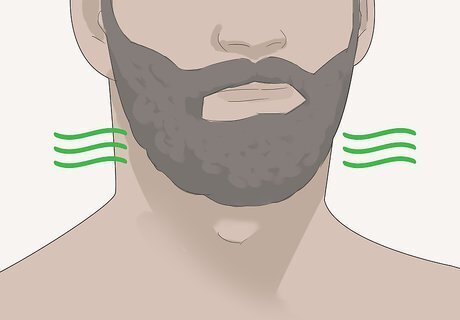
Allow your beard hair to dry fully before you trim it. Never trim a wet beard! Wet hair looks longer than dry hair, so if you start trimming while it’s still wet, it’s easy to trim off way too much. Let your beard air dry completely, or use a blow dryer on a low setting to dry the hair. If you have sensitive skin, skip the blow dryer. It can aggravate the skin beneath your beard.
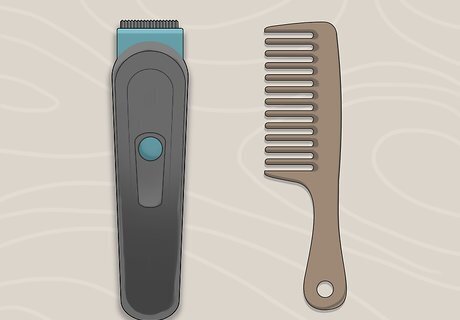
Invest in a wide-toothed comb and beard trimmer. To properly line up and trim your beard, you need the right tools. A good wide-toothed comb and quality beard trimmer are essential. If you have a good pair of clippers, you can use those instead of a beard trimmer. For daily maintenance, you might want to pick up a pair of professional barber’s scissors, too.
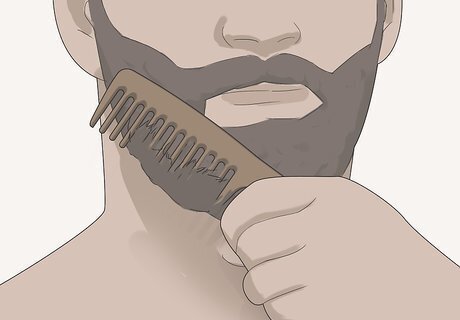
Comb through your beard. Using a wide-toothed comb, gently detangle your beard hair thoroughly. Comb the hair into its usual place. This gets everything organized before you start creating your beard lines and helps ensure clean, even results.
Designing Your Cheek Lines
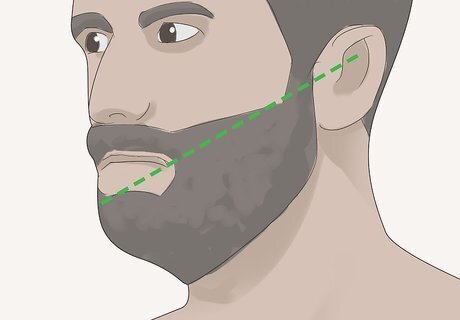
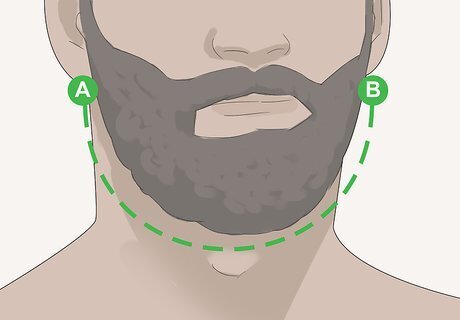
Visualize a straight line from your sideburn to your mustache. This line should follow the natural line of your cheek. You want the line to be straight, starting at the bottom of your sideburn (point A) and ending at the edge of your mustache (point B). Identify specific points for A and B; don't generalize.
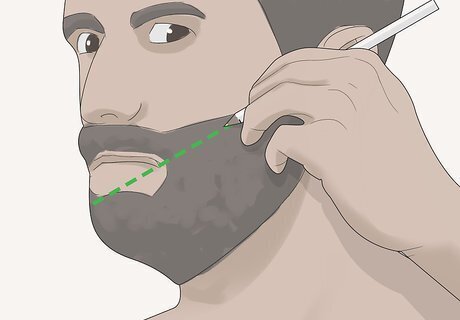
Draw a straight line from point to point with a white pencil (optional). If you’re worried you can’t create clean lines just by visualizing them, pick up a white pencil to draw yourself a guideline on each cheek. You can use a white eyeliner pencil, or hop online and order a barber’s pencil.
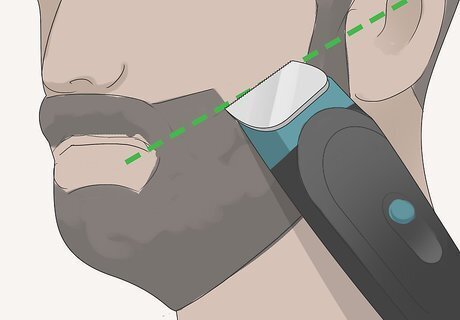
Trim the hair above one cheek line with a trimmer or clippers. For a clean and defined line, don’t use a guard for this. Carefully trim the hair above the visualized (or drawn) cheek line. Shave downward and go with the grain of your hair. Start at the sideburn (point A) and working your way down your face right next to your mustache (point B).
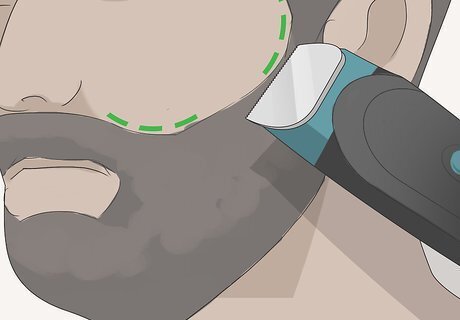
Round off the transition points if desired. If you want a very defined and angular look, don’t worry about rounding off the transition points at your sideburn and mustache. For a softer, more natural line, round off the edges at the point where the beard meets your sideburn, and again at the point where it meets the edge of your mustache.

Repeat on your other cheek. Always do one cheek first, and then refer back to it as you’re working on the other cheek to make sure things are even. Avoid going back and forth from cheek to cheek, which can result in you trimming off too much of your beard. Make the sides as even as you can, but don’t stress over absolute perfection.

Trim your cheek lines every 1-2 days for the cleanest results. If you want to keep your lines defined and sharp, you are probably going to have to do routine maintenance and clean up every other day. If your hair grows very fast, you may even need to do this daily. Avoid trimming every day since you could irritate your skin.
Shaving Your Neckline
Visualize a line that runs from ear to ear. Imagine a line that starts behind one ear (point A), curves down to the top of your neck (right below your jaw), then back up to the back of the opposite ear (point B). The ideal neckline extends down from the curve of the ear. You can always use the white pencil to draw guidelines if you need them.
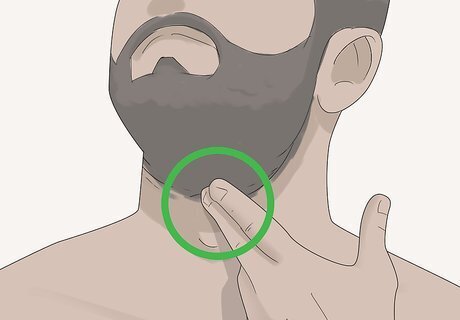
Locate the midpoint right above your Adam’s apple. Place two fingers above your Adam’s apple, right below your chin. This will help you locate point C, the midpoint between point A and B. The midpoint is typically 1 to 1.5 inches (2.5 to 3.8 cm) above the Adam’s apple, right between your head and neck.

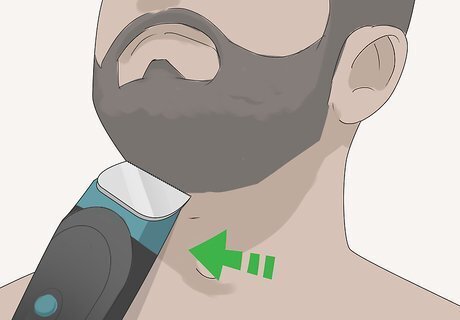
Place the trimmer at point C and shave downward. This is a good place to start with the neck line. Place the clippers or trimmer right at point C, above your Adam’s apple, and shave downward. Go down as far as necessary to remove all the hair from your neck area below point C.

Work outwards from point C. Starting at the freshly shaved midpoint, work outward, either to the right or left, and start eliminating all of the hair below the jawline. Remember to follow the line that runs from point A to point B. Avoid creating an overly rounded line – it should curve gently.
Return to the center and work outward on the other side. Once you have one side cleaned up, return to the midpoint. Then repeat the exact same movements to create the neck line beneath your other jaw.

Round off the intersection where the sideburn and neck line meet. Imagine another line that goes straight down from your sideburn. It should start at the back edge of your sideburn (the part closest to your ear) and go straight down to meet your jawline to bisect the ear-to-ear line. Use the trimmers to round the intersection off on both sides. If you prefer an angular look or want to create a more square-shaped jaw, skip rounding off the intersections.
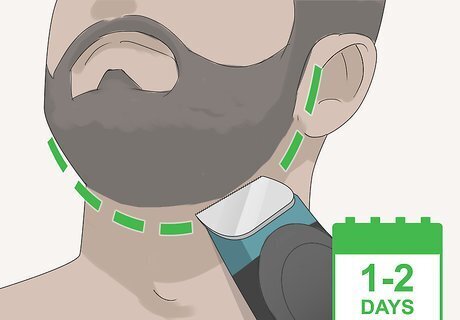
Trim your neck line every 1-2 days for the cleanest results. To keep your neck line defined, clean up the lines every other day. If your hair grows very fast, you may even need to do this daily. For a more natural look, you can do it every three or four days.


Comments
0 comment