
Brushing Your Hair into a Wrap
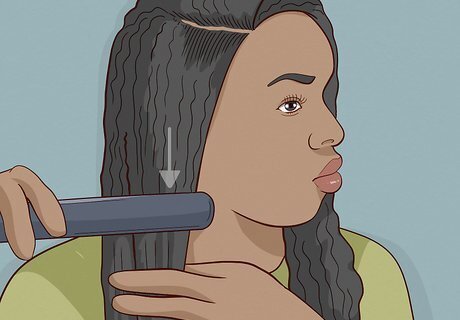
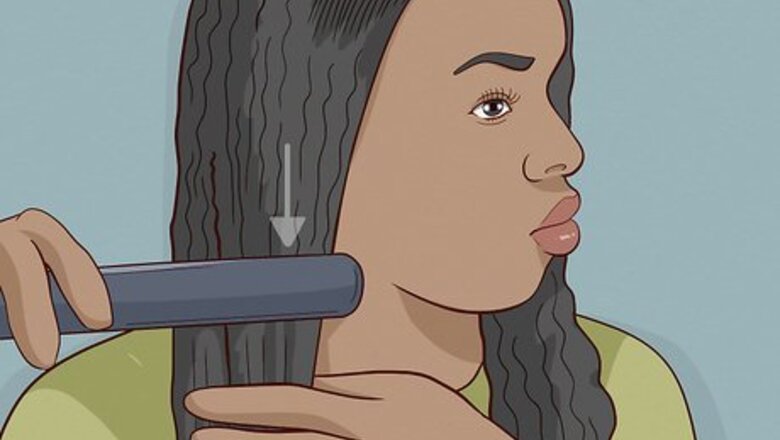
Straighten your hair however works for you. Before you can begin a silk wrap, your hair has to be straight. You can use a flat iron, rollers, or even get a blow-out at a salon. There is no need to switch things up for a silk wrap, so stick to whatever is most comfortable for you.
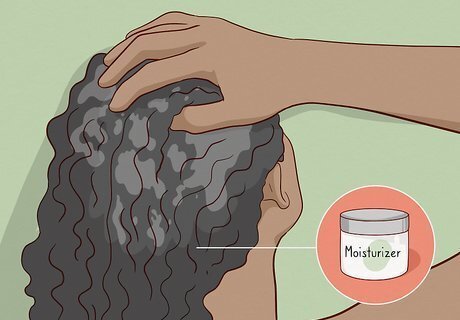
Work a dime-size amount of a light moisturizer into your hair. Run the moisturizer all throughout your hair, focusing on the ends and staying away from the roots. You can use your palms to squeeze the moisturizer, working it through all of your curls. The moisturizer will help make wrapping your hair much easier. If your hair is wet, dry it thoroughly before beginning to moisturize your hair. Rub your palms together to emulsify the moisturizer for a smoother feeling.
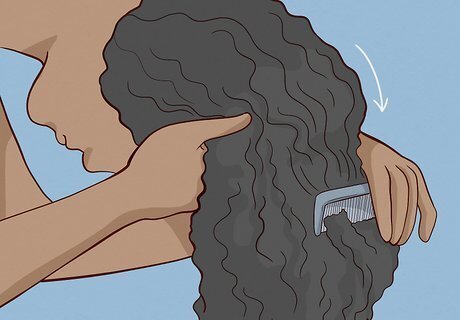
Flip your hair over with your head down. Lean forward and comb your hair down. You can use a comb to make a straight part down the middle of your hair, from your forehead to the back of your head, to make it easier to flip it down. Your hair should hang over your forehead as you brush it out.
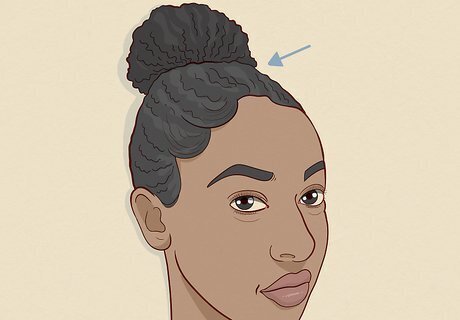
Use a brush to wrap your hair around your head, clipping as you go. You can wrap the left side of your part clockwise and your left side counter-clockwise. Your hair should wrap all the way around your head, with clips holding the ends in place. Use flat hair clips or bobby pins to keep your wrap from creasing.
Covering Your Hair in Plastic Wrap
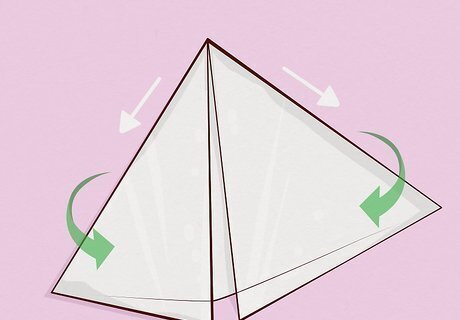
Fold the end of a piece of plastic wrap into a triangle. To begin the silk wrap, the end of the plastic needs to be folded down at each corner to form a triangle shape. This will allow you to start at a more precise point, rather than beginning with a thin single layer. You don’t need to cut the plastic wrap from the roll until the very end. You only need to do this at the very beginning, as the rest of the layers will rest on top of the first.
Wrap the plastic around your head once. Press the plastic wrap triangle against the back of your head and pull the roll around your head, letting the plastic cover your forehead. Cover your hair tightly enough that it grips itself, but not uncomfortably tight. The tip of the triangle should be right in the middle of your head, right where it meets your neck. The first wrap should be the lowest, so it’s okay for it to cover up your forehead a bit. Twist the plastic wrap before beginning a second wrap.
Continue to wrap all of your hair, twisting before each wrap. Keep pulling the roll around your head, covering new areas with each loop. You’ll know that you have fully wrapped your hair when none of it is exposed outside of the wrap. Be sure to feel the very top of your head to check that it’s been covered In order to make sure you cover all of your hair, work your way up a little bit with each wrap.
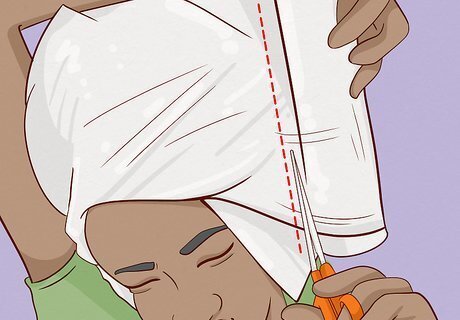
Tear the wrap from the roll, or use scissors to trim it off. Once your head has been fully covered, you can pull the roll away to break off the wrap, or take a pair of scissors to the plastic, right where the wrapped sheet meets the roll. Just like when you cover a dish with aluminum foil or plastic wrap, the tear or cut should leave enough for you to press the covering back down onto itself.
Drying and Removing the Wrap
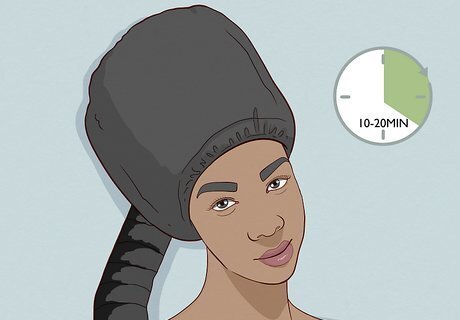
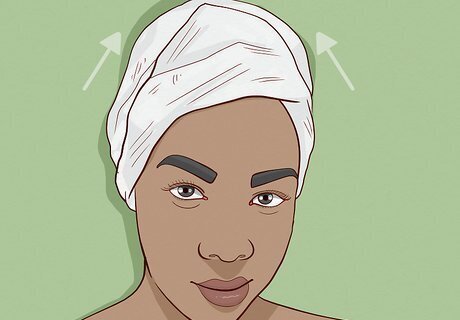
Sit under a hooded heater set to medium heat for 10 to 20 minutes. Set the heater between medium and high and let it dry out your wrapped hair. Be careful not to sit too close to the heater, or you will risk burning the plastic or worse, your hair and scalp. Avoid sitting under the heater for more than 20 minutes. Don’t let the heater go above 400 °F (204 °C), as this may cause damage to your hair. If you don’t have access to a hooded heater, you can try using a standard blow dryer on its highest setting to help set the silk wrap. Just move the blow dryer around to hit every part of your head, circling for roughly 15 minutes.

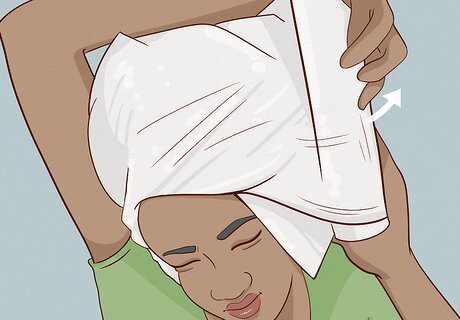
Unwrap the plastic and remove the clips. Grab the top of the plastic wrap and unwind it around your hair, making sure you don’t accidentally tear off any hair with the plastic. Then, you can snap off all of the clips you’ve used in your wrap and set them aside. Let the clips cool before removing them if they are made of metal.
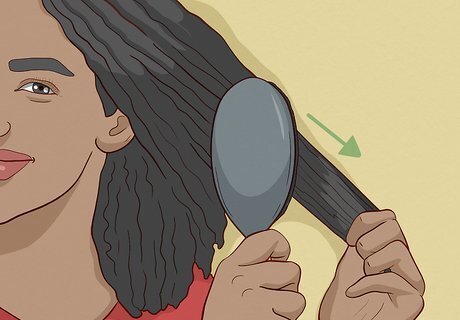
Brush out your hair. Use a thick-bristle hair brush to undo the wrap style and return your hair to a simple straightened look. It may take a few brushes in each region of your hair to get it back to how it looked before the wrap. The silk wrap will have made your much softer and easier to brush without catching, so don’t worry about tearing.
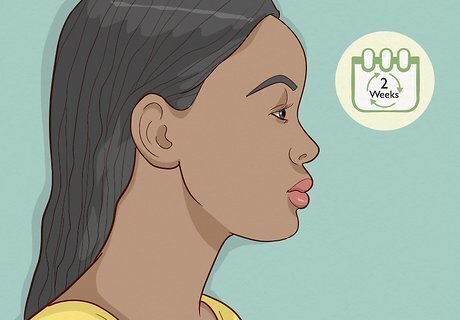
Re-do the wrap after 2 weeks. A silk wrap can last up to 2 weeks, keeping your hair silky, smooth, and straight. After 2 weeks, you will need to put it up and dry it again to maintain these effects. If you notice that your hair is not responding well to the wrap, try going to a salon or waiting longer between wraps. Your hair will revert as soon as it gets wet, so be sure to put your hair up in a wrap when working out, showering, or sleeping.


Comments
0 comment