
Using the Display Settings Menu
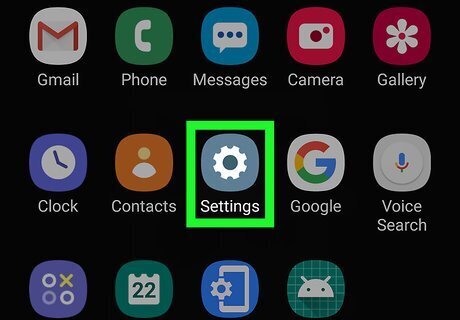
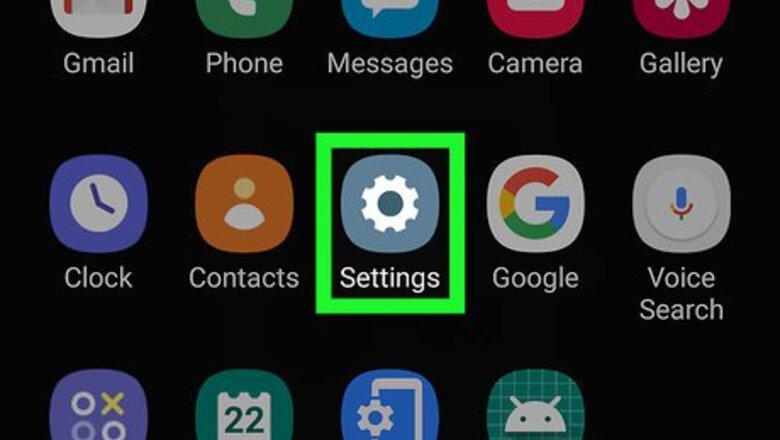
Open your Android's Android 7 Settings App Settings. It's the icon that resembles a gear. Tap the icon in your Apps menu or home screen to open the Settings menu. You can also swipe down from the top of the screen and then tap the gear icon in the resulting drop-down menu. Not all Android phones have the option to change your screen resolution in the Settings menu.
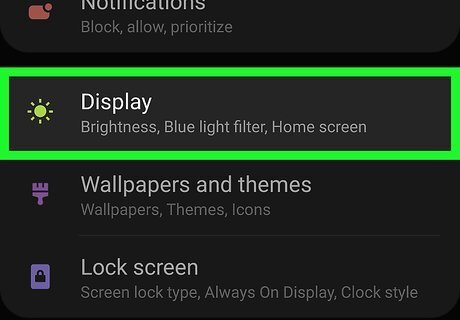
Tap Display. It's next to an icon that resembles a sun in the Settings menu. If you don't see the Display option in your Settings menu, tap the icon that resembles a magnifying glass in the upper-right corner and type "Display" in the search bar to search for the Display settings.
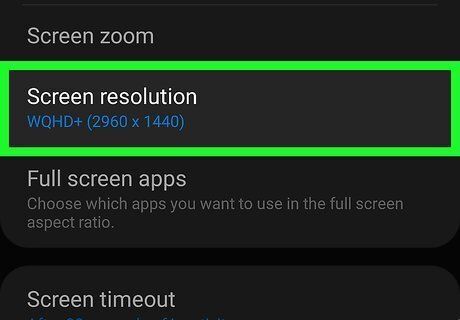
Tap Screen Resolution. It's in the middle of the Display menu.
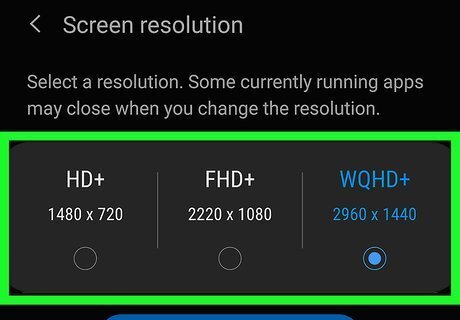
Tap HD, FHD, or WQHD. HD is the lowest resolution at around 1280 x 720 pixels. FHD is a mid-range resolution at 1920 x 1080 pixels. WQHD is the highest screen resolution at 2560×1440 pixels. Resolutions may vary depending on the make and model of your phone or tablet. More pixels means higher resolution.
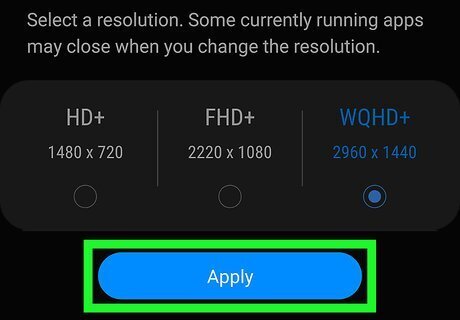
Tap Apply. This applies your new screen resolution settings.
Using Developer Mode To Change the Pixel Density
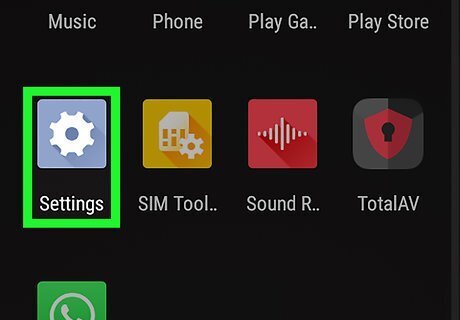
Open your Android's Android 7 Settings App Settings. Tap the Settings app icon, which resembles a colored gear, to do so. You can also swipe down from the top of the screen and then tap the gear icon in the resulting drop-down menu. Changing the pixel density (DPI) does not change the screen resolution on your device. It just changes how many pixels-per-inch are used. This can make words, text, and icons appear bigger or smaller. The option to change the pixel density or access developer options may not be available on all Android phone models.
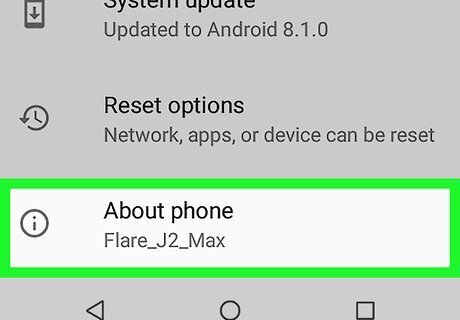
Scroll down and tap About phone. You'll find this at the bottom of the Settings menu.
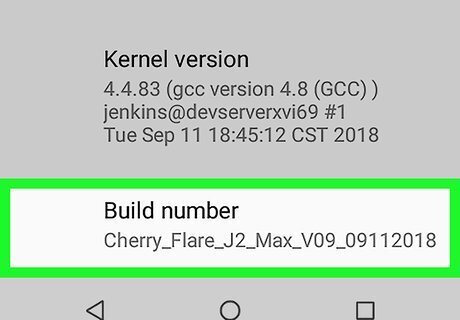
Scroll down to the "Build number" heading. It's near the bottom of the "About phone" menu. If you don't see this option, tap the icon that resembles a magnifying glass in the upper-right corner. Type "Build Model" in the search bar.

Tap Build number 7 times. This unlocks the Developer options menu item. You can use Developer option to change your Android's pixel density. You should see a "You are now a developer!" message pop up once developer mode has been enabled. Warning: Messing with developer options without knowing what you are messing with can affect your phone's performance and cause other issues. It is recommended that you [up] your Android phone before messing with developer options incase you need to reset your Android device.
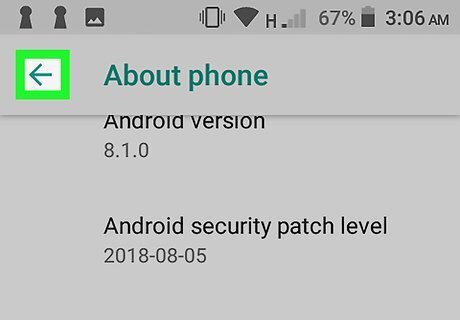
Tap the "Back" button. Doing so will take you back to the Settings page.
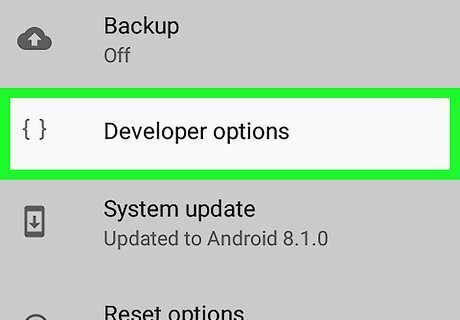
Tap Developer options. This option should be near the About phone option at the bottom of the phone. On some Android phones, you may need to scroll up or down to find this option.
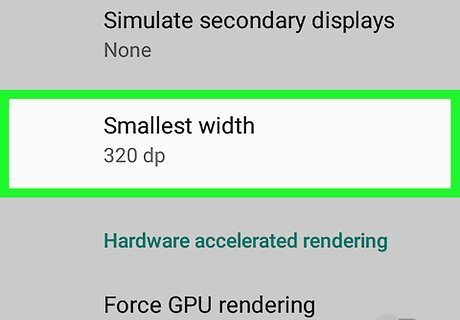
Scroll down and tap Smallest width or Minimum Width. You'll find this option near the bottom of the page. This option is near the very bottom of the Developer Options page, so you may have to scroll down for quite a while before you reach it.
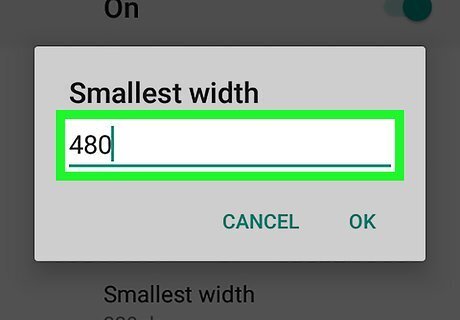
Enter a new width. Tap the text field in the middle of the pop-up window, then type in your preferred pixel density. Android DPI can be as low as 120 or as high as 640 (this may vary from one model to another). The larger the number, the smaller the on-screen items (text, icons, etc.) will appear.
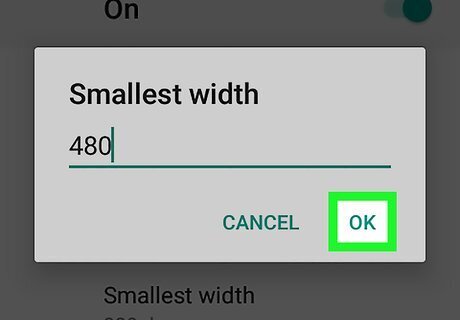
Tap OK. It's at the bottom of the pop-up window. Doing so will adjust your Android's pixel density.


Comments
0 comment