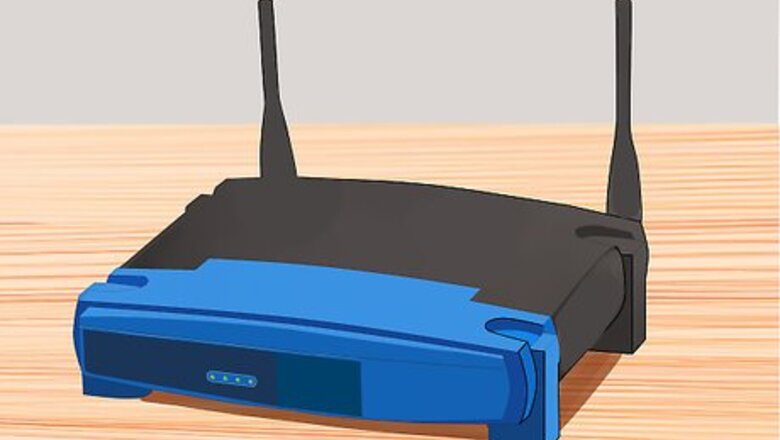
views
Bridging an internet connection refers to making connections between different ports that will be used by your computer, such as ethernet and wireless.[1]
X
Research source
Shown in this article are simple steps that you can use to create your own bridged connection.
Note: This tutorial applies to the MS Windows environment. These steps should only be used in context with a Windows 7 machine, as they are not guaranteed to work on previous versions, or on machines running another OS such as iOS, or Linux.
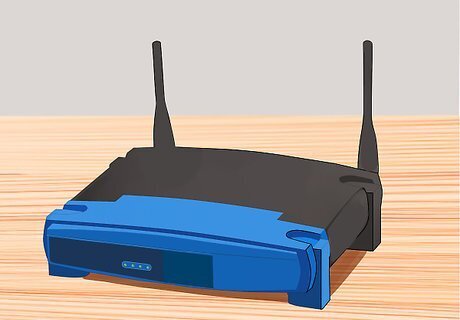
Make sure the relevant machines and crossover cable are working. To see if the cable is working, plug it into both machines. If the port lights up, then you know that it works. If it does not light up, the cord is not in working order.
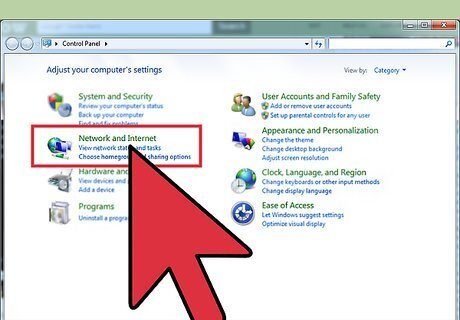
Get started. On both machines, go to the start menu, open the control panel and go to "Network and Internet". The Local Area Connection (LAN) should show up with no internet access in the window.
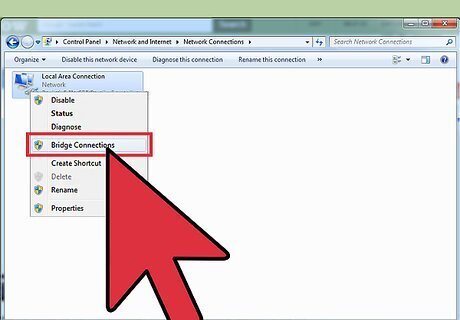
Create the bridge on the host machine. Go to "Change adapter settings" on the left pane on the host machine. Two or more connections should show up. Highlight both Local Area Connection and Wireless Network Connection. Right click one of the icons you highlighted and an options menu should come up with only "Bridge Connection". Click it and it should take a second to set up the connection. Bridge already working? Some machines cards will automatically assign the needed network information for you. If it does, an icon on the client machine's task bar will show up with a monitor and a fork like plug showing beside it. If the icon has a caution sign, it means that the information needs to be assigned manually.
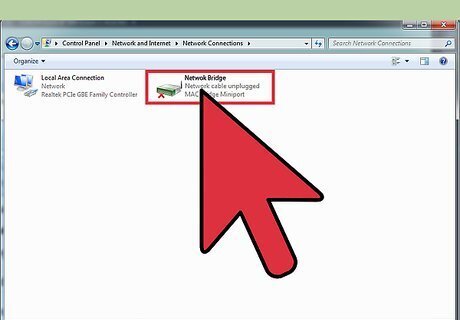
Do error checking. A new icon should show up in the window called "Network Bridge" and it should display the name of the wireless network you are connected to below "Network Bridge". If not, repeat step 3 to remove the bridge and restart the process.

Access the command line. Still on the host machine, open the start menu and in the search bar type "CMD". Open Notepad and be prepared to write down your network information.
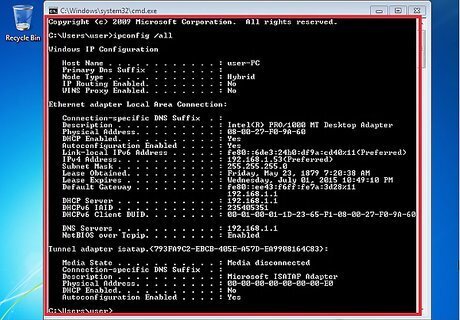
Get the machine's network information. In the CMD window, type "ipconfig /all". A large list of information should show up. Scroll to the top and look for "Ethernet adapter Network Bridge:", copy the IPv4 Address, Subnet Mask, Default Gateway, and the DNS Servers.
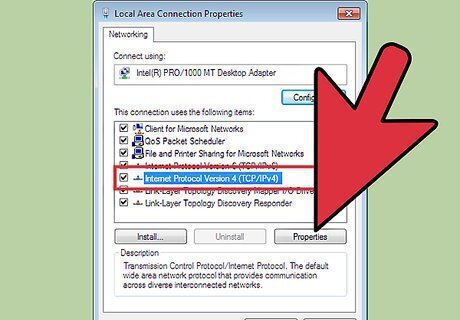
Perform a client machine setup. On the client machine, click on "Local Area Connection". A window should pop up called "Local Area Connection Status"; select Properties, and in that window double click "Internet Protocol Version 4 (TCP/IPv4)".
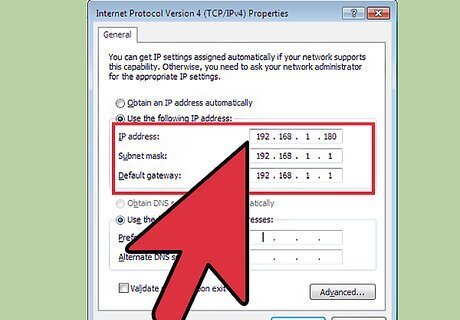
Enter the IP information. To enter the network information, select "Use the following IP Address". Now the three bars should be lit up. In the IP address row, enter the IPv4 address from the host machine, and for the last section of numbers increase it by 1. Example: 192.168.1.179 becomes 192.168.1.180. The Subnet Mask is the same as what was copied as with the Default Gateway.
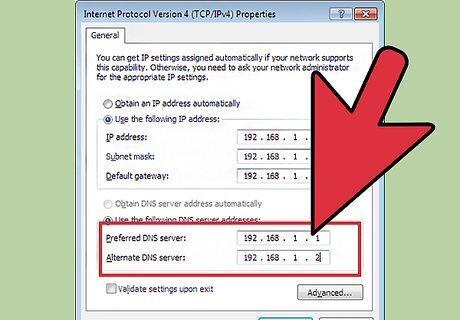
Check the DNS servers. The DNS servers will also be changed to what was copied down from the host machine's network information. For the first row, enter the information as it was from the Host, and in the second row put in the same number but increase the last number by 1. Example: 192.168.1.1 and 192.168.1.2.
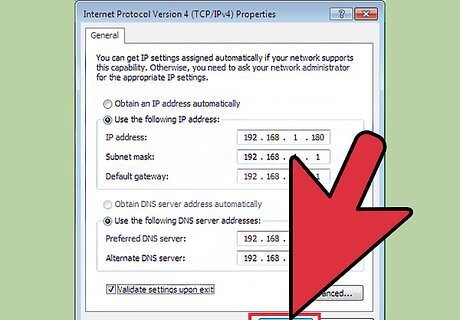
Finalize the connection. Click the box about Validating Settings upon exit and click OK. It will take a second to validate but the connection should start working a few seconds after clicking OK. Your new connection should be working now.


Comments
0 comment