
Selecting Your AirStone
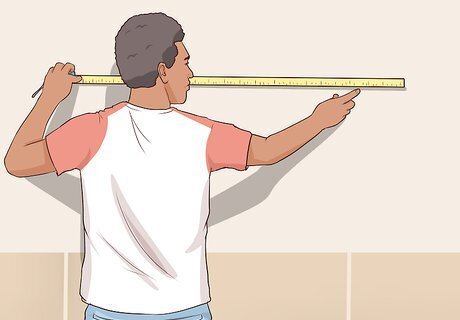
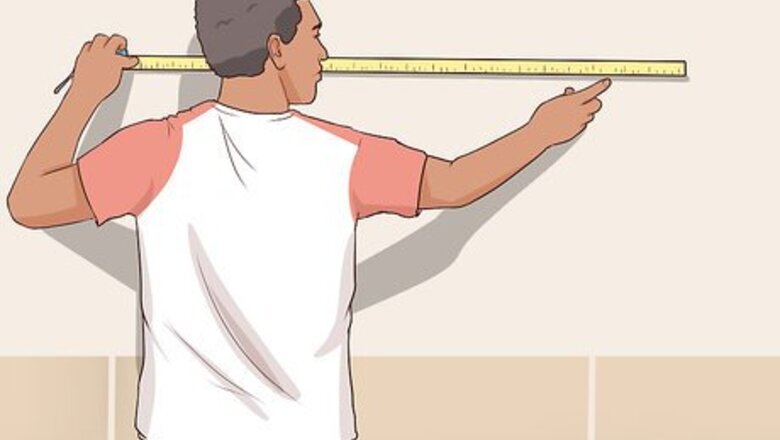
Calculate how much stone you need. Measure the length and width of the wall or surface that you are covering with stone. Multiply those numbers to find the square footage that you need to buy. Also measure the edges and corners, as these require different stones than the flat surface. The majority of the area will be covered in flat stones. You may also want corner stones or edge stones. Flat stones are cut smooth on both ends to fit tightly together. Edge stones have a rough edge on one side for placement where they’ll be seen on the end of a wall. Airstone is sold in eight square foot packs of flat stones, six linear foot packs of corner stones, and seven and one half square foot packs of edge stones.
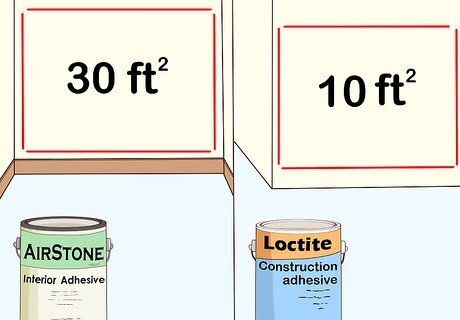
Determine how much adhesive you need. AirStone adheres best with adhesive that is specifically designed for it. For interior walls, use AirStone Interior Adhesive. This comes in a bucket that covers 30 square feet of wall. Outdoor AirStone projects should use a tub of Loctite construction adhesive, which covers 10 square feet. If you prefer to use some other adhesive besides the one designed for AirStone, you are free to do so, but the result may not be what you want.
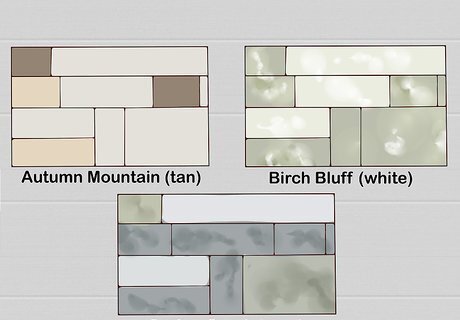
Choose from the color palettes available. Airstone currently offers three colors of stone, which are Autumn Mountain (tan), Birch Bluff (white), and Spring Creek (grey). These collections include stones in a range of colors, so be aware that every stone is not the exact same color. Since the stones in each color palette include a range of shades, you have a lot of flexibility to match them up with the other colors in the space.
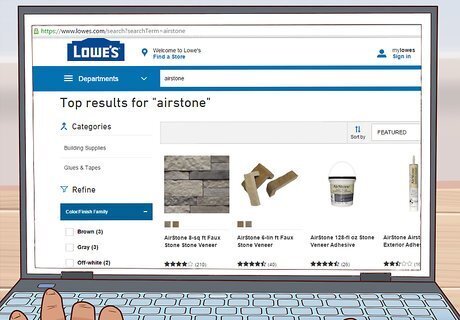
Buy AirStone from Lowe’s. AirStone can currently only be purchased in the U.S. at Lowe’s, either online or in the store. AirStone, the manufacturer, does not sell their product directly to consumers. If you order online, you have the option to have your stone shipped in the mail, delivered by Lowe’s delivery service, or set aside for pick up at a local store. Shipping costs may vary depending on how much stone you order and how far it has to ship. If you don’t like to order online, go to the nearest Lowe’s and pick out the stone you want.
Starting Your Project
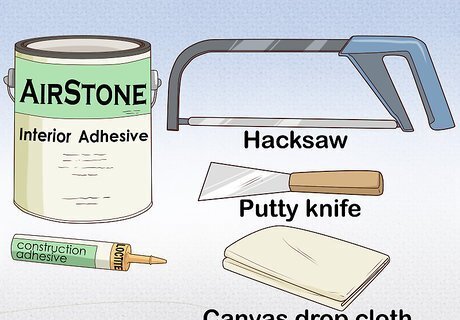
Gather your supplies. Before you start putting stones on the wall, set out everything you’ll need and cover the floor or counter with a plastic or canvas drop cloth. This prevents a mess in case you drop adhesive. The main supplies you’ll need are the AirStones, the adhesive, a putty knife, and a hacksaw. It can be useful to take all of the stones out of the box at this point.
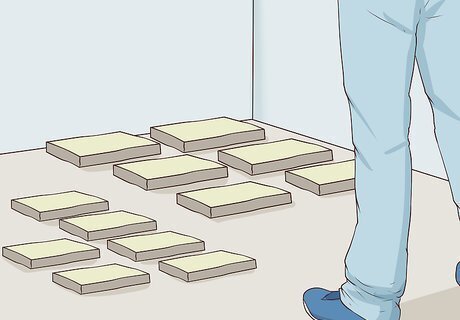
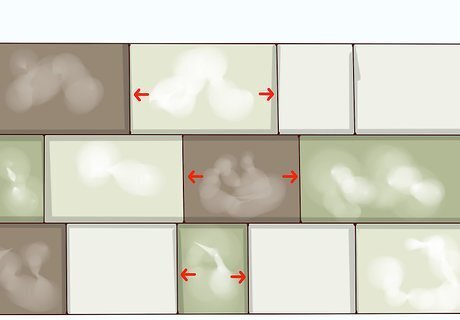
Lay the stones out and look at the variety. A primary feature of AirStone is the range of colors and sizes which create a natural look of variation. Lay the stones out and group them by size or color so that as you apply them to the wall you can pick from the piles. Purposefully randomizing the stones gives the most desirable look. This will add time to your process and it isn’t vital, but it is a helpful way to get the best look.

Make a template. Using the measurements of the area the stone will go, make a sketch on paper with the measurements. Use painter’s tape, or basic masking tape, to make a template on the floor using the measurements. This helps you visualize where the stones will go. It takes longer in the beginning, but it speeds up the process once you begin applying them to the wall.
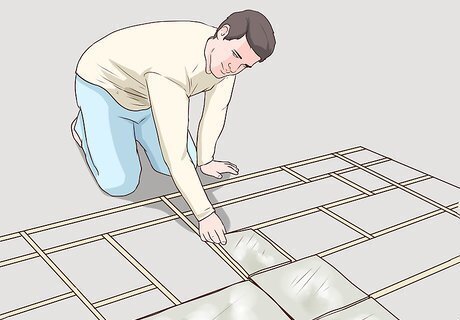
Lay the stones out on the template. Since the stones come in multiple shades and sizes, laying them in a template helps you visualize how they will fit on the wall. Lay them out so that none of the seams match up and so the colors are distributed around randomly. This also gives you a chance to see how many stones you’ll need to cut to fit the area perfectly.
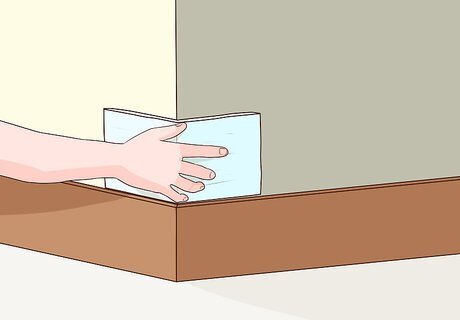
Clean the surface before you apply the stone. Take a rag and wet it with warm water and a mild soap or cleaner. Wipe the entire surface carefully to remove any dust or debris that would hinder the adhesive from sticking. Take a dry cloth and dry the surface after you wipe it thoroughly. Allow the surface to air dry if necessary.
Placing the Stones
Start with a corner piece. If the section you are covering includes a corner, always place a corner piece to start the row of stones. This keeps you from getting to the corner with too little room to hang a piece. Start with a corner piece for each row.
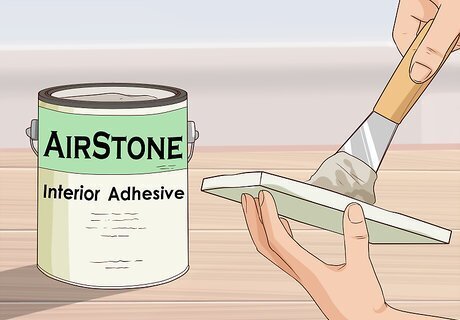
Spread adhesive on the back of the stone. Take your putty knife and scoop up some adhesive from the bucket. Don’t get too much or you might drop it off of the knife. Gently spread the adhesive. It’s not necessary to cover the entire back of the stone in adhesive, but cover roughly 90%. The adhesive will spread some when pressed to the wall. Another option for putting adhesive on the stone is to use a tube of adhesive with a caulk gun. Be sure to have a wet rag to wipe excess adhesive from the tube. A putty knife will still help you spread the adhesive.

Press the stone gently into place on the wall. AirStone’s strong adhesive does not require lots of pressure for it to stick. Gently lay the stone against the wall and hold it for a few seconds. Start on either the left or the right of the area. If you realize you’ve placed a stone in the wrong spot, it can be removed up to 30 minutes after it has been stuck.
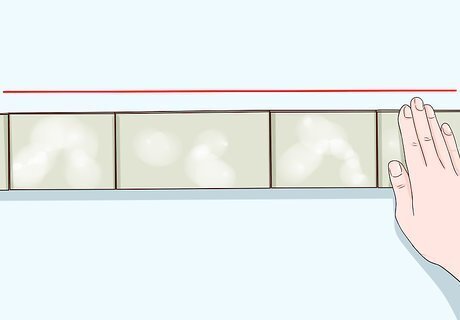
Place the following stones tightly together in a line. Once you have the initial stone placed, place the following stones in a straight line. Push the edge of each new stone you place tightly against the one before it. Cut the final stone in the line to fit, as needed. For walls that require roughly 10 or more stones, place four or five on one end of the wall, followed by four or five on the other end of the wall. Keep adding stones until the line meets in the middle, and cut stones if necessary.
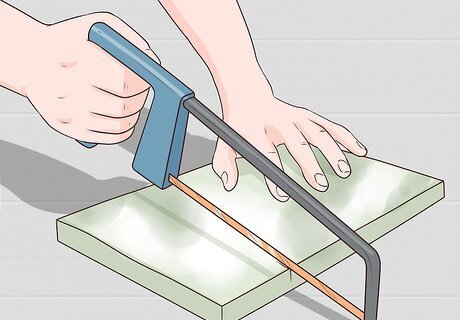
Use a hacksaw to cut stones to shorter lengths. When you get to the end of a row, you may not have a stone that is short enough to fit the spot. Use a sharp hacksaw to cut a stone to the length you need. Be sure to measure before you cut so you get the correct length. Each package of AirStone includes a variety of sizes, so check your pieces first to see if you have a piece that fits without being cut.
Stagger the seams in each line of stones. Once you place an entire row of stones, watch carefully on the second row to ensure that the ends of stones in each line do not form a two-row seam. The variety of stone lengths comes in handy to help with this.
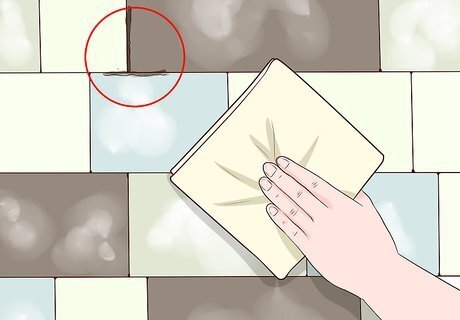
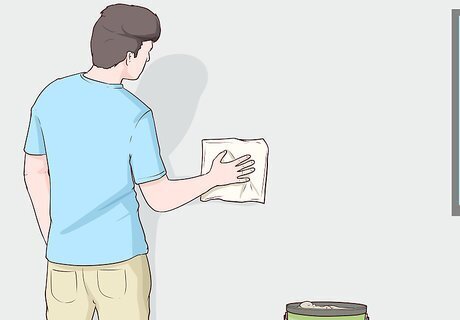
Wipe up excess adhesive immediately with a damp cloth. If you get any adhesive on the front of the stones, on your hands, or on other surfaces, wipe it up quickly. A damp cloth will wipe the adhesive away easily and won’t leave any residue. Don’t let it sit for more than 30 minutes or it will begin to dry.
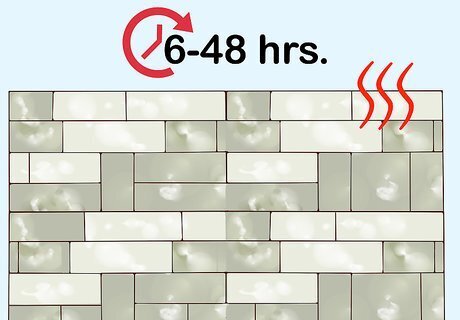
Allow at least six, and up to 48 hours, of drying time. Once you’ve placed all of the AirStone on the wall, let the adhesive sit untouched. The material of the wall and the room temperature can affect drying time. The room temperature should be at least 60 for 48 hours after the installation. Be sure not to push anything against the wall or bump it while the adhesive dries. If AirStone is installed around a fireplace or other heating element, don’t light a fire or turn the heat for during this two day drying period.


Comments
0 comment