
Removing the Bumper
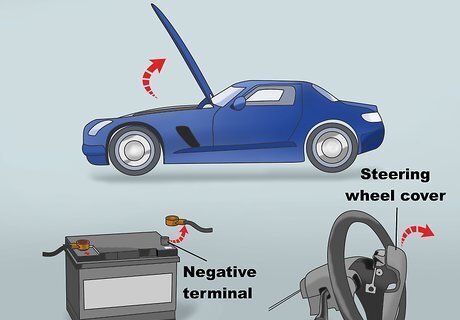
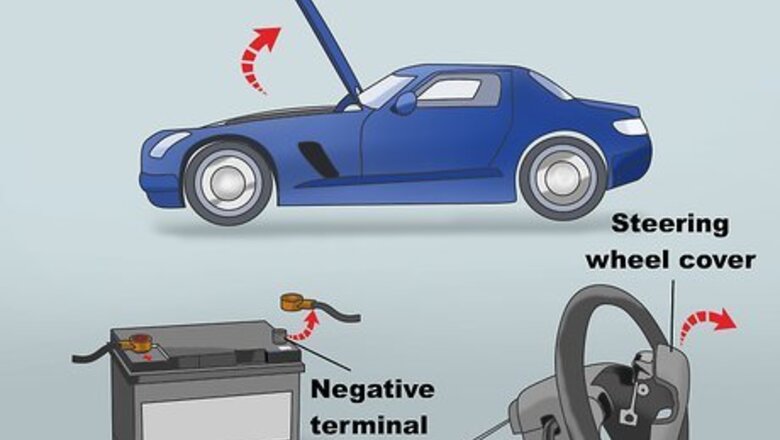
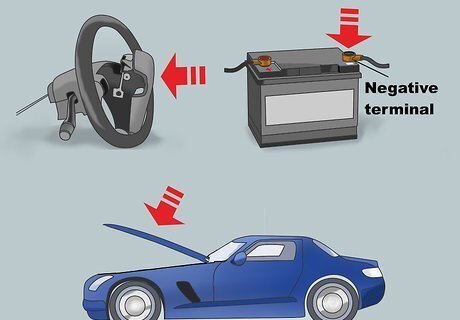
Disable the airbag if you’re removing the front bumper. To avoid accidentally setting off the airbag, you’ll need to disable it before starting the front bumper removal process. To do so, open the hood of your car and disconnect the battery, negative side first. Then, pop off the steering wheel cover by pressing the wheel’s eject button with a specialty removal tool. Inside, look for a small power box, take out the screws or bolts holding it in place, and remove the connected wires, thus disabling the airbag. If you cannot locate an eject button or power box, check your vehicle’s driver manual for model-specific instructions.
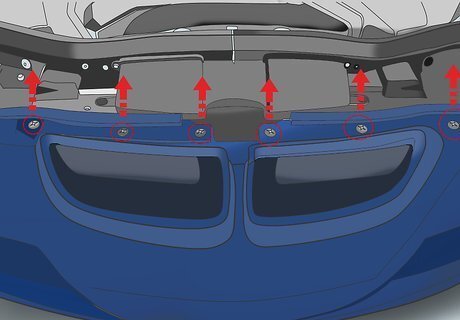
Take off any screws, nuts, or clips holding the bumper in place. For front bumpers, these are typically located directly above the bumper (under the hood), below it, and at the driver and passenger-side ends. For rear bumpers, look below the bumper, on the outer surface, and inside the trunk. To avoid problems when reattaching the bumper, take pictures showing where all the fasteners go.

Slide the bumper off your car. Once you’ve removed all the outside fasteners, gently pull on the left or right side of your bumper until it pops out. Using a screwdriver or other flat object, go along the inside of the bumper any remove any additional clips holding it in place. Then, simply slide off the bumper. Depending on the model of car, you may need to take off other elements, such as fog lights, to fully remove the bumper.
Cleaning the Bumper
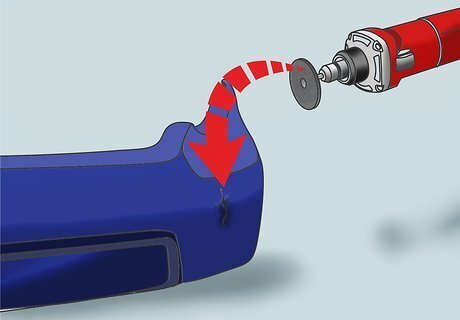
Grind down the raised surface along large cracks. Mount a flat grinding head on a handheld die grinder, then use it to remove the surface covering the front and back of large damaged areas. Make sure to grind down any sharp or loose edges along the cracks. So you can fix the bumper properly, use the edge of the grinder to create a thin, clear groove along each damaged spot. Stray fiberglass particles can damage your eyes, lungs, and any exposed skin. To avoid this, wear thick gloves, long-sleeved clothing, goggles, and a dust mask while working.
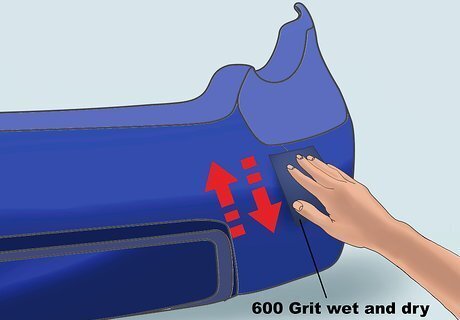
Sand down the raised surface along small cracks. Unlike large cracks, small damaged areas may be difficult to grind without further damaging the bumper. To get around this, sand the areas down using 600 grit wet and dry sandpaper. Look for this specialty sandpaper at an auto repair, home improvement, or hardware store.
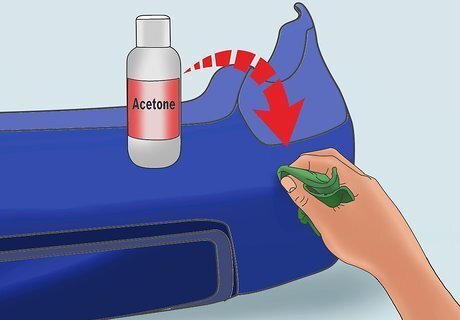
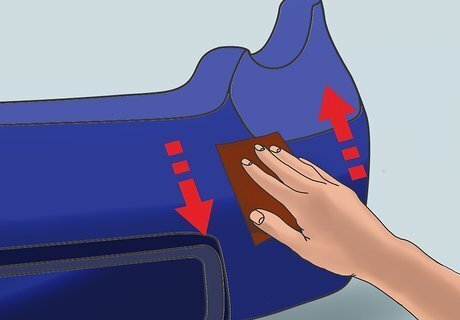
Scrub the fiberglass surface with acetone. Acetone is a highly volatile chemical that serves as a great dirt and grease remover. When applied to your fiberglass bumper, it will remove pre-existing resin so your new materials have a surface to bond with. To strip the surface properly, carefully dampen a rag with acetone, then scrub it over every damaged spot. Acetone is highly flammable, so keep it away from fire and the combustion engine of your car. For safety, wear long-sleeved clothes, rubber gloves, and safety goggles when using it.
Fixing the Fiberglass
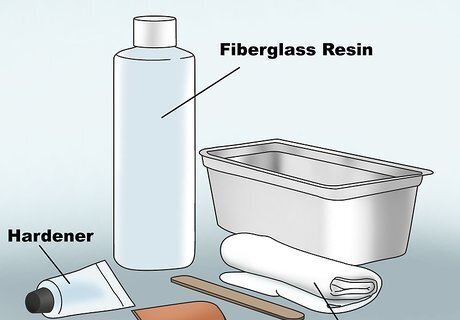
Purchase resin, hardener, and cloth matting strips. To repair your bumper, you will need fiberglass resin, fiberglass matting strips, and a liquid hardening agent, along with plastic or wooden sticks to help mix the resin and a brush or other applicator to put it on the bumper. You can purchase these separately or in pre-packaged fiberglass repair kits. Look for the materials at auto supply stores.
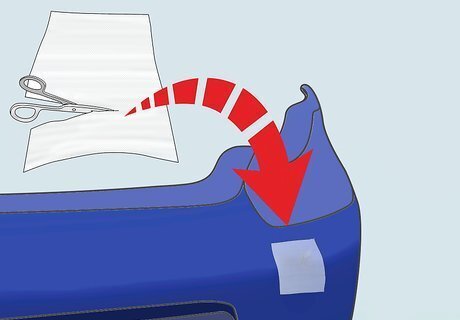
Cut the fiberglass matting to the size of each cracked area. Grab your cloth matting and hold it up to a damaged area. Using a fabric marker, make a line on top of the cloth indicating the crack placement. Then, take your fabric to a solid working table and cut it using a precision knife. So you have enough overlap to support the fiberglass, leave about 20 mm (0.79 in) of space around the marked area. Repeat this with each crack.
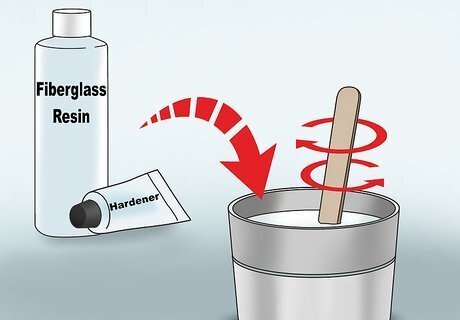
Mix the resin and hardener together. Grab a small container and pour in the amount of resin you think you’ll need to cover a specific piece of fiberglass matting. Then, check the instructions on the back of your resin container and apply the recommended amount of hardening agent. Using a plastic or wooden stick, stir the substances together until they are well mixed. Once combined, most resin mixes stay soft for 8 to 12 minutes, after which they become unusable.
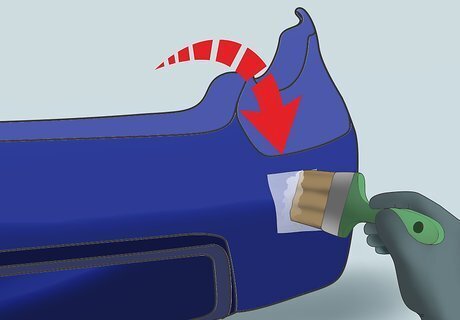
Apply the matting to your bumper using the resin mix. Cover the back of a damaged area with a sheet of fiberglass matting. Using a brush or other applicator, cover the entirety of the cloth and about 2.5 inches (6.4 cm) of the surrounding area with the resin mix. Repeat this with each crack, then let the matting cure in a moderately warm area for about 2 hours. For extremely large cracks, you may need to apply matting to the front of the bumper as well.
Applying the Final Touches
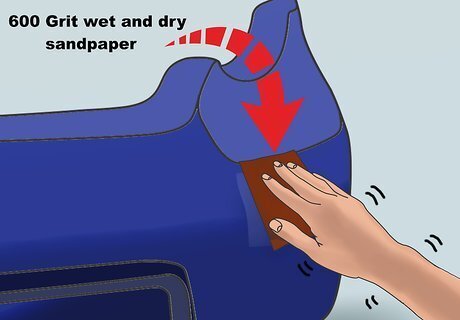
Sand down the repaired areas. Once the fiberglass is fully cured, sand down the fixed areas using 600 grit wet and dry sandpaper. Do this on both sides of the bumper until the fiberglass patches are smooth to the touch. To avoid breaking open the new seals, do not use your handheld grinder.
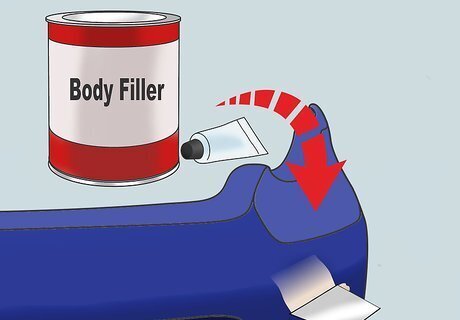
Cover the fixed areas with auto body filler if necessary. If there are still cracks or grooves in the bumper after the initial sanding, you can fix them with body filler. Estimate how much body filler you need and squeeze it into a small cup. Mix in the amount of hardening agent recommended on the body filler container, then apply it to the cracks with a plastic squeegee. Smooth the surface if necessary, then let it cure in the sun for about 15 minutes.
Sand down the entire bumper. Once you’ve successfully filled all the damaged areas, sand the entire bumper down with 600 grit wet and dry sandpaper. The goal is to get as uniform a coat as possible, with no random hills caused by the fiberglass strips or body filler.
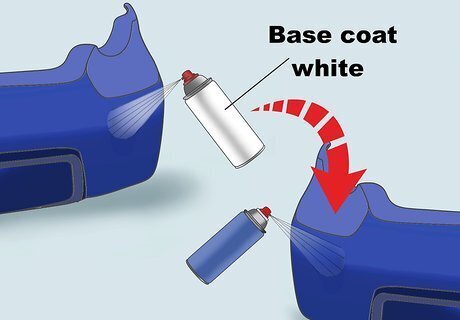
Repaint the bumper (optional). If you’re not happy with how the bumper looks, try painting it to hide the repairs. Cover the bumper with a base coat of white spray paint, then let it sit for about 10 minutes. Apply base coats until you can no longer see the repairs, then spray paint the bumper a similar color to your car. Let the paint dry for 1 to 2 hours, then spray it with a layer of clear coat. Your bumper should be ready after 24 hours.
Reattaching the Bumper

Slide the bumper onto your car. Make sure the bumper is completely dry. Then, lift it up and slide it over the front or rear end of your car. Once you have it in place, push the bumper forward until it can sit on its own. Starting on the left or right side, walk around the car and push every section of the bumper in until it is flush against the vehicle.
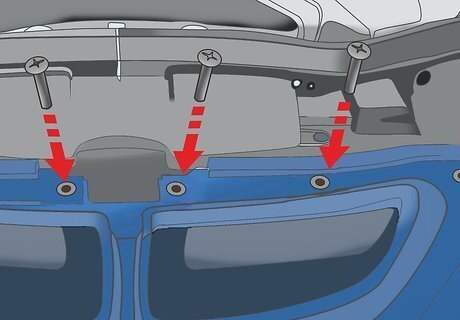
Replace and tighten any bumper fasteners. To keep the bumper from coming off, replace any screws, nuts, or clips needed to hold it in place. Then, make sure to secure the fasteners with a screwdriver or wrench until they’re tight enough that you can no longer move the tool.
Reconnect the airbag if necessary. If you disabled the airbag, make sure to reattach it before driving your vehicle. To do so, connect the steering wheel power cords to the power box, then replace any screws or nuts designed to hold the box in place. Put the steering wheel cover back on, then reconnect your car’s battery cords, positive side first.


Comments
0 comment