
Assessing the Contour Lines
Use the thicker contour lines to determine the elevation. Contour lines represent paths or segments of the Earth. Topographic maps are covered in contour lines. Some contour lines are thicker, known as indexed contour lines. They have a number next to them that shows you the elevation of that path or segment. For example, you may notice there is the number “6500” next to the thicker contour line. This means that everything along that line is 6,500 feet (2,000 m) above sea level. There are also thin contour lines on the map. These are called intermediate contour lines and are not given an elevation.
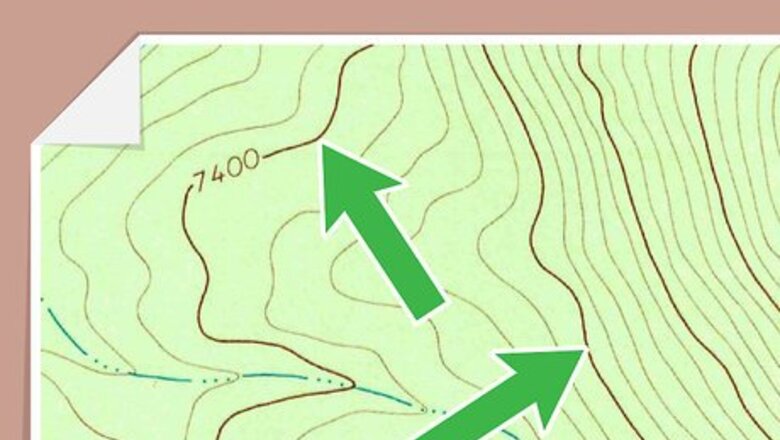
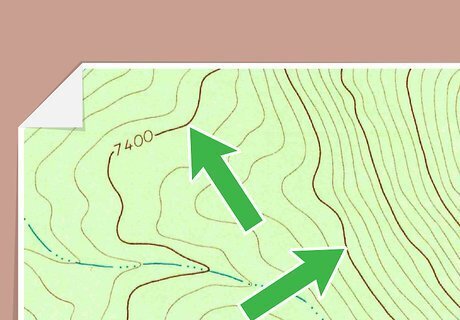
Determine the elevation change by looking at the space between the contour lines. The closer the spaces are between the contour lines, the more rapid the change in elevation. An area with contour lines that are spaced far apart have a fairly low elevation and be easy to hike or walk through. An area with a concentration of contour lines that are very close together have rapid changes in elevation. It has high and low terrain that may be more challenging to walk or hike through. Vertical cliffs are notated by a series of contour lines that are drawn very close together. In some cases, cliffs that are very vertical and high may have contour lines that form a single line.
Notice how the contour lines slope on the map. The way the contour lines curve can tell you if the path is going to be gentle or steep. A thick contour line that has rounded curves means the path is going to have a gentle slope that is easy to climb. A thick contour line with jagged curves that appear sharp means the path is going to have steep slopes that are harder to climb. Use the shape of the contour lines, as well as the space between the contour lines, to help you determine if the path is going to be easy or difficult to hike or climb on foot.
Look for flat terrain with a dashed contour line. You may notice dashed lines on the map, which are called supplementary contour lines. This indicates the elevation is half of the elevation between the contour lines around it. This indicates the terrain is flat for a long expanse, or there is very little change in elevation in these areas.
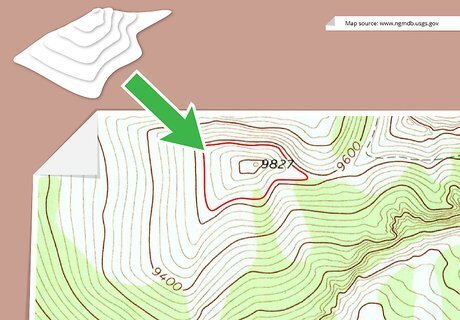
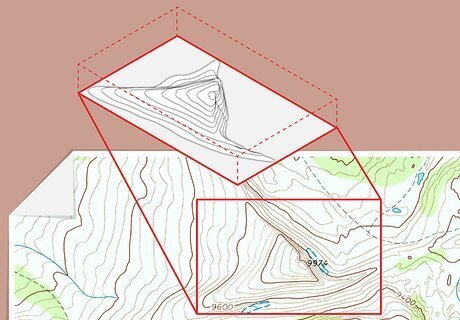
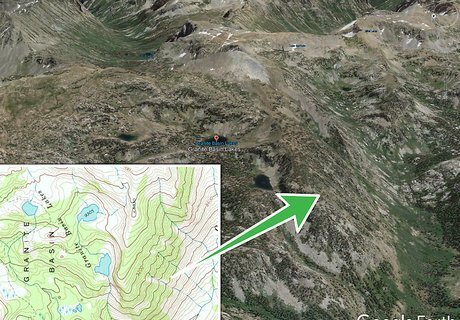
Check for contour lines that form a circle. Contour lines that form a series of circles on the map, where the circles get smaller and smaller, indicate a raised land mass. If the contour lines are not thick and they form a circle, this means there is a hill. If the contour lines are thicker and form a circle, this means there is a summit or peak. There is usually an elevation number next to the land mass so you know how high above sea level it is. For example, if you see circular contour lines and the number “5400,” this means the land mass is 5,400 feet (2,000 m) above sea level. EXPERT TIP Halle Payne Halle Payne Hiking & Backpacking Trip Leader Halle Payne has been hiking and backpacking in Northern California for over 3 years. She was Trip Leader for Stanford University’s Outdoor Education Program, Hiking Leader for Stanford Sierra Conference Center, and has taught classes in Outdoor Education and Leave No Trace principles. Halle Payne Halle Payne Hiking & Backpacking Trip Leader These circles can help orient you to the landscape. Halle Payne, former hiking and backpacking leader, tells us: "If you're trying to locate where you are on a topographic map — especially if you don't have a compass — look for peaks on the map and try to find the matching peaks around you. When I was studying navigation in high school, we weren't allowed to use compasses, and peaks allowed us to orient the map so it matched our surroundings."
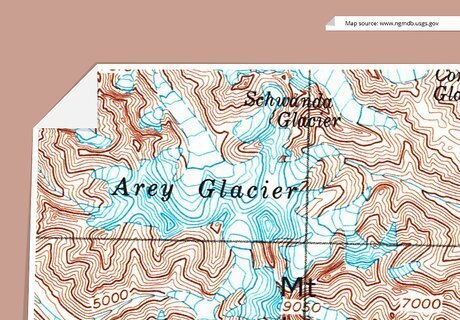
Find glaciers and cold areas by looking for blue contour lines. Blue contour lines means there is a glacier in the area or the mountains are snow-capped and very cold. The contour lines are blue whenever you are at higher elevations on the map. Being aware of the blue contour lines helps you plan a route where you do not have to deal with ice or high elevations. Opt to go around these areas or use a different route instead.
Looking at the Colors on the Map
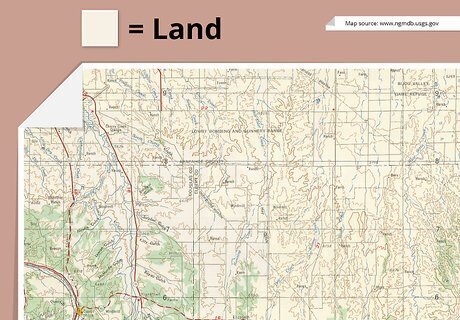
Notice the color brown for land. The map will have a lot of brown areas if it has a lot of land. Contour lines are usually brown as well to notate land mass and land features as well as the elevation. Keep in mind that just because an area is brown does not mean there is a path or trail in this area, just that there is land.
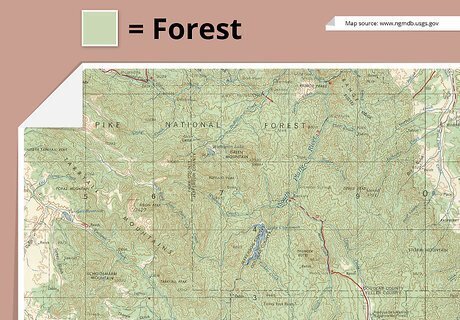
Check for the color green to find vegetation. Green is on the map wherever there are forest or woods. Green usually appears in large sections to let you know there is a lot of vegetation in the area.
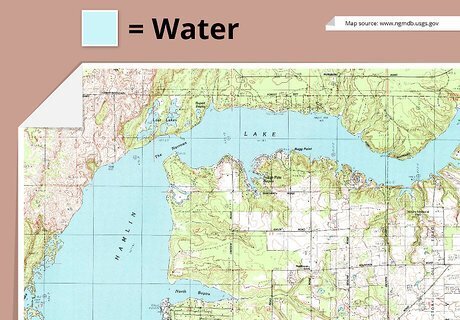
Look for the color blue to locate water features like lakes and rivers. The color blue will also appear if there are swamps, reservoirs, and any drainage sites.
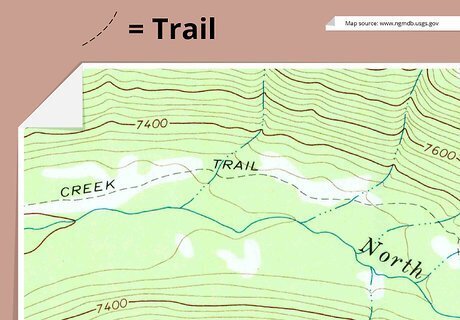
Find trails by looking for black lines. Black lines are used to notate trails on the map. They may appear a bit thicker than other lines on the map so you can see them easily.
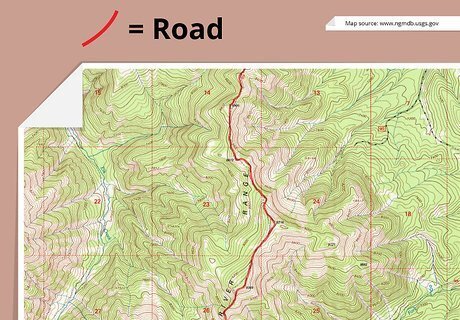
Locate roads by looking for red lines. Red lines are also used to notate boundaries on the map, such as a different town or area.
Identifying Symbols on the Map
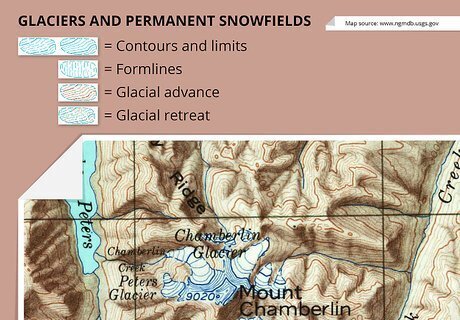
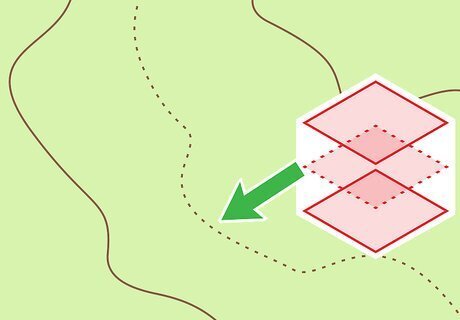
Look for a blue symbol for glaciers or snowfields. They are notated by round blue circles with dashed lines inside of the circles. The lines will point in different directions to notate if the glaciers or snowfields are advancing or retreating. Find a complete list of symbols on topographic maps at https://pubs.usgs.gov/gip/TopographicMapSymbols/topomapsymbols.pdf It may be useful to bring a list of symbols with you when you use the map so you can refer to it as needed.
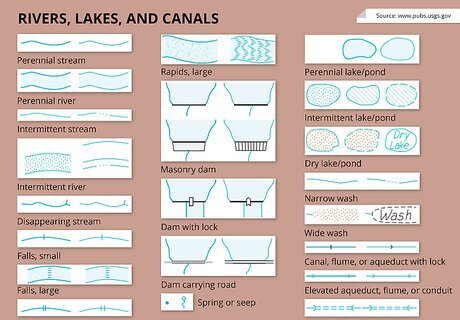
Identify the type of river or lake with blue wave symbols. Streams and rivers that are ongoing appear as solid blue waves on the map. Streams and rivers that are intermittent, where there is a break in their flow, have dashed lines or dots in the wave. Dams are notated on the map by two blue squares locked together.
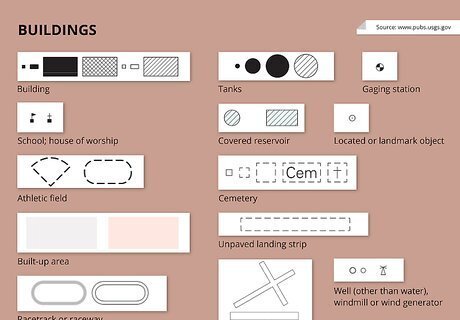
Locate buildings and schools by finding black boxes. Buildings appear as small block boxes on the map. They may appear as solid black boxes or shaded boxes. Schools are notated by small black dots. Athletic fields appear as triangles or boxes with dashed lines. Other man-made objects like wells, tanks, and cemeteries are notated on the map using specific symbols.
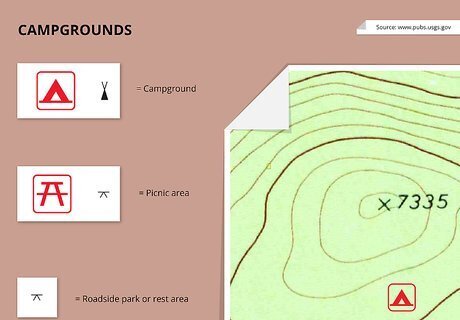
Check for campgrounds by looking for red tents. Find picnic areas by looking for red tables. Roadside rest areas appear as small black tables on the map.
Using the Map
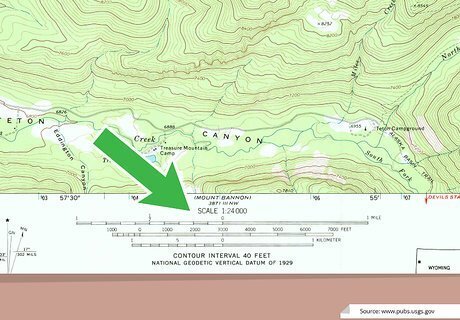
Determine the scale of the map. The scale on the map will help you determine the distance between objects and landmarks. This is handy when you want to plan a hike or walk. It can also help you figure out how far you are from landmarks or objects. The scale will appear on the top or bottom of the map and have a ratio next to it. The rain will tell you how to measure distance on the map. For example, it may say, "SCALE: 1:24,000." This means that 1 inch (2.5 cm) on the map represents 24,000 inches (61,000 cm) on the ground. There will also be graphic scale under the ratio. The graphic scale will break down the map by miles, feet, and kilometers. Use the graphic scale to make quick estimates of distance on the map.
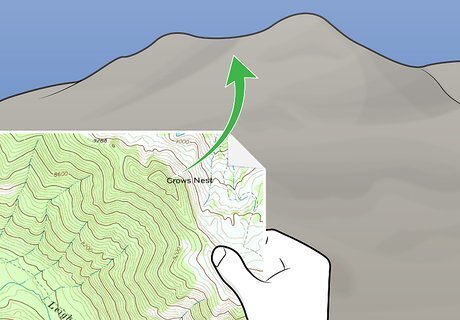
Locate a tall peak or hill in your area and refer to the map. If you get lost and need to find your way using a topographic map, try finding a landmark like a tall peak or hill close to you. Then, look on the map for a series of circular contour lines to notate the hill or peak. You can then navigate your way using the peak or hill on the map as a guide.
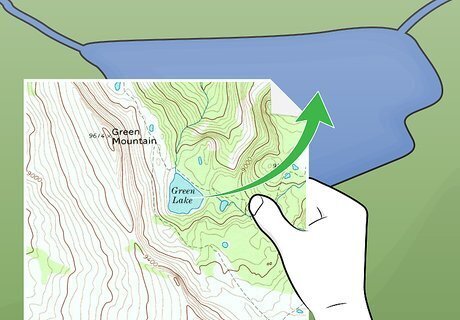
Search for a water feature or a man-made structure. You can also use a nearby water feature like a river, stream, lake, or dam to determine your location. Or use a man-made structure like a campground, a building, a school, or a rest area to orient yourself with the map. If you can't tell what side of a feature you are on, locate another feature and determine where you are in relation to both of them.


Comments
0 comment