
Measuring and Cutting the Fabric
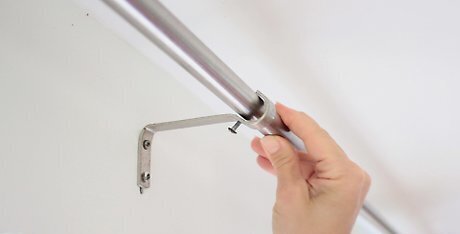
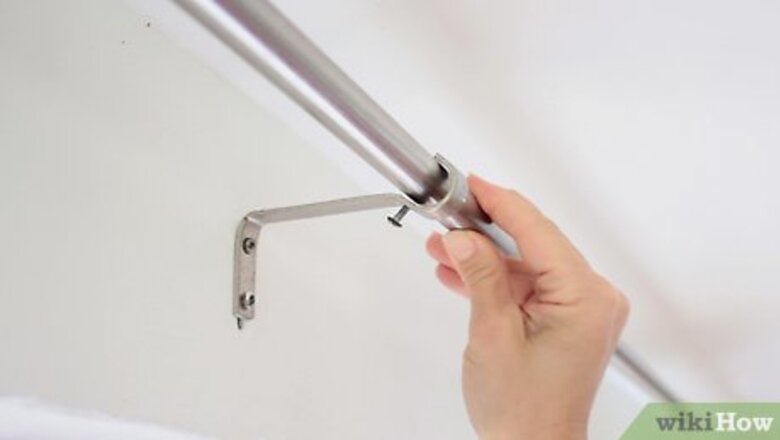
Start with your curtain rod mounted above the window. Choose and install your curtain rod before you think about cutting out any fabric. Once you have the positioning of your curtain rod set, you can reference the curtain rod and your window frame to help you decide how long and wide your curtains should be. If you’re mounting your curtain rod near the ceiling, leave a few inches of space between the rod and the ceiling. The top hem of your eyelet curtains will sit around 2 in (5.1 cm) above the rod so you’ll need to factor in a little clearance when placing your curtain rod. Try positioning the curtain rod roughly 4 to 6 in (10 to 15 cm) above the window. The higher up it is, the taller your space will look, and the longer your curtains need to will be.
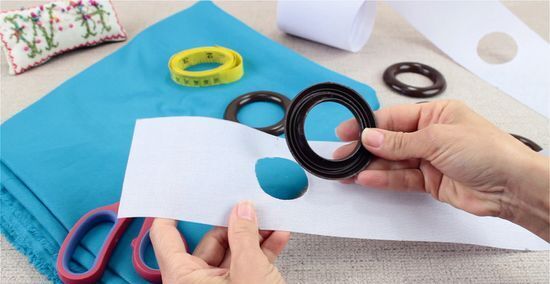
Obtain snap-together eyelet rings and eyelet tape. Look online or in a fabric store for “drapery eyelet heading tape” or “eyelet curtain tape.” Eyelets are commonly referred to as grommets so try using this search term as well. Choose eyelet rings in the material and style of your choosing, but make sure they’re wider than the diameter of your curtain rod by at least ⁄4 in (0.64 cm). Then pick out a corresponding eyelet tape which has holes of the same diameter as the rings. If you’re using separate eyelet rings and eyelet tape, try to pick up products from the same manufacturer to ensure a good fit. Some eyelet tape comes with the eyelet backing pre-attached, but other brands make the front and back eyelet ring pieces separately. Either option will work out fine.
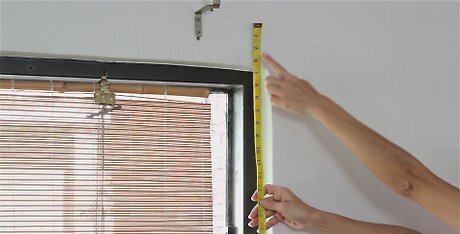
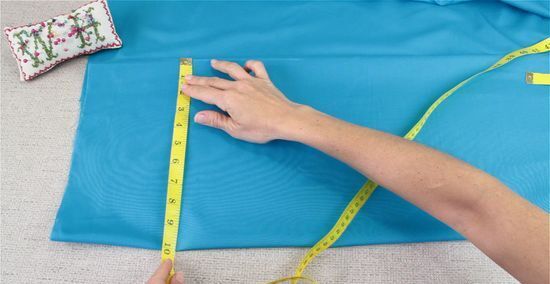
Measure from the curtain rod to where you want the bottom of the curtain to sit. Use a tape measure to determine how long you should make your curtains. Measure from the top side of the curtain rod down to where you want the hem of your curtain panel to sit. The length depends on how long you want to make your eyelet curtains. Curtains can look nice in a number of lengths. Yours could fall just below the bottom of the windowsill or you could have them graze the floor. It’s totally up to you! If you want your curtains to touch the floor, there might be 60 in (150 cm) from the top of the curtain rod to the floor.
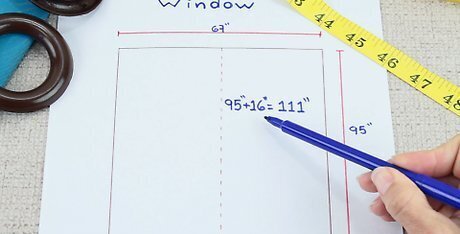
Add 16 in (41 cm) to your desired curtain length measurement. You’ll need to add some additional fabric to account for the top and bottom hems. Once you know how long you want your finished curtains to be, add 16 in (41 cm) to reach your curtain fabric length. This is the length you’ll use when you go to cut out the fabric. If you measured 60 in (150 cm) from the curtain rod to the floor, your new length will be 76 in (190 cm).

Add 8 in (20 cm) to your desired curtain width. First, calculate how wide you want each finished curtain panel to be based on the width of the window frame. Then add 8 in (20 cm) to this number, to leave enough fabric for the left and right hems. Use this new number as your curtain width. For reference, the combined width of your curtain panel(s) – whether you’re making 1 or 2 – should measure about 2 or 2 1/2 times wider than your window frame, if you plan to draw them closed. If you intend to leave the curtains open, you can make the panel(s) narrower at about 1 1/2 times wider than the window frame overall. For just 1 panel, If you want each finished curtain panel to be 50 in (130 cm) wide, you’ll need a 58 in (150 cm) piece of fabric.
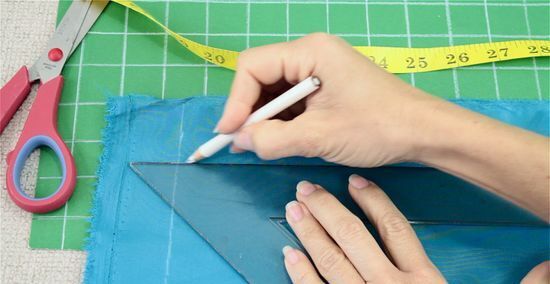
Draw out the length and width measurements onto your curtain fabric. Choose a non-stretch woven fabric for your curtains. Lay your fabric out on a flat surface, with the wrong side facing you. Use a ruler or yardstick and a pencil or tailor’s chalk to transfer the curtain fabric length and width measurements onto the wrong side of your fabric. If you’re making 2 curtain panels, either draw them out separately or draw one double-width rectangle with a dividing center line. Remember to refer to the measurements that include the extra amount of fabric for the hems. If you’re using a directional or patterned fabric, be sure to orient your rectangle in the right direction. A variety of fabrics work well for eyelet curtains, depending on your preferred opacity and weight. For instance, cotton voile can make breezy sheers while a heavy damask can add opulent texture to your windows.
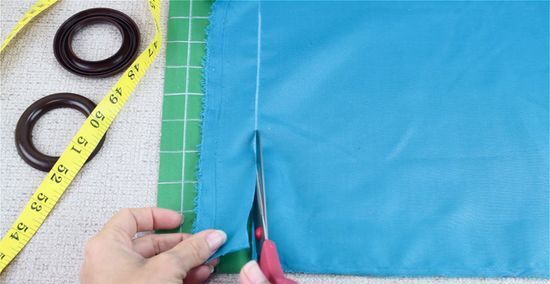
Cut out the curtain fabric along the drawn lines. Use fabric shears to cut out the panels along the marked lines. Keep your cutting lines as straight as possible. If you marked out a double-width rectangle for 2 curtain panels, cut along the center line to separate the 2 panels from each other. For fabric that frays easily, try using pinking shears instead.
Inserting the Eyelet Tape and Rings
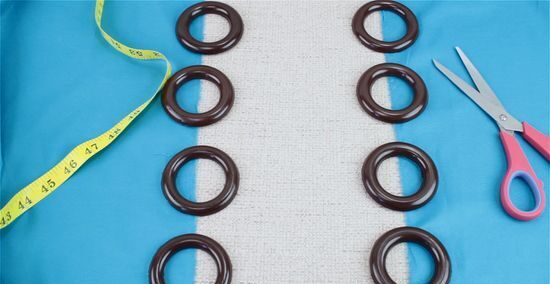
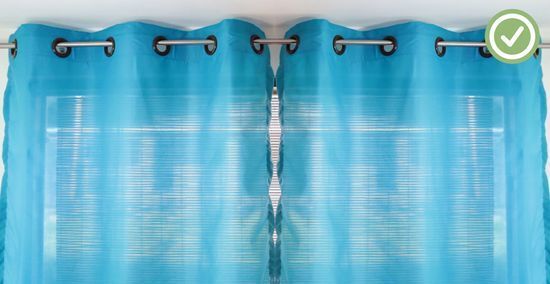
Use an even number of eyelets for your curtain panel. This is very important to remember when you’re cutting and laying out your eyelet tape! When you hang up your curtains, an even number of eyelets will allow you to arrange the pleats correctly. With an even number of eyelets, the left and right sides of the curtain panel will fold neatly back towards the wall. With an odd number of eyelets, you’ll end up with one side pointing out towards the room instead of the wall. This will expose the side seam and it won’t look very crisp.
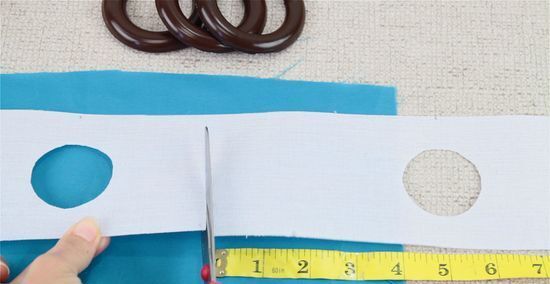
Cut a length of eyelet tape to match the width of your curtain fabric. You can do this by measuring the eyelet tape to the same width of the curtain fabric, or by laying the tape out onto your cut-out curtain fabric to eyeball the width. Once you know how much eyelet tape you need, cut 1 piece for each curtain panel. Keep in mind that you’ll need an even number of eyelets! It’s okay if the eyelet tape needs to be up to 8 in (20 cm) narrower than the curtain fabric, since 4 in (10 cm) of fabric will be used in the hems on the left and right sides. If you take measurements and determine that you need 11 eyelets, just subtract 1 and cut a length of tape containing 10 eyelets instead. You’ll eventually center the eyelet tape along the top of the curtain panel so it’s okay if the tape is slightly shorter.
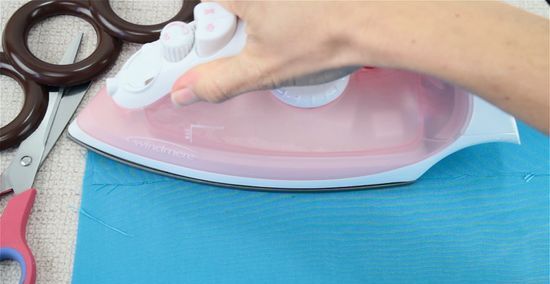
Press down the top edge of the curtain fabric by 2 in (5.1 cm). Lay out your curtain fabric with the wrong side facing you. Along the top side, fold the raw edge of your curtain fabric over towards the wrong side of the fabric. Press the fold in place with an iron.
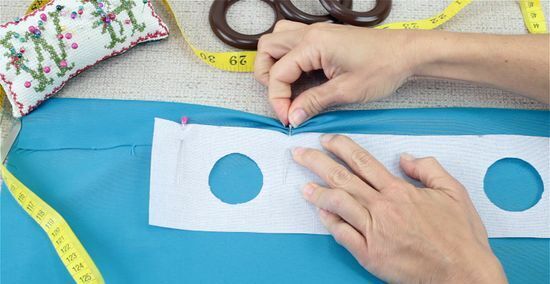
Pin the eyelet tape along the folded top edge of the curtain fabric. With the wrong side of the curtain fabric facing you, lay out your eyelet tape along the top edge of the curtain. Overlap the top of the eyelet tape so that it covers the raw edge of your curtain fabric. Insert pins through all of the layers of material to secure the top edge of the eyelet tape in place. Then smooth out the tape against the fabric and add insert pins along the bottom edge of the tape. Position the top of the eyelet so it’s 2 in (5.1 cm) below the folded edge. This will leave you with 2 in (5.1 cm) of curtain fabric sitting above the curtain rod. When centering the eyelet tape, check to make sure there’s the same amount of space between the farthest eyelets to the edge of the fabric on either side. Make sure you don’t have any eyelets touching the left and right sides of your curtain panel, since 4 in (10 cm) of fabric will be used for the hems on either side.
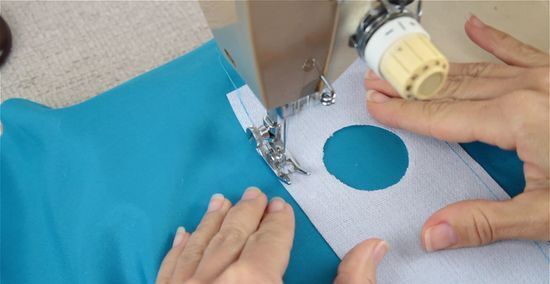
Sew the top and bottom sides of the eyelet tape onto the fabric. Take the curtain panel to your sewing machine. Run a machine straight stitch along the top edge of the eyelet tape, backstitching at the start and end of your row of stitches. Then sew along the bottom edge of the eyelet tape in the same way. Use thread that coordinates with your curtain fabric since you’ll be able to see 2 rows of stitching from the right side. By doing this, you’re simultaneously stitching down the eyelet tape and hemming the top of the curtain panel.

Trace the inside of each eyelet hole with a pencil or tailor’s chalk. Now you can mark out where the eyelet holes should go in your curtain fabric. Hold the eyelet tape smoothly down atop the curtain fabric and run a pencil or chalk along the inside of the eyelet. When you’re done, you’ll have a series of circles drawn on your fabric to correspond with each eyelet. For extra stability, place 1 pin on either side of the eyelet hole while you trace and cut out the hole. Make sure your marks are clearly visible on the wrong side of the curtain fabric.
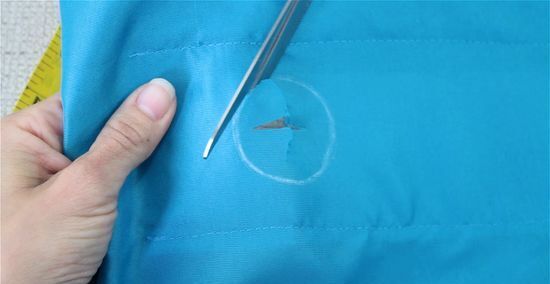
Cut out eyelet holes in the fabric along the traced lines. Use fabric shears to carefully cut out the circles you just drew. Pinch the curtain fabric to create a small fold in the center of the circle, and clip this with your scissors. Cut across to the marked line and proceed to make small cuts all the way around the circumference of the circle. Avoid cutting into the eyelet tape. Use your finger to lift up the tape if necessary. Be careful not to cut past the line or you’ll end up with holes that are too big for the eyelet rings. You may discard the circular fabric cutouts when you’re done.
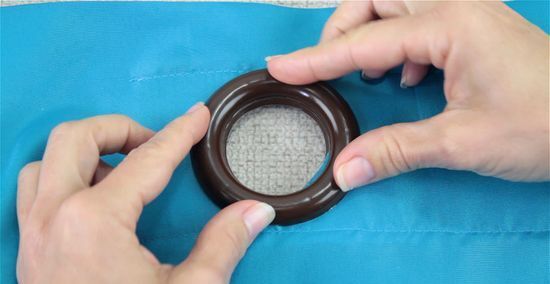
Snap the front and back eyelet pieces together around the fabric. Flip over the curtain panel so the right side of the fabric faces you. With the fabric holes and eyelet tape holes perfectly aligned, snap the eyelet front and back pieces together over the holes. This will sandwich the fabric to the tape and will conceal the raw edges around the hole. Some types of eyelet tape come with the back pieces attached, but not all do. If yours does, all you need to do is press the eyelet front pieces on until they click together. However, if your eyelet tape doesn’t come with the back pieces built-in, line up the backs to the fronts around the holes in the tape.
Hemming the Panels
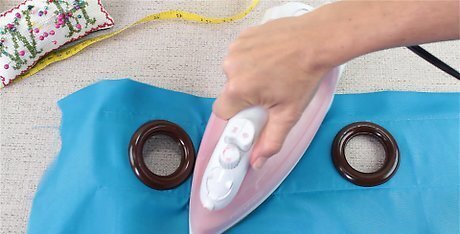
Press the top hem with an iron. Since the eyelet tape is covering up the raw edges along the top, you don’t need to do any additional stitching or folding along the top hem. Just use an iron to press along the top fold to add a crisp crease.
Create a deep double-folded hem at the bottom of the curtain panel. Fold the cut bottom edge towards the wrong side of the fabric by 2 in (5.1 cm) so that the raw edges are hidden. Use an iron to press along the fold. Then turn up the new, folded bottom edge by another 10 in (25 cm). Pin the hem in place and secure it with a machine straight stitch. The depth of this hem physically and visually adds weight to the bottom of the curtain panel. This means your curtains will hang straighter thanks to the extra weight at the bottom. Plus, they’ll look like professional, intentionally-designed curtains rather than scraps of fabric hanging up.
Hem the left and right sides of the curtain panel with a double-folded hem. Working on 1 side at a time, turn the raw edge towards the wrong side of the fabric by 2 in (5.1 cm). Then fold it over another 2 in (5.1 cm) so the raw edges are hidden. Use pins to hold the double-folded hem in place and then sew down each side hem using a machine straight stitch. Use an iron to press the folds before stitching to achieve a crisper finish.


Comments
0 comment