

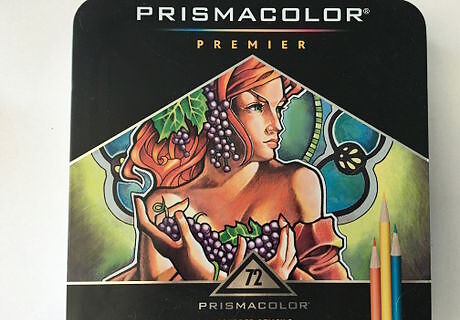
Choose what brand of colored pencils you will use before you start drawing. Any brand is ok to use, but using smoother pencils will help with blending. An example of a good brand is Prismacolor Premier, depicted above.
Find a reference photo. It will be much easier to pick out the correct colors if you have a photo to look at, as well as help with the shape and shading. You can use a picture of your own eye or one from the internet. If you're having difficulty drawing the eye shape, look at drawing books and do a lot of practicing. With time, you'll be able to draw it.
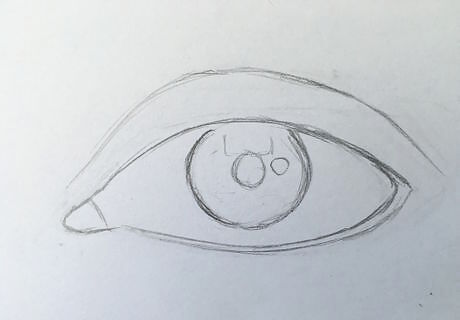
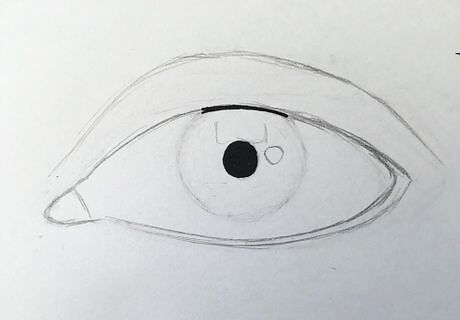
Draw the outline for your eye using a regular pencil. Pay attention to the size of the tear duct and waterline, as this will be important for making it look realistic. Also notice areas where there are glared or reflective spots; you should draw these areas out so you know to avoid coloring inside them. If you plan to go back over light areas afterwards with something such as a white gel pen, only draw out the largest light spots.
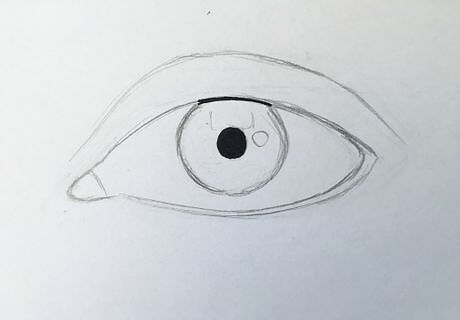
Using a black marker or pen, color in the pupil black and any other very dark areas such as the top of the iris. Do not draw the eyelashes yet, this will be done later.
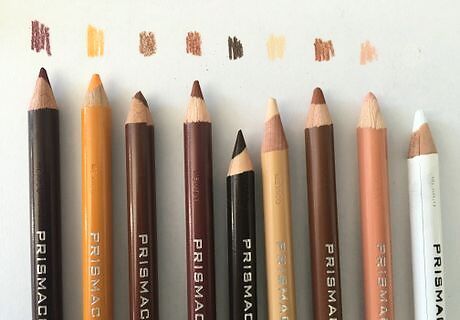
Pick out which colors you plan to use. Be sure to test them out before using them to make sure they match your reference photo. Having a white pencil will help you blend over areas if you make a mistake. Don't sharpen the pencils too much, as the tip is more likely to break if it is at a very sharp point. When you're starting, it's usually a good idea to have a color wheel with the different tones and colors so you can mix and match them until you get to the desired colors for the eye.
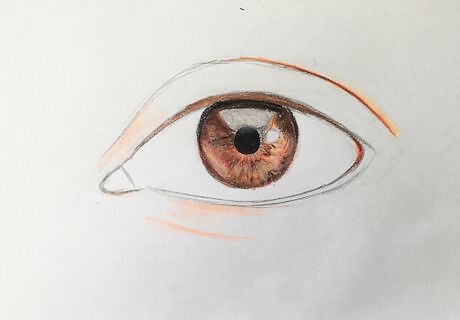
Erase the outline of the iris so it is less visible. This is so the graphite of the pencil doesn't mix with your colors.
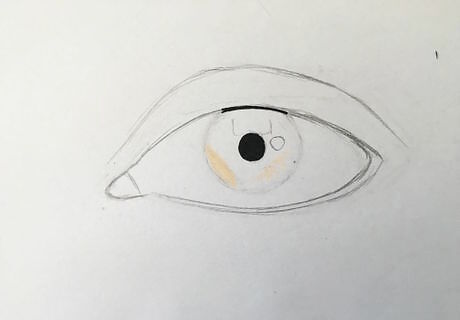
Using your lightest chosen color, fill in areas with the most light in the photo. This should not be the areas you drew out where there was glare on the eye.
Continue to fill in the lightest areas, adding in some darker areas of detail. Remember it is much easier to make colors darker than lighter.
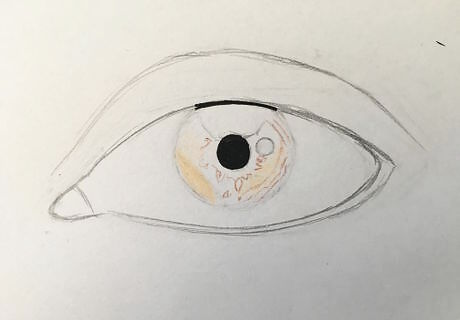
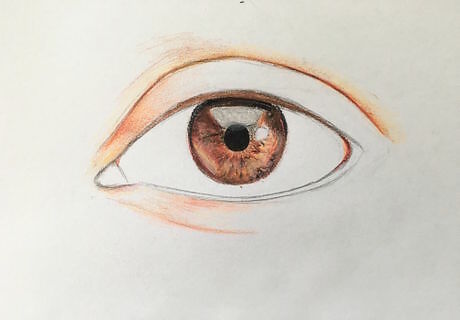
Using a darker color, outline the outside of the iris.
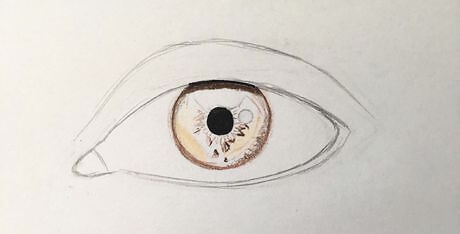
Color in the darkest areas of the iris. The top of the iris will likely be one of these spots, as well as some of the details in the iris.
If any of the glare areas aren't perfectly white in your photo, color them the correct color.
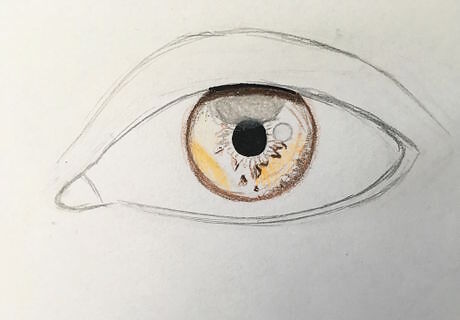
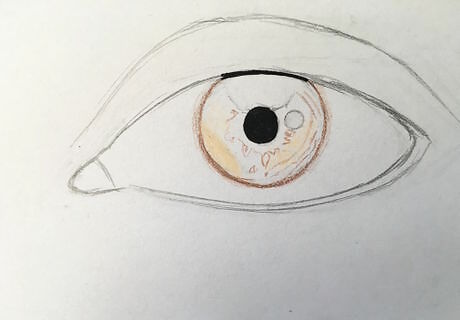
Begin adding in more intense color if need be, being careful not to go overboard. Adding more color later is easier than taking it out.
Using a black pencil, lightly go over the areas of the iris with texture. This will help you reference where the deeper areas of the iris are later.
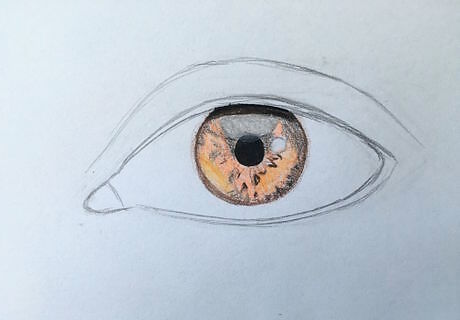
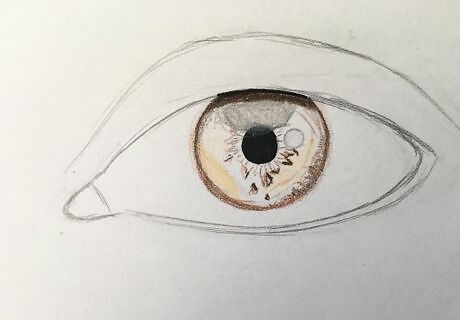
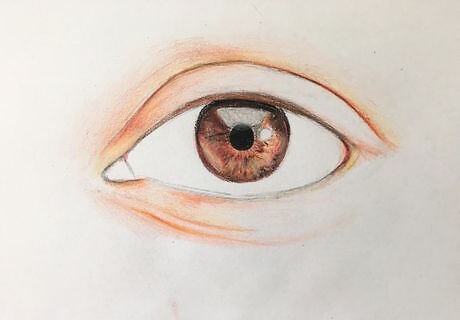
Layer on the base color for the iris. This color will be the color that appears most prominently in the iris, such as orange, light brown, or blue. Try to avoid picking a dark color.
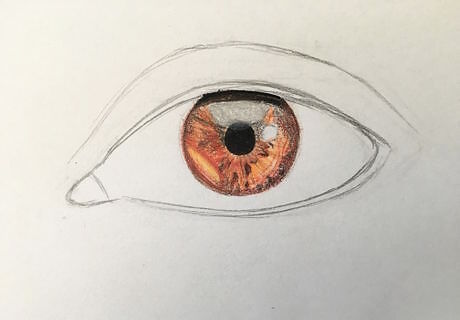
Layer on more intense color to complement your base color. In the case of orange, it could be a brighter orange or even a red if used with caution. Different hues of each color will give you different combinations and hues. Not every orange is made equal, for example. Try out different mixes until you get the desired color.
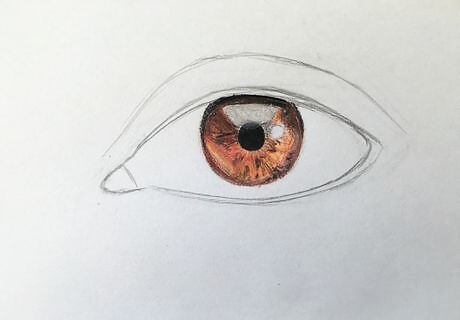
Add more shading around the iris, concentrating the majority at the top.
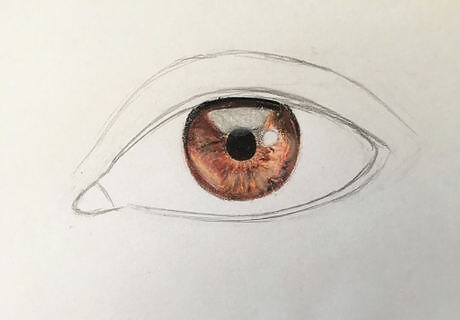
Add white to the middle of the iris in a ring around the pupil. This will help it look more 3D.
Using a medium toned color, go over the areas of the skin that will have the most shadow.
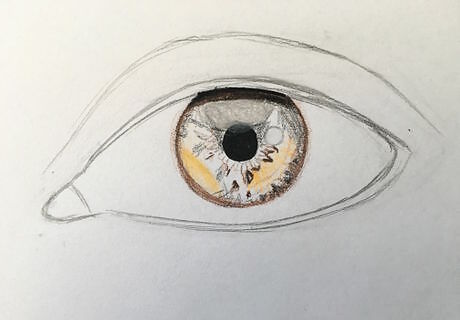
Continue layering colors, getting darker as you go.
Add a dark color into the crease of the eye and other parts of the drawing that have the most shadow.
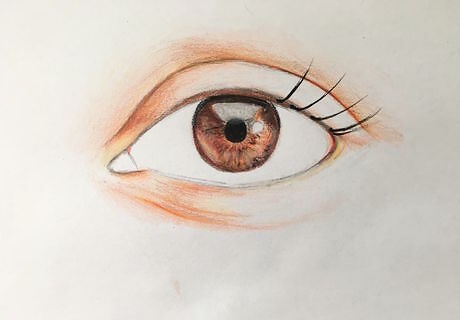
Begin adding eyelashes. It is easiest with a black marker or pen, however you can still use a colored pencil. Make sure they curve and don't go straight up. Look at your reference photo to see how they should curve under the waterline.
Finish the upper eyelashes, being sure they go in the correct direction for the angle of the picture and that they vary in length.
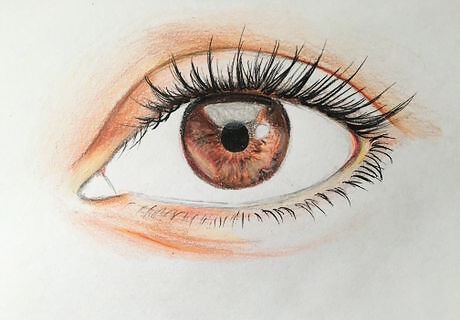
Add the lower lash line, being careful to put the lashes on the edge of the waterline.
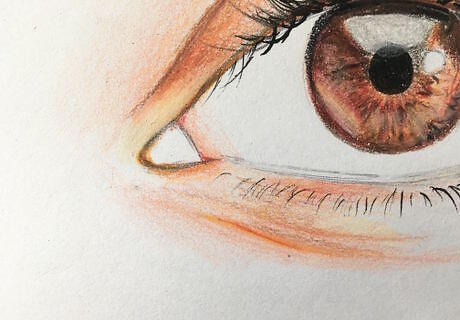
Start to shade the inner corner of the whites of the eye. In a photo with cooler light, you will use a grey. If the photo has warmer light you will use a more pinkish tone.
Color in the tear duct, noticing any lines and shadows in the reference photo that will help you make it look more realistic.
Extend the shading of the whites of the eye. You can also add in reflections or shadows of the eyelashes.
Using a dark red or purple, very lightly draw veins in the eye. Don't make them too visible or it will make the eye less realistic. Pay attention to where they are most visible in your reference photo.
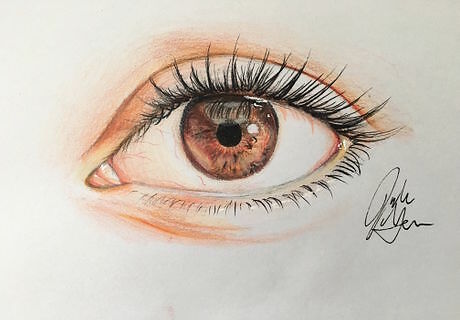
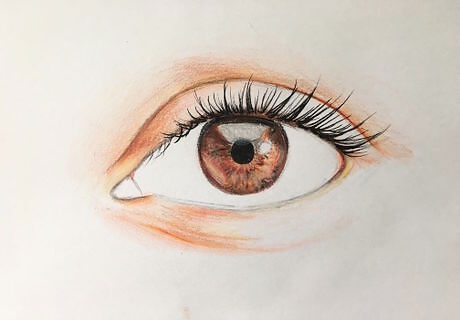
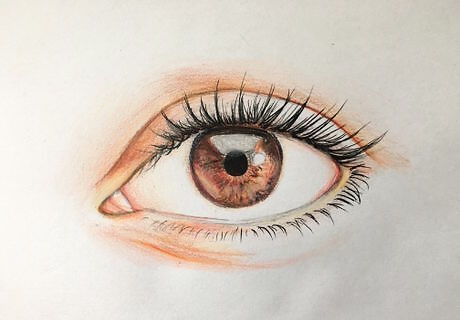
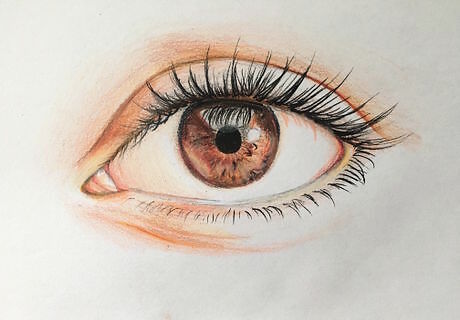
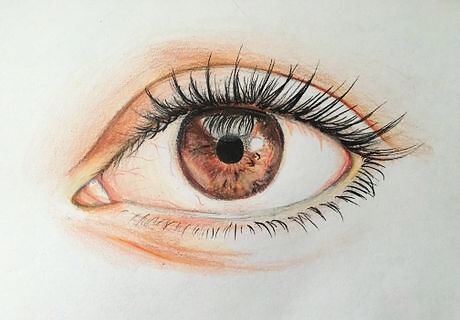
Add in any finishing touches such as extra white areas and your signature.


Comments
0 comment