
Figuring Your Measurements
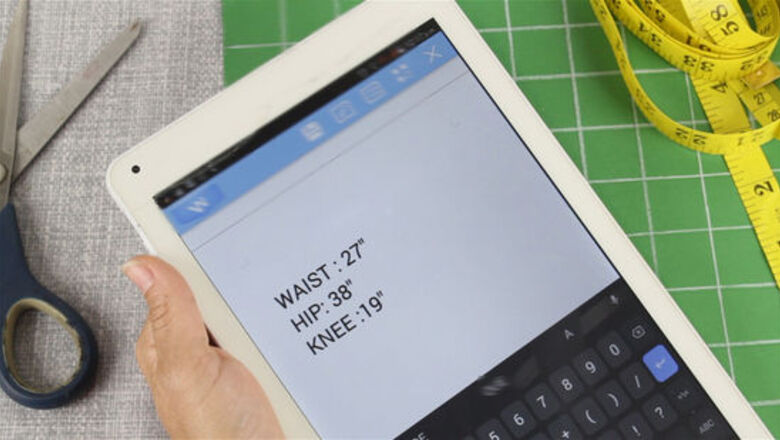
Measure your waist and write down the result. Stand up straight and breathe normally before you wrap a measuring tape around your waist. If you're not sure where your waist is, feel above your hips and below your ribs to find it. Then, write down the measurement. Ensure that the measuring tape lays flat around your waist. If it's twisted, your waist measurement will be off. The waist is where the top of your 6-piece skirt will sit.
Wrap the measuring tape around your hips and write the measurement. Move the measuring tape down so it circles around the widest part of your hips. It's important to write the measurement for the widest part or your skirt won't fit properly. Keep your feet together when you measure your hips or they'll be spread too far apart.
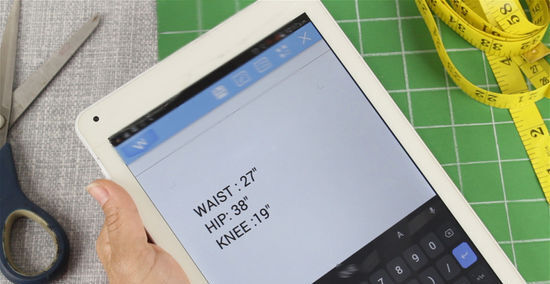
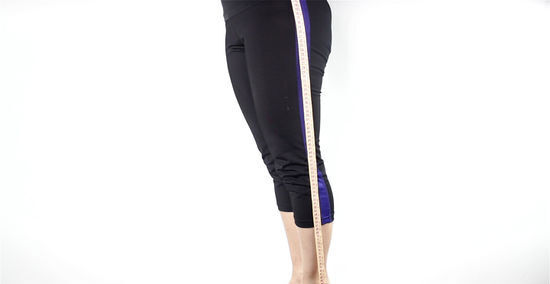
Measure from the waist to the knees. Since the 6-piece skirt will flare out at the bottom, you need to measure from the waist to the knees. Measure from the top of the waist to the middle of your knee caps and write this measurement down.
Decide how long you want the entire skirt to be. Next, hold the measuring tape at your waist and measure the total distance to the floor. If you want your skirt to be shorter, just write down your desired length.Tip: You may want to ask someone to help you with this measurement since it can be hard to stand straight while measuring.
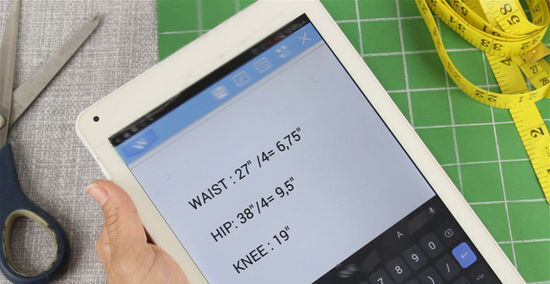
Divide the waist and hip measurements by 4. You'll need to adjust the waist and hip measurements in order to find the width for your skirt. Take each measurement and divide by 4. Then, write down the new measurement. For example, if the waist was 24 inches (61 cm), it's now 6 inches (15 cm). If your hips measured 34 inches (86 cm), the new measurement will be 8 ⁄2 inches (22 cm).
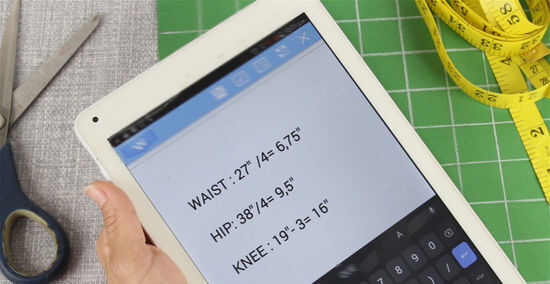
Subtract 3 inches (7.6 cm) from the waist to knee line measurement. In order to move easily in your 6-piece skirt, you also need to adjust the waist to knee measurement. Subtract 3 inches (7.6 cm) and write the new measurement. For example, if your original measurement was 19 inches (48 cm), subtract 3 inches (7.6 cm) to get 16 inches (41 cm).
Marking the Measurements on Paper
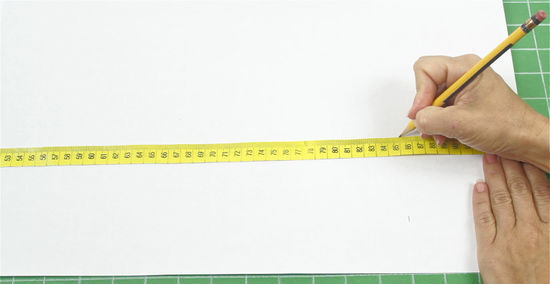
Spread pattern paper on a flat surface and lay a yardstick along the side. Unroll pattern paper on a table and cut it so it's as long as your skirt will be. For example, if your length measurement is 34 inches (86 cm), the pattern paper should be at least 34 inches (86 cm) long. Then, place a yardstick down the long side of the paper. If you don't have pattern paper, use lightweight butcher paper. You'll use the yardstick to mark your measurements on the side of the pattern paper.
Make a mark ⁄2 inch (1.3 cm) from the top of the paper. You'll be making the pattern for the skirt directly on the paper, so the top of the paper will be the top of the skirt. Mark ⁄2 inch (1.3 cm) from the top which will be the seam allowance for the waist. If it helps you keep track of the lines, you can write Waistline at the top of the paper.
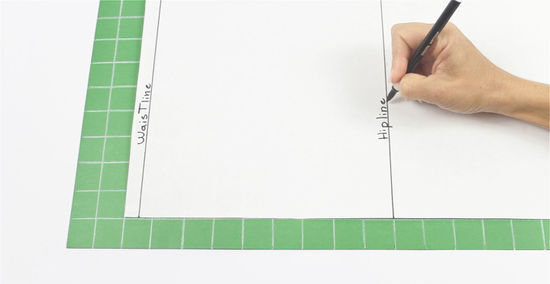
Mark the hip measurement on the paper. Take your adjusted hip measurement and measure this distance down from the waistline mark you made. For example, measure 8 ⁄2 inches (22 cm) from the top mark and make a new mark that says Hipline.Did You Know? A small skirt usually has an adjusted hip measurement of 7 to 8 inches (18 to 20 cm), medium is between 8 and 9 inches (20 and 23 cm), large is between 9 and 10 inches (23 and 25 cm), and xl is between 10 and 11 inches (25 and 28 cm).
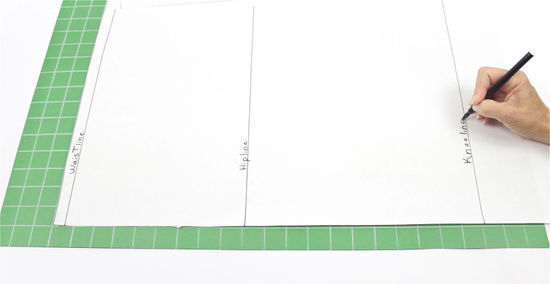
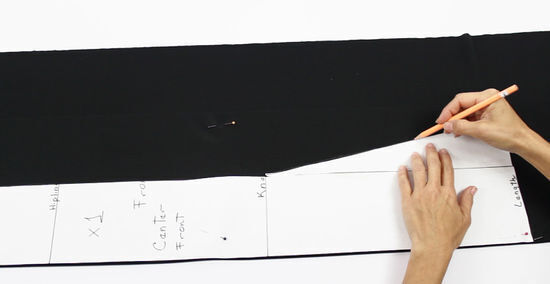
Create a mark for the knee line. Use your adjusted knee line measurement and measure down from the waistline mark. For example, you may measure from the waistline down 16 inches (41 cm) to find the knee line. Remember to write Knee Line next to the mark so you don't forget which measurement the mark is for.
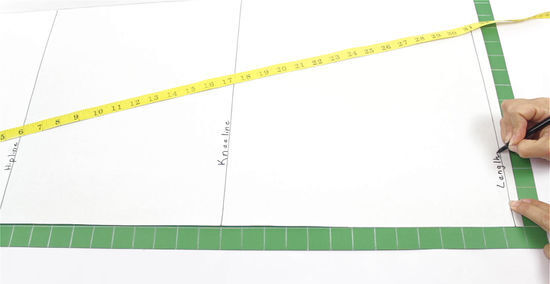
Make a mark for the total length of the skirt on your paper. Refer back to the measurement you took for the length of the skirt from the waist down to the bottom. Measure this distance from the top waistline mark and make a new mark at the bottom. You can label this mark Length.
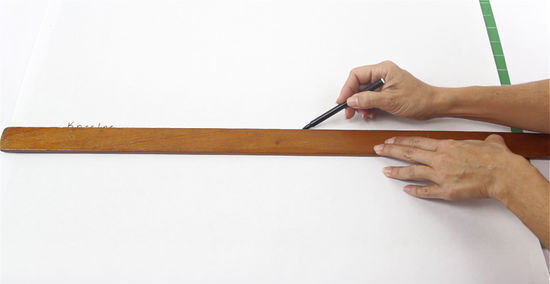
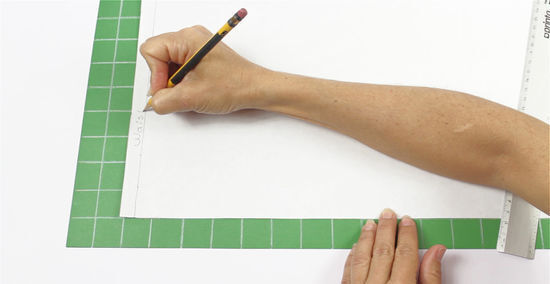
Draw a horizontal line from each mark across the pattern paper. Lay a yardstick or ruler at each mark you made and use a pencil or pen to draw a long horizontal line for each. To make this easier, you could use an L-ruler.
Drafting a Pattern
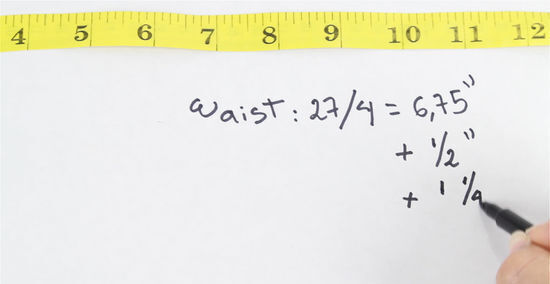
Make a mark at the waistline and hipline quarter measurements. Place a ruler parallel to the horizontal line you just made for each measurement. Then, make a mark at the quarter measurement for the waist and the hip.Tip: You can make 2 more seam allowance marks on the waistline that are ⁄2 inch (1.3 cm) and 1 ⁄4 inches (3.2 cm) down from this mark. For the hipline, make another measurement that's ⁄4 inch (1.9 cm) from the quarter mark. For example, if the adjusted waist measurement was 6 inches (15 cm), make a mark on the horizontal line at this point. Your adjusted hipline measurement might be 8 ⁄2 inches (22 cm).
Mark the knee line and length line. To give your skirt room for you to move, subtract 2 inches (5.1 cm) from your adjusted knee line and measure this mark on the horizontal line. Then, add a few inches to the horizontal length line to give your skirt its flare. For example, you might add 3 inches (7.6 cm) if you'd like the skirt to have a noticeable flare.
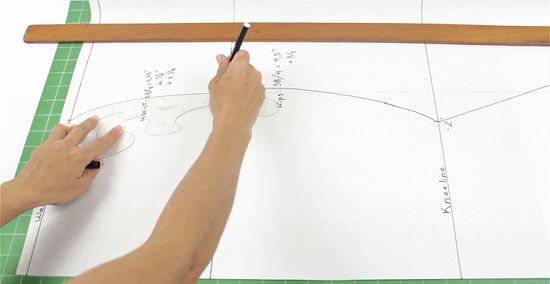
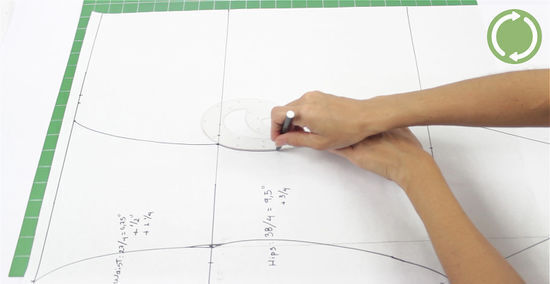
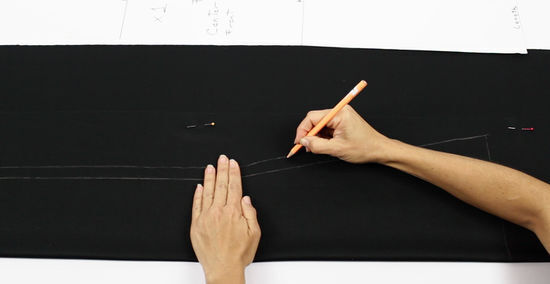
Connect all of the marks you made using a ruler or pattern master. Lay a ruler from the length and knee line marks you just made and draw a straight, diagonal line to connect them. To make smooth curves on your pattern, use a pattern master to draw from the knee line mark through the hip line mark up to the waistline mark. You can buy the curved pattern master from most craft supply stores. You should now see a curve from the waist to the knee and a diagonal line flaring to the length line.
Label this piece the front and make a back piece. To keep track of your pattern once you cut it out, write Front on the lower panel of the piece. Then, draw another piece with the same measurements, but make them curve and flare towards the middle of your pattern paper.Tip: If you aren't trying to conserve paper, you can use the front piece as a template and cut out the back piece on another sheet of pattern paper.
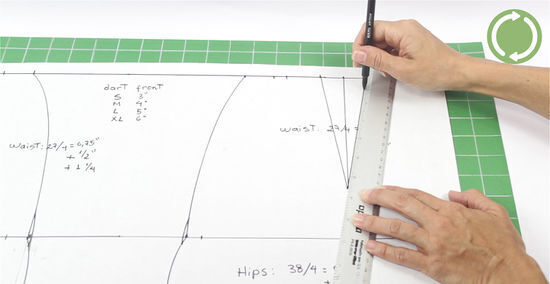
Draw a dart in the center of the waistline. Find the middle of your waistline measurement and draw a triangular dart so the point is closer to the hip line. The size of the dart is up to you, but usually, you'll want:Tip: Add an extra 2 inches (5.1 cm) to the length of the back dart. Small: a 3 inches (7.6 cm) dart Medium: a 4 inches (10 cm) dart Large: a 5 inches (13 cm) dart Extra-large: a 6 inches (15 cm) dart
Cutting the Patterns and Your Fabric

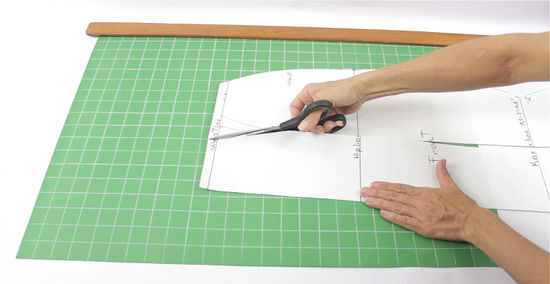
Cut out both panels. Take sharp scissors and carefully cut out the front panel, starting at the bottom and up the diagonal line. Then, cut around the curve to the top of the paper. You'll also need to cut out the back panel. Since you'll be cutting the fabric on the fold, these 2 panels will actually create 4 panels of your 6-piece skirt.
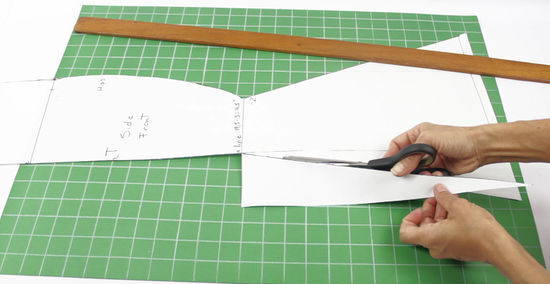
Cut each panel in half vertically and cut out the darts. Start at the base of the panel and cut a straight line through the center so you're cutting up towards the dart. When you reach the bottom point of the dart, cut a V to remove the dart completely. Repeat this for the other panel. If your pattern paper was longer than the length you want your skirt to be, trim off the excess paper at the bottom.
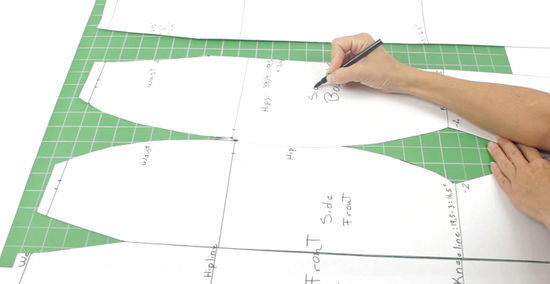
Label the 4 pieces. It's easy to get the pieces of your pattern mixed around, so write on each piece in order to keep track of it. For example, label them:Tip: The side pieces flare diagonally at the bottom. Center back Side back Side front Center front
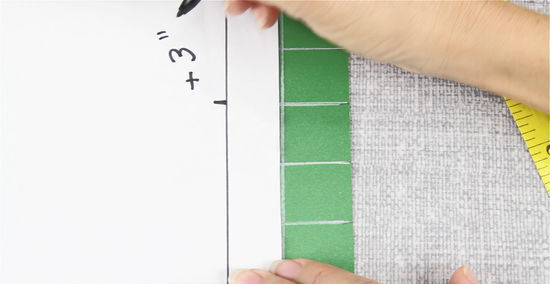
Add a 3 in (7.6 cm) diagonal flare to the bottom of each piece. Tape a 3 in (7.6 cm) wide strip of pattern paper to each panel. The paper should connect from the knee line to the length line. Then, draw a diagonal line from the bottom of the extended length line to the point of the knee line. You can now trim off the excess paper from the side of each flare.
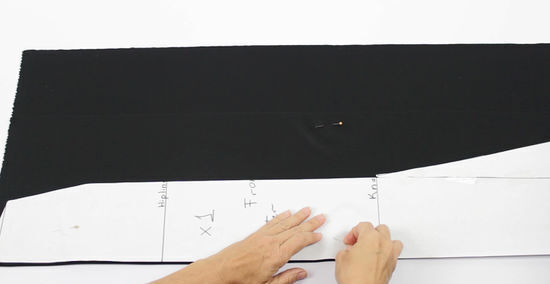
Fold your fabric and lay a panel along the fold. Spread the fabric for your skirt on the work surface and fold it over so the wrong side of the fabric faces up. Then, lay 1 of the panels on the fabric so the straight side matches the fold. You can readjust the fabric's width once you've laid the pattern piece on it. You'll be doing this for each of the pattern pieces you made.
Trace the fabric along the pattern panel. Take a piece of tailor's chalk and run it on the fabric so you trace the outline of your panel and can remove it. Do this for every panel you make. If the fabric shifts around a lot, you can pin the sides in place so your pattern won't move as you trace.
Draw a ⁄2 inch (1.3 cm) seam allowance around the line you traced. Now you'll need to add space for a seam allowance, so use the tailor's chalk to draw an identical pattern that's ⁄2 inch (1.3 cm) from the outline you just made. If you'd like to hem the bottom of the skirt, add a 1 inch (2.5 cm) seam allowance.

Cut along the seam allowance lines to create the pieces for your skirt. Remove the paper patterns from the fabric and carefully cut along the seam allowance lines. Remember that you shouldn't cut along the fold. Instead, you'll open up the folded fabric to see the entire piece. Now you can pin the pieces for sewing your skirt. Since this is a big sewing project, you should use a sewing machine to sew the skirt panels together.


Comments
0 comment