
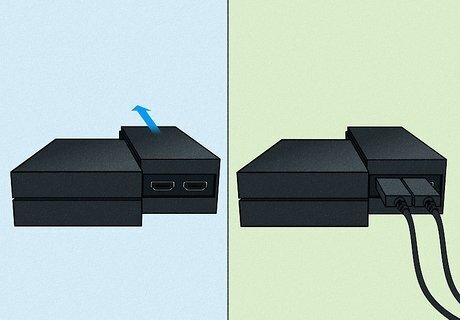
- Connect your processor unit to both your TV and PS4 using two HDMI cables.
- Plug your PlayStation camera into your PS4.
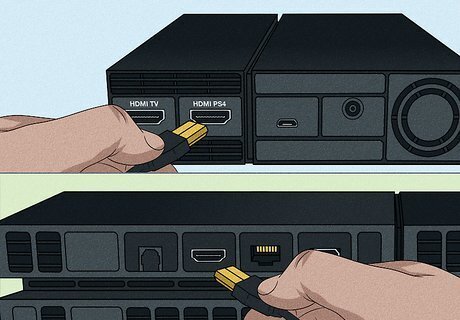
- Connect one USB cable to the back of the processor unit and one to the front of your console.
- The exact final connection instructions will depend on which model PS VR you have.
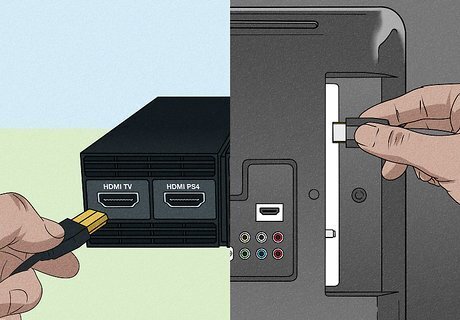
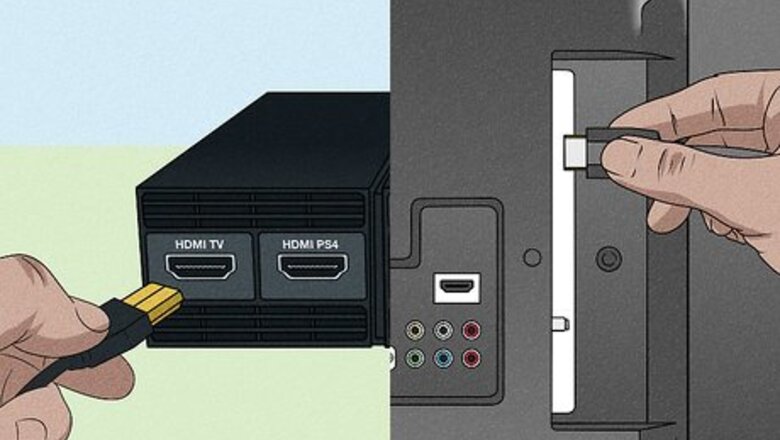
Plug your processor unit into your TV with an HDMI cable. If your PlayStation is connected to your TV via HDMI, unplug it and use that cable to connect the TV to the VR's processor unit. The HDMI port looks like a trapezoid that should also be labeled on both the processor unit (HDMI TV) and the TV.

Connect your PlayStation Camera to your PS4 console. Using the cable that came with the camera, plug in the camera to the console at the ideal height of 4'7" from the floor. As of this step, your PS4 is disconnected from your TV, but is connected to the PlayStation Camera. The VR's processor unit is connected via HDMI cable to your TV.
Plug your processor unit into your PS4 using another HDMI cable. Make sure the HDMI cable is at least a 1.4 to ensure data can pass through unhindered. The HDMI port looks like a trapezoid that should also be labeled on both the processor unit (HDMI PS4) and the console.
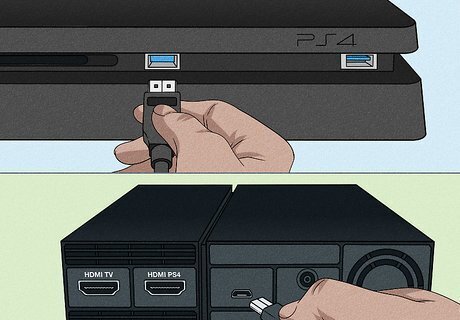
Plug in a USB cable in the rear of your processor unit and in the front of your console. Once you have this USB cable setup, you'll have 2 connections between your PS4 and the VR's processor unit.

Connect the AC power cord from the processor unit and a power supply (like a wall socket). After this step, you should have your VR processor unit connected to power as well as two connections to your PS4 and one connection to your TV; the PS4 should be connected to a PlayStation camera, a power source, and the VR processing unit.
Slide the processor unit connection cover back and plug in the VR connection cable. This cord has two ends that you'll insert into the processor unit once you line up the symbols on the plugs to the symbols on the ports. Sliding the unit back will reveal the ports; if you don't slide this back, you won't be able to see or use them. You can slide the cover back when you're done to protect the ports if you want to. If you have the CUH-ZVR2, the cover is solid and won't slide, but the ports with the symbols you have to match with the plugs are easily visible.

Connect the VR headset to the connection cable (CUH-ZVR1 only). The connection cable's end with the PS logo will connect to the VR headset. If you have the CUH-ZVR2, it's wireless and does not have these cables, so you can skip this step.

Turn on your TV and console. You can use one of the controllers to turn on the PS4.
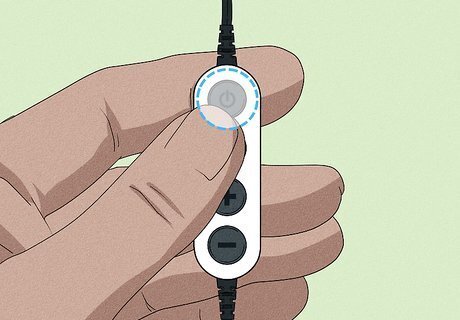
Press the POWER button. This is either on the in-line remote on the VR headset connection cable or on the back of your headset and will turn on the VR set. The lights on the back of the headset should glow blue to indicate that they are connected properly.

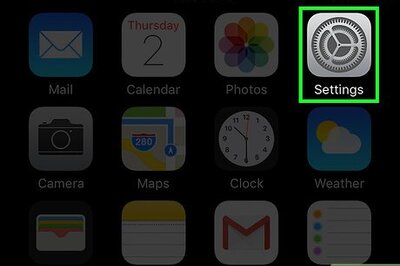
Follow the on-screen instructions to update any software (if prompted) and use the VR headset. If you're not prompted to update, you can continue to follow the on-screen prompts to use the VR headset. If you need to adjust the camera settings, go to Settings > Devices > PlayStation VR > Adjust PS Camera. To change your headset settings, go to Settings > Devices > PlayStation VR > Check How to Put On VR Headset.


Comments
0 comment