
Cleaning the Aerator
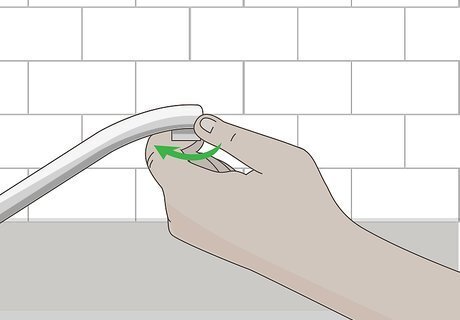
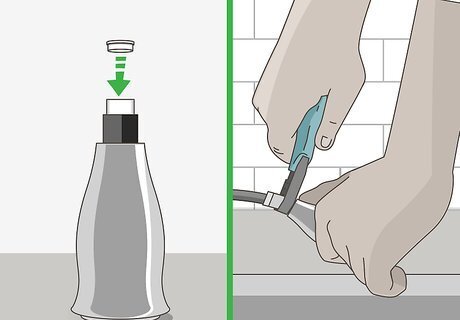
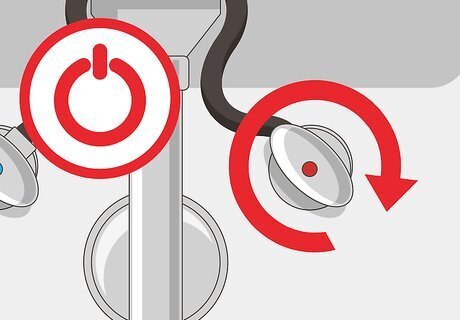
Unscrew the aerator from the end of your faucet with channel lock pliers. The aerator looks like a cylindrical piece with mesh at the end of your faucet, and it is used to filter out fine sediment from your water. Tighten channel lock pliers around the aerator and twist it counterclockwise to loosen it. Once it’s loose, you should be able to unscrew it by hand. If you’re worried about scratching the metal on your aerator, put a rag between it and the pliers. EXPERT TIP James Schuelke James Schuelke Professional Plumber James Schuelke, along with his twin brother David, is the co-owner of the Twin Home Experts, a licensed plumbing, leak detection, and mold inspection company based in Los Angeles, California. James has over 32 years of home service and business plumbing experience and has expanded the Twin Home Experts to Phoenix, Arizona and the Pacific Northwest. James Schuelke James Schuelke Professional Plumber Not sure where the problem is? According to professional plumber James Schuelke: "Turn on both the hot and cold water. If they're both low, there's debris clogging the aerator, or the very tip of the faucet where the water comes out. If only one or the other is low, the issue will be that either the piping needs to be replaced or there's debris caught in the hot or cold stem of the faucet that needs to be flushed out."
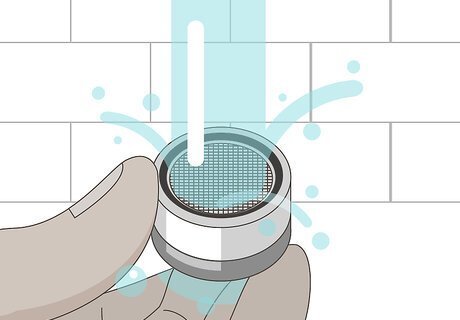
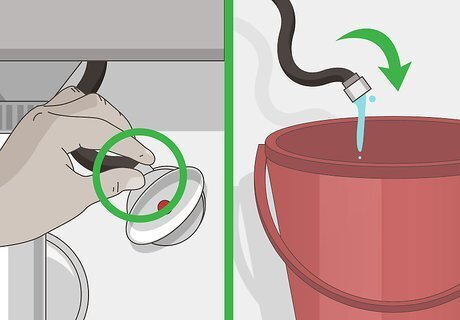
Rinse out any debris inside the aerator. You may notice sediment or debris inside the mesh of your aerator. Turn the aerator upside down and run it underneath warm water to get rid of any material that’s still stuck inside. If the debris isn’t rinsing out on its own, try using a toothbrush to gently scrape it out. Make sure your sink is plugged so you don’t lose any pieces of your aerator. Only use a toothbrush meant for cleaning purposes.
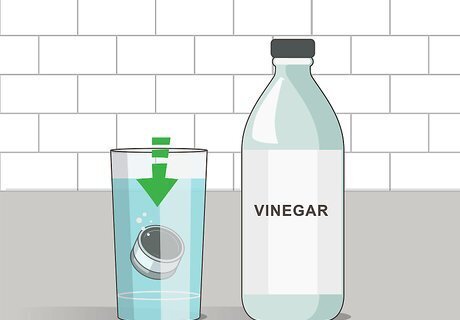
Soak the aerator in white vinegar overnight. Even if you rinse your aerator, there may be built-up lime and debris inside it. Fill a glass with enough vinegar to fully submerge the aerator. Leave the aerator in the vinegar overnight so the lime and debris can break apart. When you take the aerator out, rinse it with clean water. You can also use a lime cleaner like Formula 409.
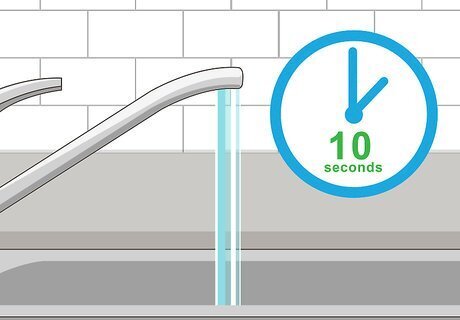
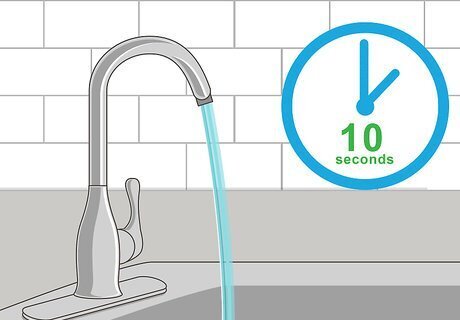
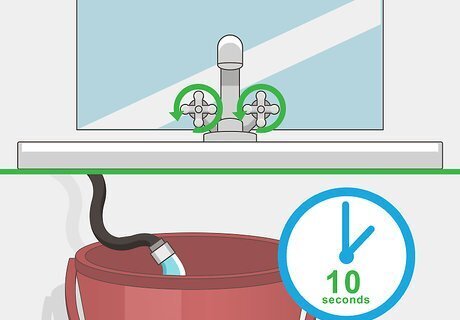
Run the faucet for 10 seconds to clear any debris. Before you reattach your aerator, turn on the faucet to rinse out any sediment that’s leftover inside of it. This ensures that debris won’t catch in your aerator right after you’ve cleaned it.
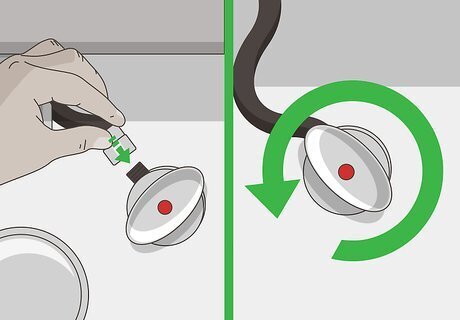
Screw the aerator back on to test your faucet. Turn the aerator clockwise on your faucet by hand. Keep turning the aerator by hand until you have a tight seal. Use your channel lock pliers again to make sure the aerator is on as tight as it can go. Turn on your faucet to see if the water pressure changed. If the aerator still gives you trouble, try buying another one from your local hardware store. Make sure it fits the model faucet that you have.
Cleaning the Filter in a Pull-Out Faucet
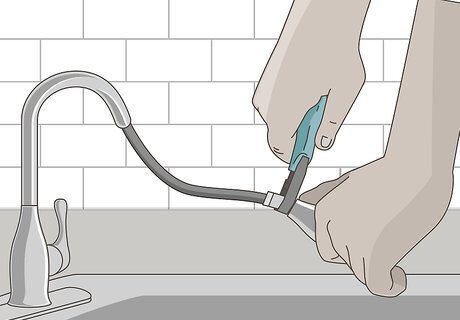
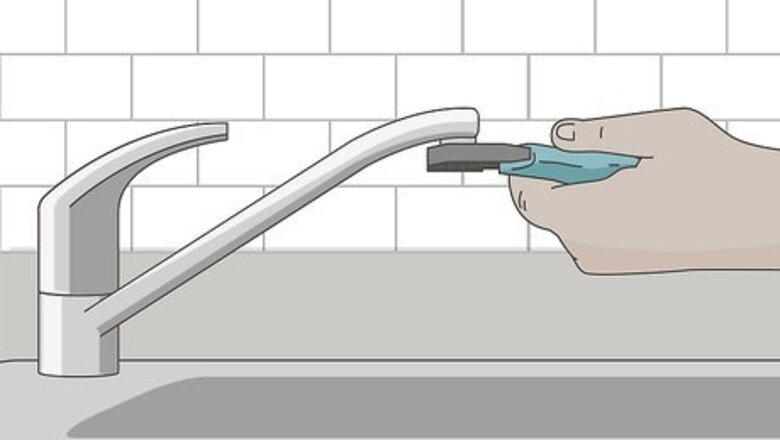
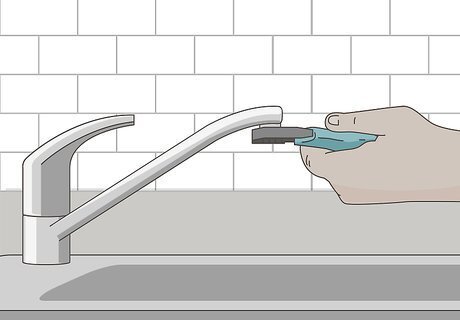
Unscrew the handle of your faucet with channel lock pliers. If your sink has a faucet with a hose that you can remove from the base, pull it out so you can access the bottom of the handle. Grip the nut at the bottom of your handle with channel lock pliers and rotate it counterclockwise to loosen it. When it’s loose, the handle should easily come apart.Tip: Pull the hose out far enough so it doesn’t fall back through the base of the faucet or else you’ll have to feed it back up through your sink again.
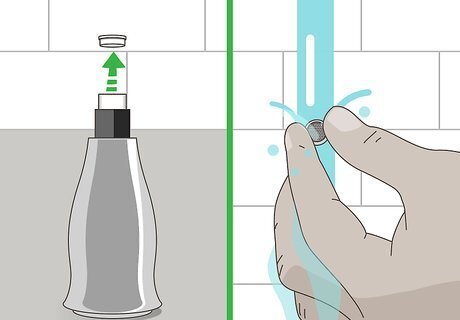
Pull out the filter and rinse it. The filter is located at the base of the handle and looks like a cylinder with metal mesh layers. Pull the filter out from the handle by hand. Run the filter underneath warm water to rinse out any of the debris or buildup inside it. Use a stiff-bristled toothbrush if sediment is stuck on the mesh. You can also remove the aerator from the handle to clean it as well.
Run the faucet for 10 seconds to clear out any debris. Before you reattach the handle, run warm water through your faucet. This can help get rid of any sediment that's loose inside the faucet so it doesn’t catch in your filter.
Put the filter back and screw the handle onto the supply hose. Set the filter back inside the base of the handle the same direction it was facing before. Hold the handle up to the end of the hose so you can easily screw it back together. Tighten the nut by hand as far as you can before using your channel lock pliers to seal it. If your faucet still has low water pressure, then you may have a problem with your supply line or pipes.
Checking the Shut-Off Valves

Locate the valves underneath your sink. The water valves control how much water goes through your pipes and can be found underneath your sink. You should have 2 valves made of plastic or metal attached to your faucet to control hot and cold water separately.
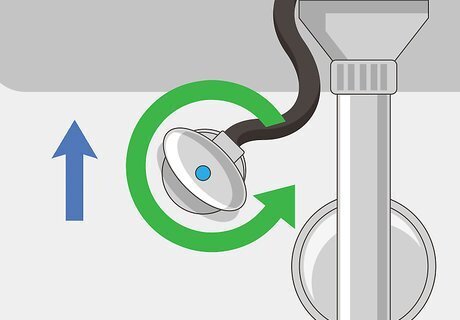
Turn the valves counterclockwise to open them and increase water pressure. If you have low water pressure, make sure the valves are in the open position. Rotate each of the valves counterclockwise until the arrow is pointing in the direction of the pipes. This means the water valve is fully opened and you should get the maximum amount of pressure. Make sure both of the valves are all the way on so you can control the water temperature easier.
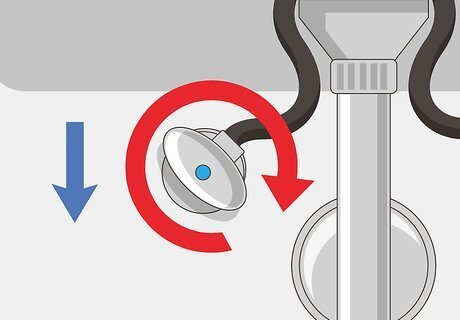
Rotate the valves clockwise to reduce water pressure. If you have water pressure that’s too strong, turn the valves clockwise by a quarter rotation to decrease the pressure. If you turn 1 of the valves, make sure to turn the other valve the same amount. Try turning the valves completely off and back on again to see if it fixes the problem on its own.
Flushing the Supply Lines
Turn off the hot water valve. Locate the valve underneath your sink that controls the hot water. Rotate the valve clockwise until it’s horizontal with the pipe it’s connected to. This will turn off hot water to your faucet. Put a towel underneath your sink in case any water spills.Tip: If you aren’t sure which valve controls the hot or cold water, try turning one off and feel the water temperature from your faucet. If the water stays cold, then you’ve turned off the right valve.
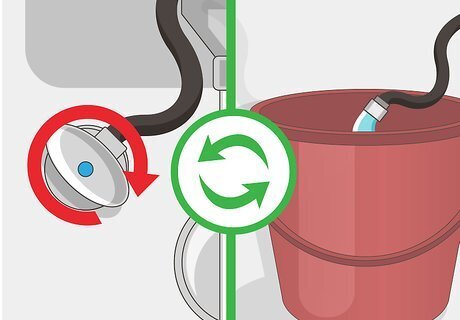
Unscrew the supply line from the hot water valve and hold it over a bucket. Use channel lock pliers or your fingers to rotate the nut above the valve counterclockwise. Loosen the nut until you can disconnect the supply line from the valve. Hold the end of the supply line over a bucket so it doesn’t spill any water. Clean underneath your sink so you can easily fit a bucket directly under the supply line.
Run your water for 10 seconds to clear the supply line. Turn your faucet all the way on so it’s at a neutral temperature. The cold water will go up through the faucet and out the hot water supply line. Let the water run for 10 seconds before turning it off again. If your faucet has 2 handles to control the water temperature, turn them both the same amount.
Reattach the supply line and turn the valve on. Hold the supply line over the valve and spin the nut clockwise. Keep tightening the nut by hand until you can’t rotate it anymore. Use your channel lock pliers to secure the supply line in place and prevent any leaks. Turn the valve counterclockwise into the open position.
Repeat the process with the cold water valve. Turn off the cold water valve and disconnect the supply line. Make sure the supply line feeds into the bucket so you don’t spill any water. Turn your water on for 10 seconds to flush the line. Attach the supply line back to the valve with your pliers and turn the valve on. Once both lines are flushed, the water pressure should be back to normal.


Comments
0 comment