views
Locating the Problem
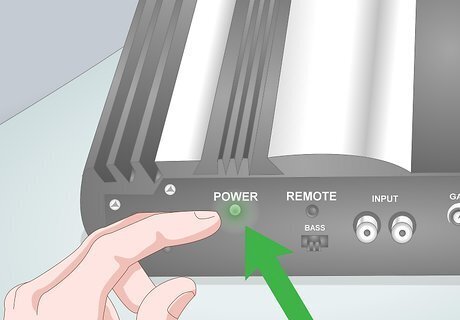
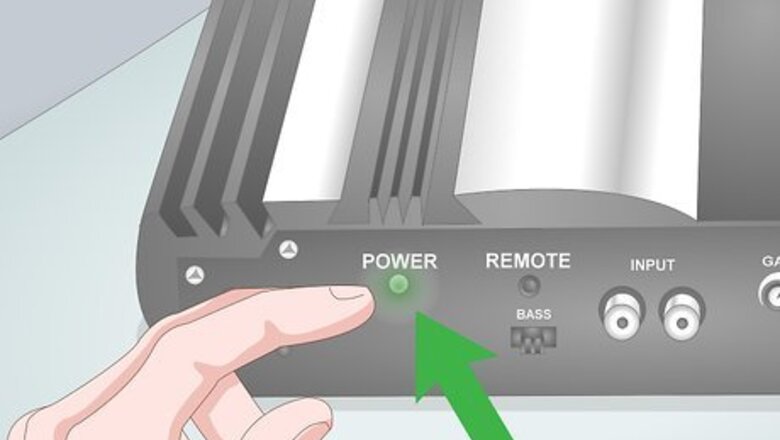
Look for lights indicating that the amp is turned on. Activate the amp like you normally would and note what happens. No matter what type of amp you have, something is supposed to change when you hit the on switch and turn up the volume. A lot of amps have power lights that activate when the amp is live. Also, listen for any noises the amp makes, since that could also help you determine the source of the problem. Car amps, for example, often have a green power LED light and a red “protect” light. The protect light often means a blown fuse, so you know to check the wiring when you see it.
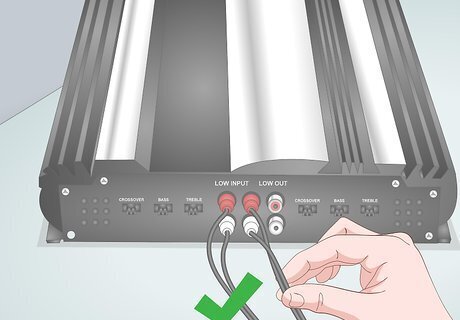
Check the wiring to make sure the amp is plugged in. Go over all the wires, double-checking that they are plugged in correctly. If the amp doesn’t activate at all when you turn it on, the problem could have to do with the power supply. Sometimes you have to contend with a loose cord, which is a very easy fix to make. Wiggle the wires, testing them to see if they are in place and cause the amp to activate at all. Car amps, for instance, often have a red power wire and a black ground wire. It also has a blue remote turn-on wire that powers the amp when you turn on your vehicle. If your amp plugs into the wall, test the power cord. Also, make sure your guitar, speakers, subwoofers, and other devices are connected to the amp if you’re using them.
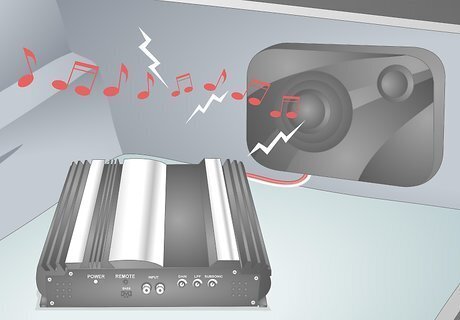
Test the sound quality on the amp to pick up unusual noises. So your amp turns on, which is a plus, but it doesn’t sound right. Sound distortion can be caused by a few different issues depending on what kind of amp you have. It is often from loose wires, but it could also be your overall setup. Sometimes replacing the wires, fixing the amp’s components, or changing your setup suddenly makes everything better. If you don’t hear any sound but know your amp is on, the wiring is likely the culprit. Moving the wires may give you a burst of sound. You may also need to detach speakers or other devices overpowering the amp.
Fixing a Blown Fuse
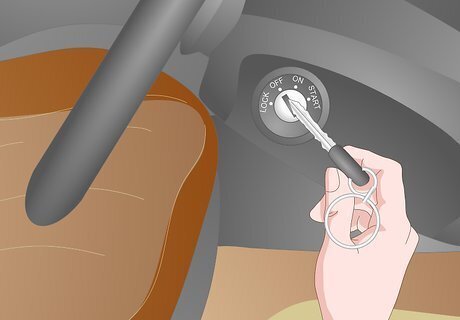
Turn off the power supply before handling the fuse. Make sure you deactivate the amp first. If you’re troubleshooting a car amp, turn off the car’s engine and remove the ignition key. Otherwise, unplug the amp from the wall. Always turn off the electricity before handling fuses or exposed wires.
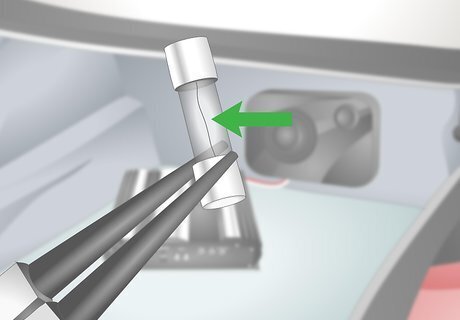
Pick up the fuse to see if the wire is broken in it. Locate the fuse by looking on the back of the amp or by following the black ground wire. Most amps have a fuse installed on them. Car amps may also have a separate fuse in a small box close to the battery. Lift the fuse out with a pair of needle-nose pliers to check the small metal wire inside of it. The location of the fuse depends on your amp. Search its casing thoroughly and follow any electrical wires.
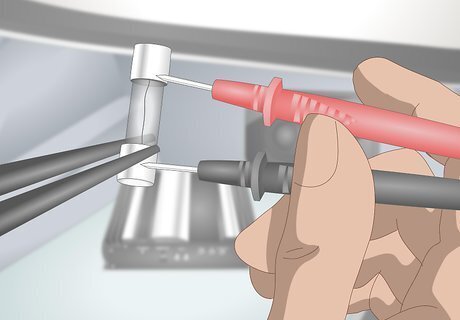
Test the fuse with a multimeter. A multimeter is a device that detects electrical currents in fuses and wires. It has a black lead and a red lead you touch to the ends of the fuse. After turning on the machine, set its dial to 200 Ω, the lowest resistance setting. Then, touch the leads to the exposed ends of the fuse to see if the readout shows a number like 0.6 ohms, showing that the fuse isn’t the problem. Before touching the fuse, touch the leads together. The multimeter will read 100 if everything is working. If that doesn’t change when you touch the fuse, then the fuse is broken. If you’re using a fuse with metal prongs, touch a lead to each prong. For a glass tube fuse, touch the lead to the ends of the tube.
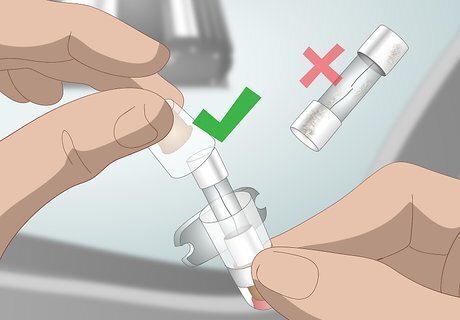
Replace the fuse with an identical one if it looks damaged. Broken or scorched fuses often mean a simple fix. You will need to get a fuse that has the same amperage rating as the one you’re replacing. A lot of amps use fuses rated 25 or 30, and this number is usually printed on the fuse itself. You could also double-check your owner’s manual for the correct rating before popping a new fuse into your device. Most fuses can be found at auto part stores and hardware stores. Bring your broken fuse in and ask for the staff to find a replacement. If you can’t get a fuse there, look for online electronics shops. The type of fuse you need depends on the amp you have. Car amps use plug fuses that are similar to or often the same as normal car fuses. Home stereo and guitar amps may use glass tube fuses. Getting the exact fuse is very important. If you get a fuse with a lower rating, it won’t provide enough amperage to power your amp. A fuse with a higher amperage could carry too much power and cause a fire.
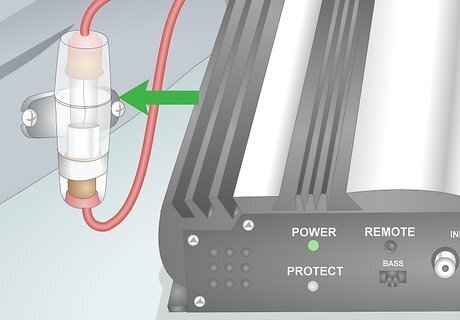
Turn on the amp to see if the fuse blows again. Plug the amp back in and reactivate the electrical circuit. Then, turn on the amp. If it works, then congratulations, you solved the problem. Sometimes the fuse could blow again right away, meaning that you probably have a short in the wiring. You will hear the fuse blow out. Listen for a pop as soon as you turn on the amp. The amp will lose power right after that. If the fuse blows before you turn on the amp, the problem may be in the electrical circuit. This could mean your car or home wiring is broken or getting too much power. If the fuse blows as soon as you turn the amp on, the amp probably has an internal problem that needs to be fixed.
Testing the Power Wires
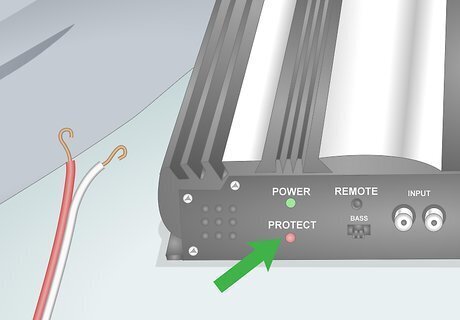
Unplug the connecting wires to see if the protect light turns off. The protect light on an amp is there to keep the amp safe when something goes wrong. Test it by disconnecting the amp. If you’re working on a car amp, simply remove the red wire on its back end. Watch the light in case it turns off, meaning that the problem is likely somewhere in the wiring. To access the wires connecting to a car amp, you may need to pull the faceplate off of your radio. Pry the edges of the plate with a plastic tool until you are able to pull it off the car. If the light stays on, the amp itself could be the problem. It may have shorted out from a strong electrical current, so take it to an experienced repair technician.
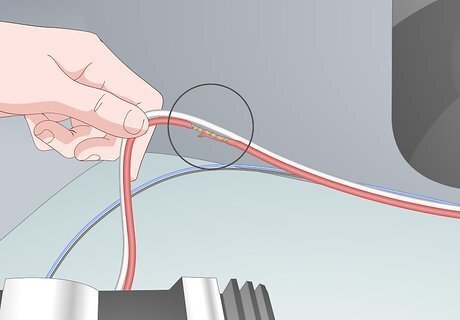
Inspect all of the wires for any signs of damage. Take a quick glance across all of the connecting wires. Notice any broken wires, burnt-out wires, or anything else that looks out of place. These signs of damage could be the reason the amp is getting too much power. Any wires that look loose or improperly placed could also be responsible for the problem. Broken wires can easily prevent an amp from turning on. They are also dangerous since the exposed metal conducts an electrical current. Don’t touch it unless you’re sure the power is off.
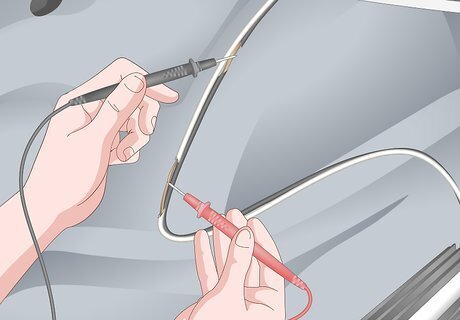
Use a multimeter to test for blown wires. Wires could become grounded when they come loose and touch something they aren’t supposed to. Touch the black and red test leads of the multimeter to the end of the power wire. If the wires still work, the multimeter will react. Your amp needs to be turned on for this. When it is on, the wires conduct about 12 to 14 volts of electricity. If you’re working on a car amp, try touching the red lead to the amp end of the red power cord. Touch the black lead to the negative terminal on your car battery.
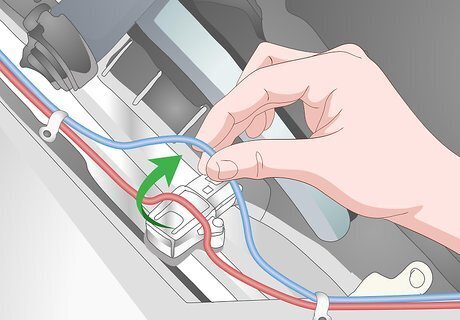
Lift up any wire connections touching bare metal. Metal causes active wires to short-circuit, so reposition them to fix them. It happens sometimes with car amps and speakers that have loose wires. Turn off the power first before handling the wires, then find safe, out-of-the-way spots to secure them with plastic wire ties. Test the wires with a multimeter if you need to in order to be certain that they aren’t active. The dangerous part is the exposed ends of the wire. The insulated parts can touch metal without causing a problem and they won’t harm you either. Blowouts caused by metal ruin the fuse if your amp has one. If it doesn’t, the amp or speaker could overload and take damage.
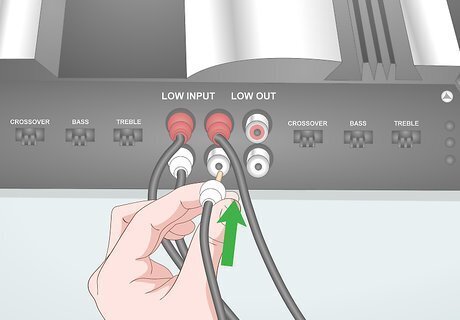
Hook up working electrical cables to test the amp. Pull the RCA plug cables out from the back of the amp, then replace them with new ones. RCA cables are colored cables that easily plug into the back of the amp, but make sure the ones you get are compatible with the amp you have. Afterward, turn on the amp to see if that solves the issue. If the new cables work, chances are your old ones were faulty and you won’t have any more problems.
Fixing Sound Crackling and Static
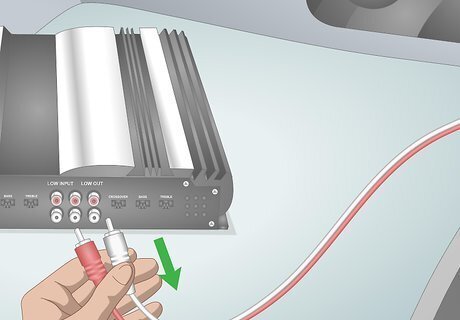
Test the sound by unplugging the sound cables or colored RCA wires. What you hear is often as important as what you see when dealing with an unruly amp. Now that you know your amp isn’t completely busted, remove the sound wires connecting to speakers and other devices. If the noise stops, then you know you have a wiring problem. Hissing and crackling are often easy to fix by rearranging the wires or getting complimentary speakers. If the noise doesn’t stop, then you probably have a faulty amp to replace.
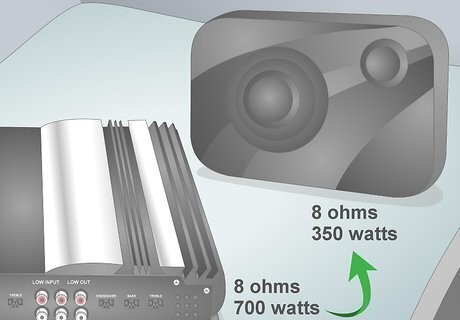
Compare the amp’s power ratings with the speakers and subwoofers. Every device has an amperage rating that indicates what current strength it can handle. Use speakers with a similar or slightly higher rating than the amp. The wrong rating, whether it is too low or too high, means your system won’t work the way you want it to. If the amp has a much lower rating than the other devices, it won’t send enough sound to the speakers. You may hear a lot of static or get a low-volume sound. Higher amp ratings lead to a louder, stronger sound quality. However, if the amps are more powerful than the speakers, your speakers could burn out much quicker than usual.
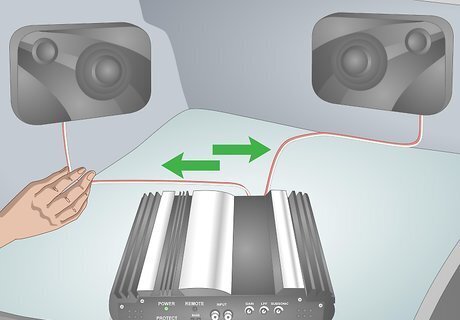
Reroute speakers wires so they aren’t touching one another. Hissing coming from your speakers is often a sign that the wires aren’t positioned correctly. It’s an easy fix, but it’s often a little annoying and time-consuming. Go back through the wires, separating the speaker wires from the amp wires. Tuck the speaker wires into safe areas, taping them down or using plastic ties to keep them in place. The positive and negative wires are a common problem. When they touch, they cause the system to go silent and lose power. This doesn’t usually harm your devices. You can test for wire problems by moving the wires apart while the speakers and amplifier are on. Don’t touch any exposed ends or active power sources like a car battery or wall outlet. Listen for the sound to come back on as you separate the wires.
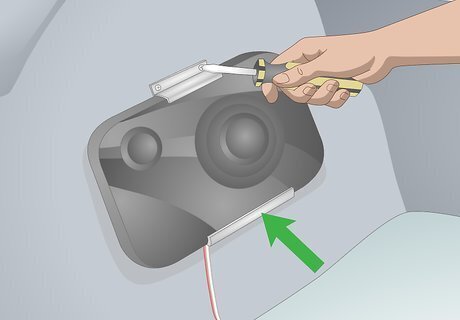
Stabilize the speaker enclosure to prevent rattling. Loose speakers and subwoofers rattle in their cases as sound passes through them. Make sure your devices fit securely in storage spots or leave them out in the open so they aren’t bumping against things. Keep them well-mounted so they don’t move at all. If your devices have screws holding them in place, tighten the screws to prevent them from rattling. Whooshing sounds happen when air gets pushed out of a speaker or subwoofer as it vibrates. You can fix it by mounting the device to stabilize it or by turning down its settings to make it rattle less.
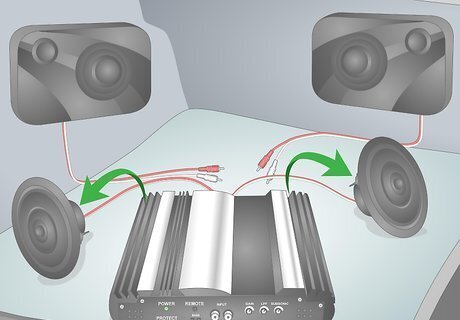
Connect the amp to a working pair of speakers. If your amp turns on but no sound comes out of the speakers, your overall setup may be the problem. Not all speakers are compatible with an amp. If your amp is still alive, it will respond when you connect it to speakers and other devices in good condition. Turn up the volume to see if anything changes. Fixing any wiring and mounting issues solves sound problems if your amp still works. Radio silence from a good pair of speakers is a good sign that your amp needs to be replaced.
Repair a Tube Guitar Amp
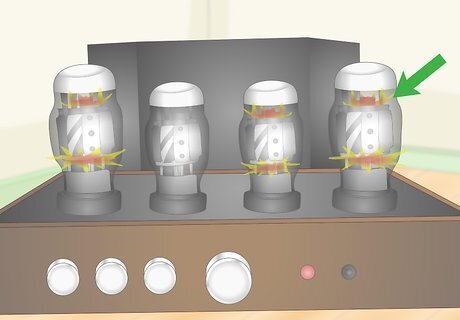
Inspect the glass tubes for cracks and other signs of damage. Damaged tubes are usually very easy to spot. Plug your amp in, turn it on, and watch the tubes light up. Any tube that stays unlit or has cracks in it needs to be replaced. Milky stains inside the glass are also signs of a dead tube. If the amp doesn’t turn on at all, it might simply be broken. Test it in another wall outlet first. A bad power supply could be fixed by a technician in some cases.
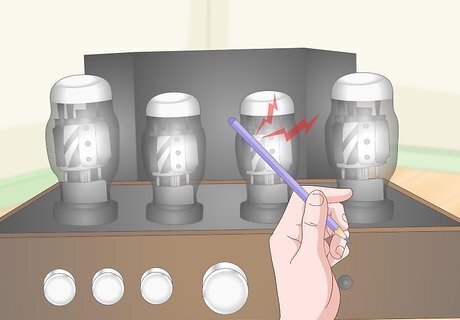
Tap the tubes with a pencil and listen for distortion. Tap the top of each tube very lightly to force it to vibrate. Listen for the sound the vibration makes. Unusual sounds, which could be anything from simple static to the worst squeals you have ever heard, are a bad sign. Find the tube that sounds different from the others and replace it. Another way to do it is to press down lightly on each tube as you play your guitar. The tubes get very hot, so cover up! Play individual notes to cause each tube to rattle as you listen for anything out of the ordinary.
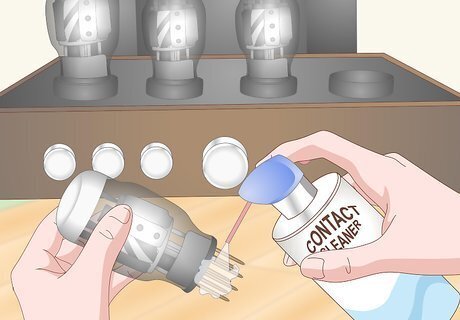
Spray a contact cleaner on the tube plug to test it. Let the offending tube cool down before you pull it out of the amp. Coat the plug with a contact cleaner, then put it back into the amp. Sometimes doing this cleans out the connection, causing the tube to work again. Test it out with your guitar. A contact cleaner is basically compressed air mixed with isopropyl alcohol. You can get spray bottles full of it at most hardware stores. You may need to pull the tube out of the socket and put it back in a few times before the cleaner affects it.
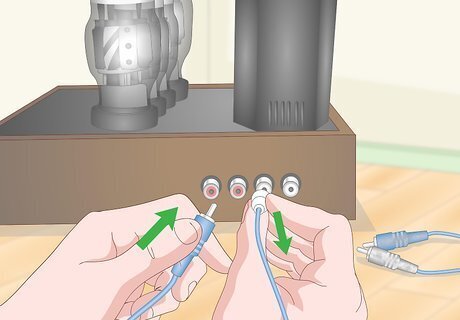
Replace all of the wires to make sure they work right. Sound problems with a tube amp are typically because of the tubes, but sometimes the cables cause distortion. If you hear sound coming from the amp, make sure your guitar plug-in isn’t loose, or else it could cause rattling. Also, check the RCA wires running the speakers to make sure they are intact and plugged in. Test the amp with new cords and speakers if needed. Sometimes this helps you isolate the problem to a faulty cord or connection.
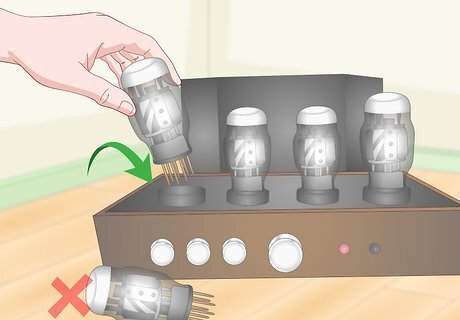
Swap broken tubes out for identical replacements. Stick to tubes with the same amp rating in order to avoid damaging your setup. Check your owner’s manual or look for a number on the tube to find out the amperage rating. When you’re ready to replace it, wiggle the tube gently to pop it out of the amp. Order a new glass tube online. There are many different amp suppliers that stock tubes fit for the kings of the guitar. If you’re replacing a tube, you might as well replace its partner. Amps have pairs of tubes with matching power levels. The second tube will burn out quickly after the replacement.





Comments
0 comment