views
Windows (Xbox Game Bar)
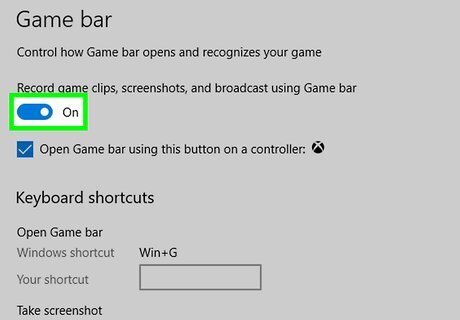
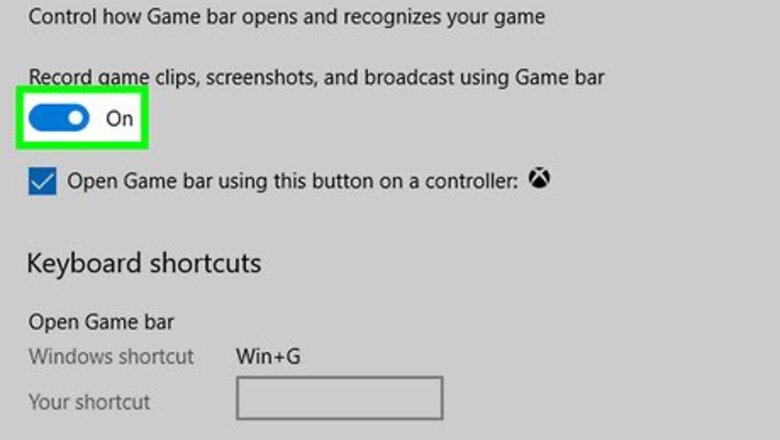
Enable Xbox Game Bar in Windows. If you just want to record one app at a time, such as a game or an app you downloaded from the Microsoft Store, you can use Xbox Game Bar to record the screen. Game Bar is turned on by default in Windows 11, but if you're using Windows 10, double-check your settings: Click the Windows menu and select Settings. Click the Gaming tab on the left. Click Xbox Game Bar on the left. If the "Enable Xbox Game Bar" switch is not turned on, click it to turn it on now.
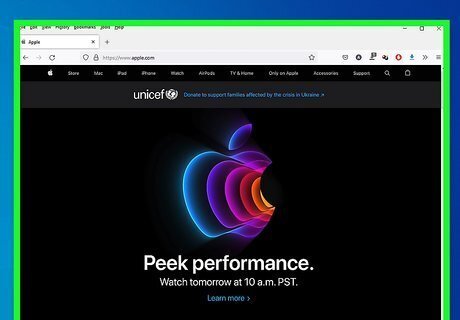
Open the app you want to record. Xbox Game Bar won't record your entire desktop—just one app at a time. If you need to record the whole desktop at once, see this method. Other third-party apps that have extensions in your browser like Vimeo are very useful and can easily be activated.
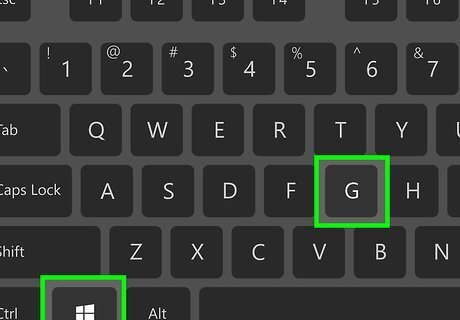
Press ⊞ Win+G. Pressing the Windows key and the G key at the same time opens the Game Bar at the top of the screen.
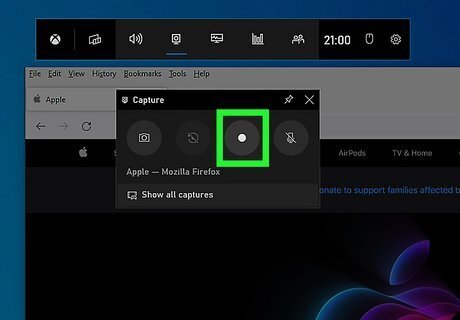
Click the Start Recording button. You'll see this solid dot button on the Capture widget in the upper-left corner of the screen. When Game Bar begins recording, a smaller floating version of the bar will move to the upper-right corner. If it's your first time recording with Game Bar, you'll be asked to give permission to record the screen. You can also start recording immediately using the keyboard shortcut Windows key + Alt + R.
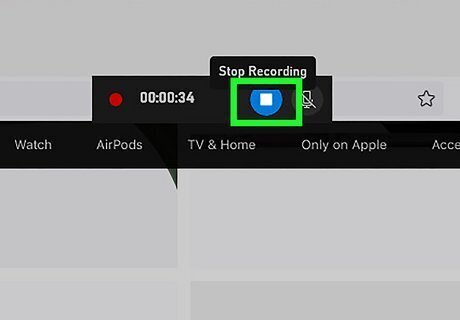
Click the Stop button on the floating Game Bar when you're finished. It's the square on the floating Game Bar. This stops the recording and saves it to your Game Bar Gallery.
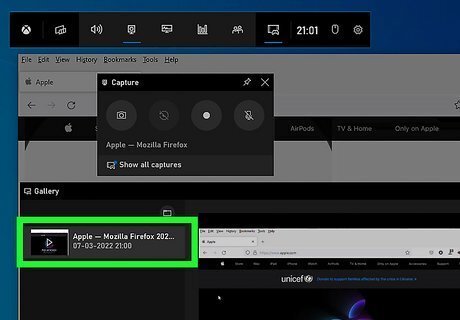
Locate your recording. By default, your screen recordings will save to your Videos directory in a folder called Captures. You can now view, share, upload, or edit it as needed. An easy way to get to the video is from the Game Bar's built-in gallery: Press Windows key + G to reopen the Game Bar. Click the Widgets menu, which is the first clickable icon on the Game Bar. Click Gallery. Select the recording and click Open File Location. Click Continue.
Windows (OBS Studio)
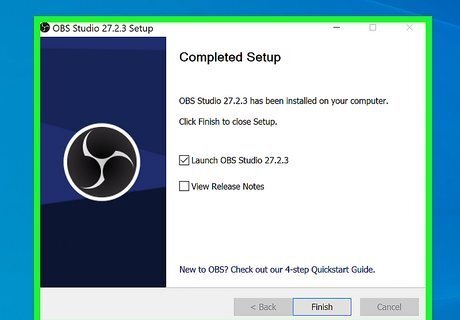
Install Open Broadcast Software (OBS) Studio on your PC. If you want to record your entire desktop, the built-in Game Bar option won't be helpful. OBS Studio is a free screen recording option that allows you to record your entire screen, as well as individual windows. You can download it for free from https://www.obsproject.com. To install the app, just double-click the downloaded file and follow the on-screen instructions. OBS is a great option if you also want to add other things to your screen recordings, including overlays, multiple windows, webcams, and more.
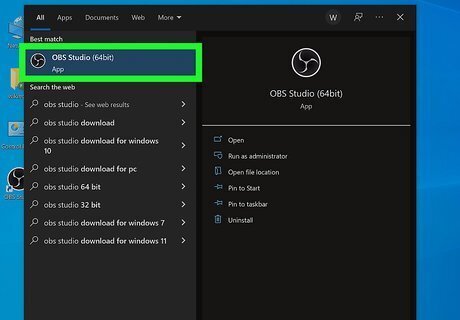
Open OBS Studio. After installing, it should launch automatically. If not, you'll find it in the Windows Start menu.
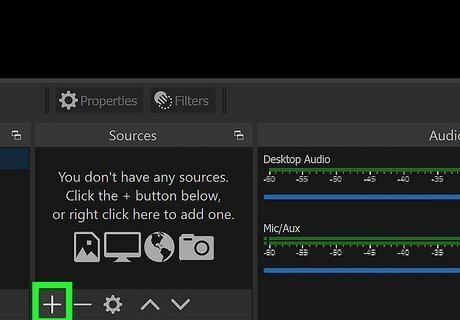
Click the + under "Sources." It's near the bottom of the OBS Studio window. A list of sources will appear.
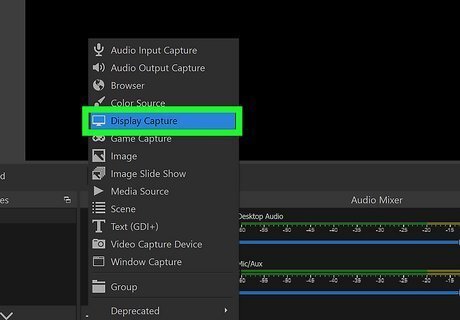
Choose a source to use for your recording. You have many options for recording depending on what you want to do: If you want to record the entire screen, choose Display Capture and click OK. Then, choose a display (if you have multiple monitors or desktops) and click OK. To capture full-screen gameplay, choose Game Capture, click OK, and then choose your preferences. In the "Mode" section, you can choose to select a particular window or record any full-screen app. To record a single window, choose Window Capture and click OK. Then you can select the window you want to record from the menu, choose whether to display the cursor, and click OK. If you want to record audio as well, choose Audio Input Capture and select your microphone.
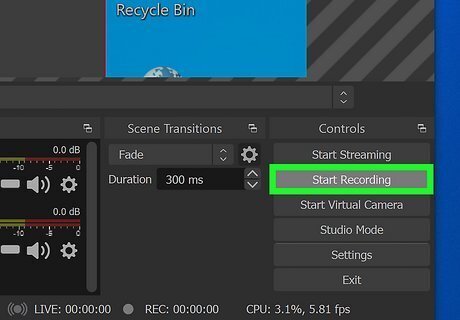
Click Start Recording. It's in the bottom-right area of the OBS Studio window. OBS Studio will begin recording from all selected sources.
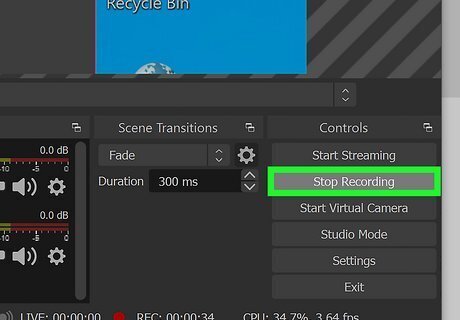
Click Stop Recording when you're finished. This option is also at the bottom-right corner. This saves the finished recording in the MKV file format in your default Videos directory. To find the file, click the File menu and click Show Recordings in the menu. You can stop the recording by clicking Stop Recording in the bottom-right corner of OBS Studio.
macOS (Screenshot Toolbar)
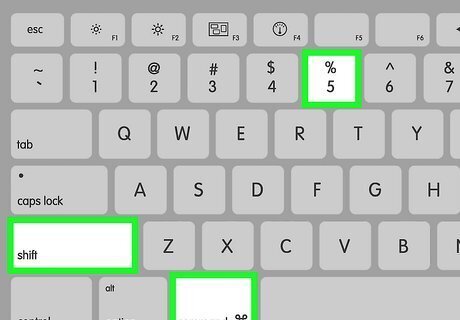
Press ⇧ Shift+⌘ Command+5. This opens your Mac's Screenshot toolbar, which contains options for recording your screen.
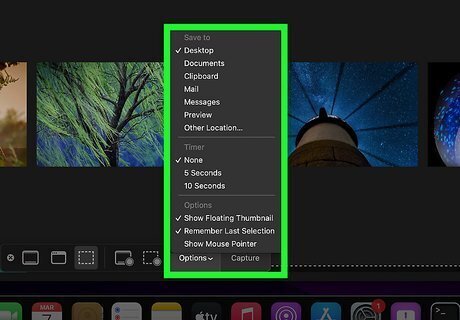
Click the Options button to choose your preferences. It's toward the right side of the Screenshot toolbar. In this area, you can: Choose a saving location for the resulting video, such as Desktop (the default location) or Documents. Choose a countdown timer length. Select a microphone if you want to record your voice along with the screen. Show animations that represent mouse clicks (helpful when creating how-to videos).
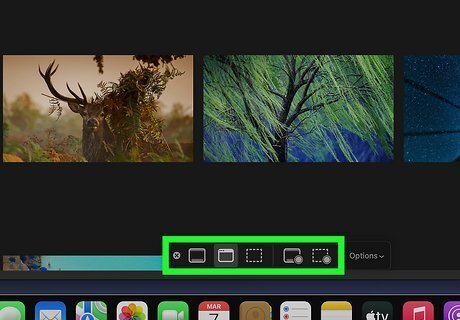
Choose an area of the screen to record. If you want to record the entire screen, just click the square made of several dashed lines with a circle at its bottom-right corner. If you want to record just a single window or portion of the screen, follow these steps: Click the icon that looks like a window with a circle at its bottom-right corner. The screen will dim around a bright rectangular area. The brighter area inside of the rectangle is the area that will be recorded. Move the rectangle to the desired area, and/or click and drag its edges to make it the correct size for your needs.
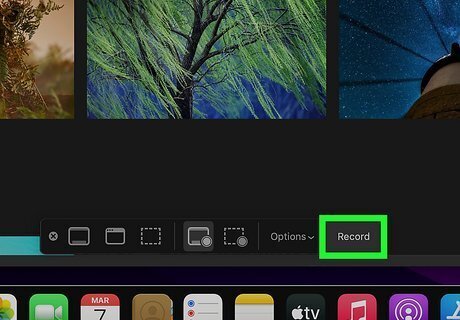
Click Record. It's at the far-right edge of the toolbar. Screen recording begins immediately.
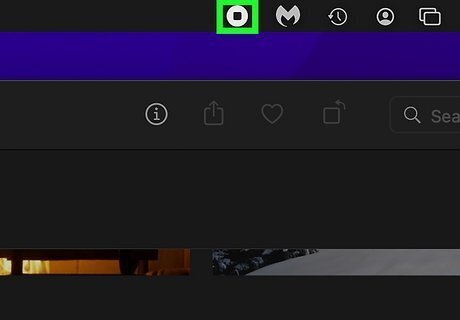
Click the Stop button when you're finished. You'll see the black circle with a white square inside on the menu bar at the top-right corner of the screen. You can also press Command + Control + Esc to stop recording. The recorded videos will be saved in the MOV format on desktop.
Mac (QuickTime Player)
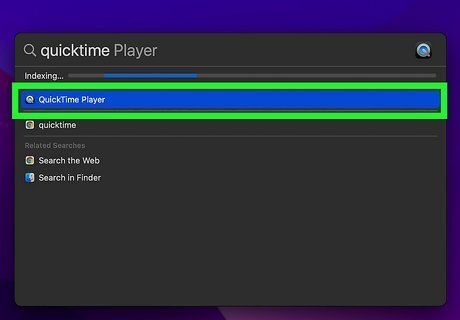
Open QuickTime Player on your Mac. You'll find it in your Applications folder, on the Launchpad, and/or by searching for quicktime in Spotlight search.
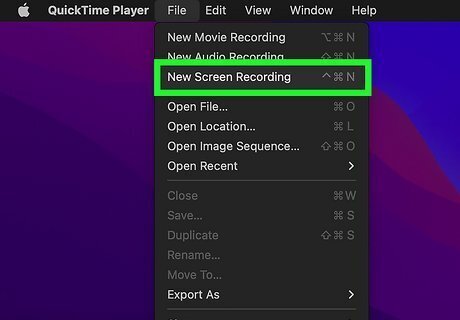
Click the File menu and select New Screen Recording. Depending on your version of macOS, you'll either see a Screen Recording panel, or the macOS Screenshot toolbar. If you see a gray toolbar with options for taking screenshots and a button that says "Record" at the end, use this method to record your screen instead.
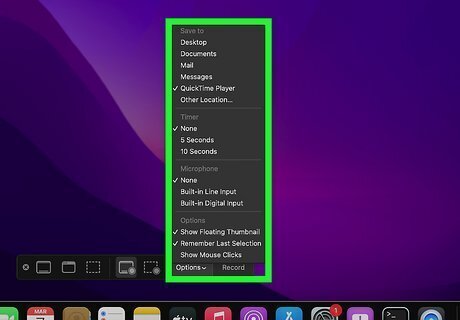
Choose your recording options. Click the down-arrow next to the red recording button to expand options, including microphone selection (if you want to record your voice while recording the screen) and the option to enable or disable animations that display mouse clicks.
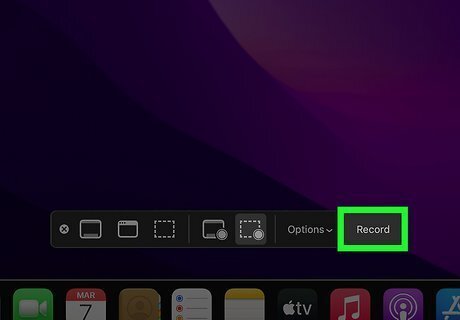
Click the "Record" button. It's the red button at the bottom of the Screen Recording bar. A selection box will appear.
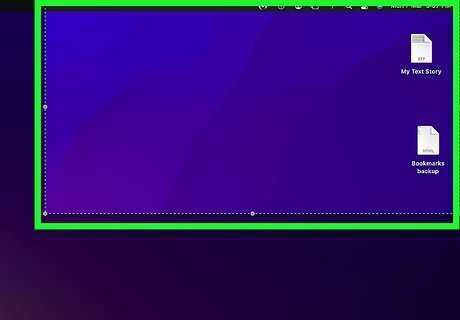
Choose an area of the screen to record. You have two options: To record the entire screen, click anywhere on the screen to start recording. To record a specific area, click and drag the area you want to record, and then click Start Recording.
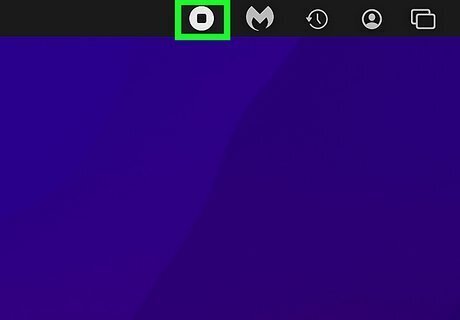
Click the Stop button when you're finished. You'll see the black circle with a white square inside on the menu bar at the top-right corner of the screen. You can also press Command + Control + Esc to stop recording. When you stop recording, the video will open immediately in QuickTime Player.




Comments
0 comment