

Buying Your Curtains and Rod
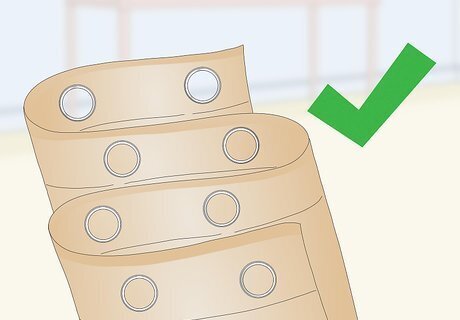
Buy a set of eyelet curtains with an even number of grommets. This is very important, because the number of grommets affects the way that you thread the curtain onto the rod. If the curtain has an odd number of eyelets, the edges of the curtain won't lay properly against the wall. Match the color and style of the curtains to the room that you are hanging them in.
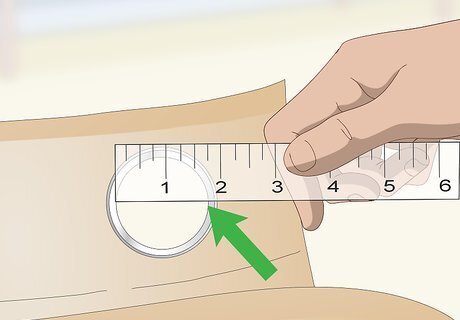
Find out or measure the inside width of the grommets. The rod you buy needs to be thin enough to slide through the curtain's grommets. Most rods should be thin enough to do this, but it wouldn't hurt to get the exact measurements. Check the packaging that your curtains came in. If you can't find the grommet size on the label, use a ruler to measure the inside width on 1 of the grommets. If you don't want to measure, a rod with a width between 1 ⁄8 to 1 ⁄2 inches (3.5 to 3.8 cm) will probably work for most eyelet curtains.
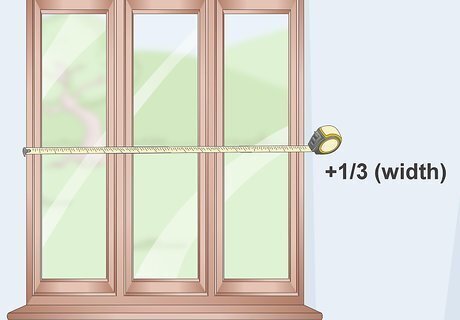
Measure your window to determine the rod length you need. Measure across your window first. Multiply your measurement by 1/3, then add the answer back to your measurement. This will give you the length of the curtain rod. For example, if your rod is 54 inches (140 cm): 54 x 1/3 = 18 18 + 54 = 72 Final curtain rod length: 72 inches
Buy a curtain rod that's the right length and matches the grommets. The rod should be the same shade and color as the grommets on your curtain. It should also small enough to slide through them. If the length you need falls between 2 standard sizes, choose the larger size. Matching the shade is important. A light silver rod won't look good against dark silver grommets. Check the label when buying the curtain rod. Some measurements include the finials while others don't. You need to look at the measurement without the finials.
Buy matching finials for the rod, if needed. Finials are the ornamental stoppers on both ends of a curtain rod. They prevent the curtains from sliding off the rod. Many curtain rods already come with these. If your curtain rod doesn't come with them, buy them separately, but make sure that they match.
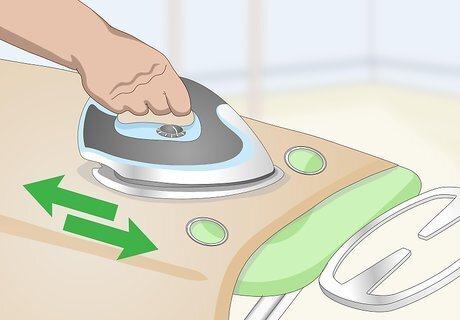
Iron the curtains from the front if they are creased. Read the washing instructions to find out what temperature setting you should use on the iron—or if you can iron the fabric in the first place. An alternative to ironing is steaming the curtains with a steamer. If you can't iron or steam the curtains, drape the curtains across your bed for several hours up to an entire day. This will help relax any creases.
Installing the Brackets
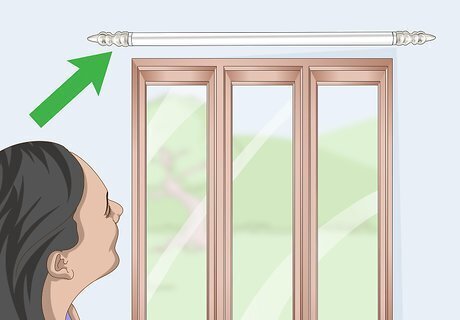
Decide where you want to mount the curtain. In general, brackets are mounted 4 to 6 inches (10 to 15 cm) above the window frame, and about 3 inches (7.6 cm) to either side of it. You can deviate from these measurements if you want to alter the proportions of your window. For example: If you want your window to appear taller, place the brackets 8 inches (20 cm) above the window, or closer to the ceiling or crown molding. If you want your window to appear wider, place the brackets 3 to 6 inches (7.6 to 15.2 cm) from the sides of the window.
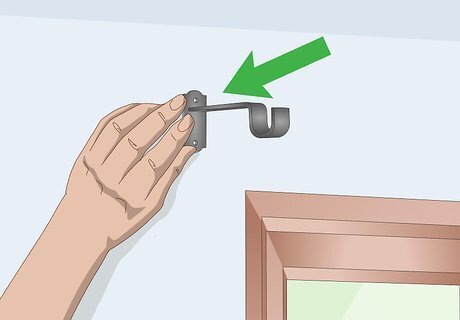
Place the bracket against the wall where you want it to hang. Use a ruler to measure up and to the side of the window first. Next, place the bracket against the wall where you measured to. Place a level on top of the bracket to make sure that it is straight and not crooked. Where you measure to depends on where you want the bracket to hang. Refer to the previous step for guidance. The bubble on the level should be centered between the guidelines on the tube. If the bubble is off-center, tilt the bracket until the bubble is centered.
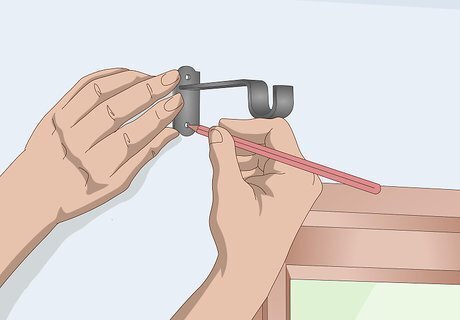
Use a pencil to create guide marks for the drill holes. Stick a sharpened pencil through 1 of the screw holes, and wiggle it around to create a mark. Repeat this step for the other screw holes on the bracket.

Drill holes into the wall using the pencil marks as guides. Set the brackets aside first, then use a drill to make holes in the walls, right over the pencil marks you made. You need to drill the holes first without the brackets, otherwise you risk chipping the wall's surface.

Insert wall anchors into the hole if you don't have a wooden stud. Wooden studs help anchor screws into walls. If you don't have a wooden stud behind the hole, you should insert a wall anchor into the hole first. If you aren't sure about the studs, pick up a stud finder tool at a home improvement store. They're cheap and can prevent you from mistakenly hanging the curtains without a stud to support them. Make sure that the wall anchors can hold the weight of the rod and the curtains.
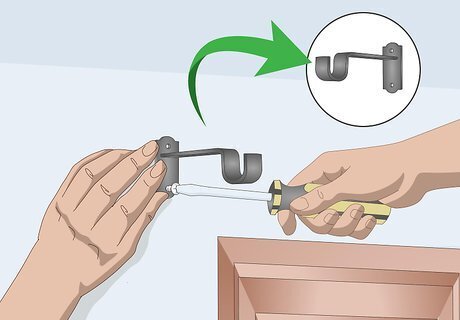
Replace the bracket and insert the screws, then do the other brackets. Hold the bracket against the wall. Insert a screw into 1 of the holes, then drill it into place. Do the remaining holes on the bracket before moving onto the second bracket. Remember to measure and mark the placement first before drilling into the wall and installing each bracket.
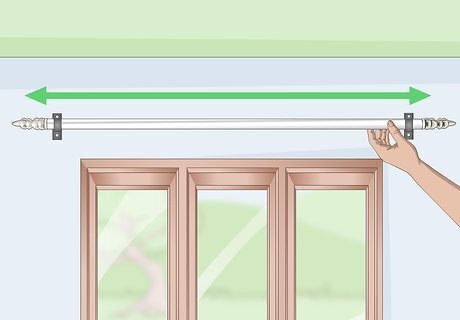
Set the rod onto the brackets, then adjust the length, if needed. Some curtain rods are sold at a set length, while others are adjustable. Take your final rod measurement from the previous section, and adjust the rod to that length. Make sure that you have an equal amount of extension on both sides of the window.
Attaching the Curtain to the Rod

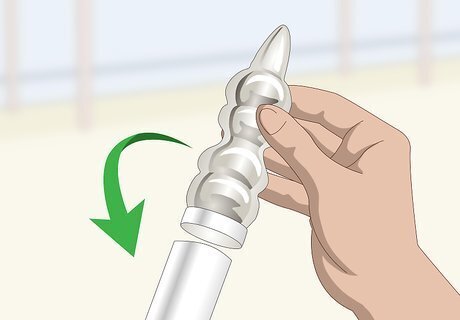
Remove 1 of the finials from the curtain rod. Take the curtain rod off the brackets first, then unscrew 1 of the finials. Set the finial aside some place where you won't lose it.
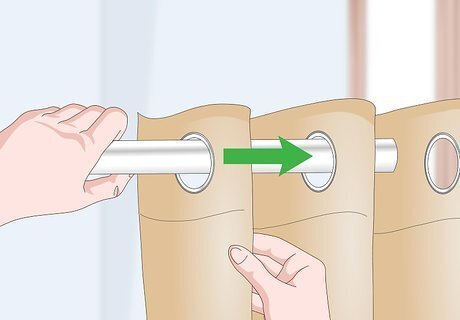
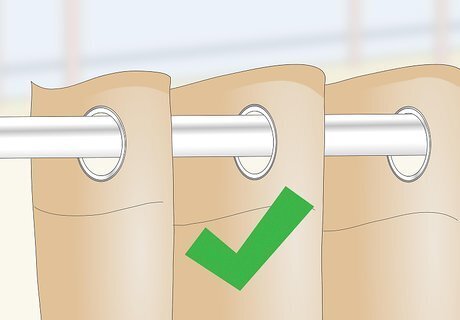
Weave the curtain rod through the grommets, starting from the front. Turn the curtain so that the front/right side is facing you. Slide the curtain rod down through the first grommet and up through the next one. Continue weaving until the rod comes out of the last grommet. It is very important that you start weaving from the front of the curtain. If you start from the back, the edges won't lay right.
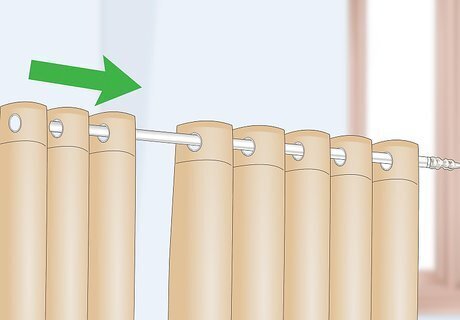
Repeat the process with the second panel, if needed. If you will only have 1 panel on your curtain rod, you are done and can proceed to the next step. If you will have 2 panels, repeat the previous step. Make sure that you slide the second panel in the same way, starting from the front of the curtain.
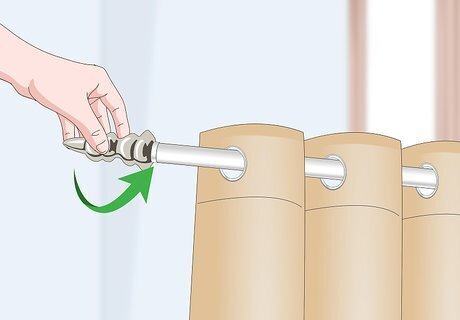
Screw the finial back onto the curtain. Shift the curtain down the rod so that it doesn't get caught. Place the finial back onto the rod, and screw it back into place, just like you would screw a cap onto a bottle.
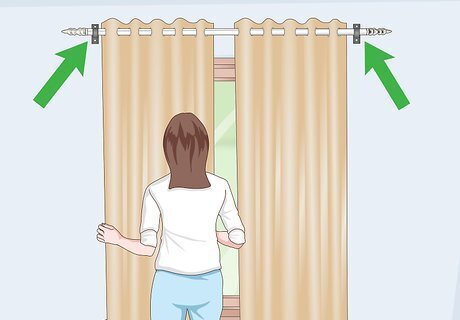
Place the curtain rod onto the brackets. Your curtain is now ready to use. There are a few more steps that you can take to make the presentation even nicer. They are not absolutely necessary, but they can really update your room and make the curtains drape nicely.
Adding the Final Touches

Move the curtain so that the outer grommets are outside the brackets. Lift the left side of the curtain rod and slide the curtain so that the first grommet is on the outside of the bracket. Set the rod back down, and repeat this step with the last grommet on the second panel. If you want to be able to move the curtain panel back-and-forth across the entire rod, the last grommet should be inside the bracket. If your curtain has just 1 panel, do this step with the first and last grommets.
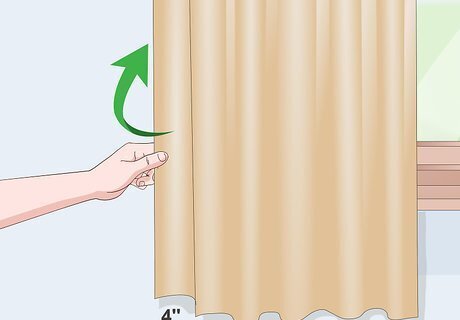
Fold the returns inside the curtain, if needed. The return is the excess 4 inches (10 cm) or so of fabric on each side of the curtain panel. Not all curtains have this, but if yours does, tuck the excess fabric into the curtain to that it rests against the wall. This will give your curtain a nicer finish. If the return won't stay inside the curtain, insert a drapery pin to the back of the return. Place a screw into the wall, then secure the pin to the screw.
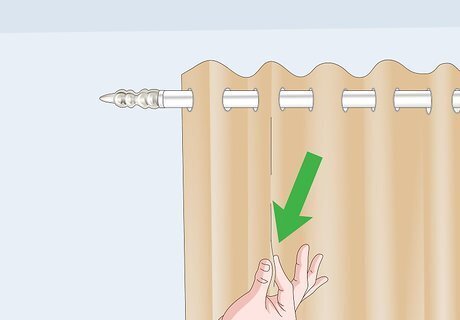
Adjust the folds on the curtain, if needed. Eyelet curtains develop natural folds because of the way that they are hung. If your curtains didn't get these folds, open the curtains up. Run your fingers down them from top-to-bottom, placing your fingers into the folds.
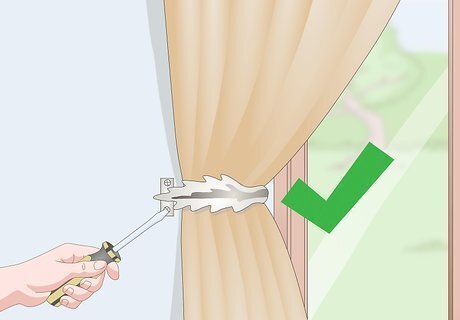
Install tie back brackets, if desired. Eyelet curtains typically don't need to be tied back because of the way that they drape, but you can certainly install wall-mounted tie backs if you want to. Measure two-thirds down from the top of the window frame. Place the tie back bracket against the wall and mark the holes with a pencil. Remove the bracket and drill the holes. Replace the bracket and insert the screws. You can also tie back the curtains using ropes or ribbon.


Comments
0 comment