
views
An Artificial Shadow
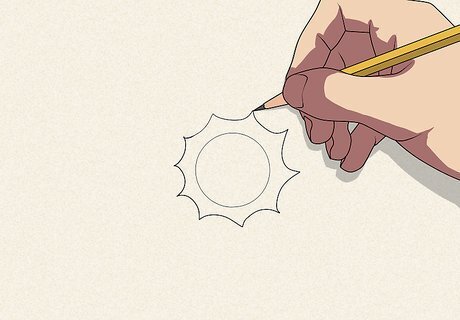
Imagine the artificial light. Knowing what kind of light that creates the shadow is very important in drawing shadow. That way, you will know where the direction of the shadow should be drawn which is against that specific light source. Train your eyes to see like an artist, let us start by you imagining a light bulb at the middle of your drawing.
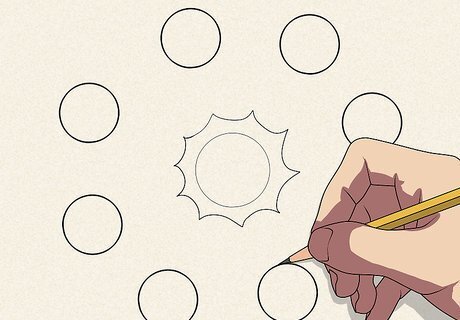
Draw eight circles around the imaginary light bulb. These circles will serve as the subjects of your drawing. This way, you will see how the light source affected the shadow based on where the subject was placed.

Use your pencil to add shadows on the circles. Draw harder or darker lines on the circles to show the shadows. The shadows are the shades within clear boundaries or the subject that receive no or little light. Use hatching or crosshatching while trying to show the shades. Make sure that you don’t let any shade go out of the circle. The darker areas should be the areas that are against the light source.
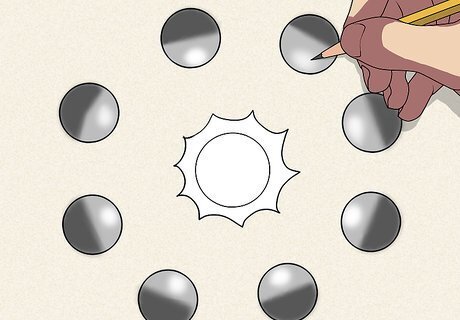
Show the light areas. Use your eraser to show the light areas. This is to emphasize that the light areas are conforming to the light source or to make it simple, the light is bouncing from the artificial light to the subject that is facing the light source.

Start showing the cast shadow. Always remember that the shadow is against light. So when a subject is placed beside a light source, the shadow should show on the surface where the light is blocked by the subject. Again, keep in mind where the subject is placed to know where the cast shadow should be drawn.

Smudge the farther area of the cast shadow. Use your finger to smudge the farthest areas on the cast shadow. This effect shows that the cast shadow is far from the light.

Add darker shades on the nearer areas. This is to show shadowing effects. The nearer the cast shadow on the boundary line of the subject, the less transparent the cast shadow should be.
A Natural Shadow

Imaginary sunlight and flat surface. This is where the natural light shows. Imagine that there is a sun on the upper right corner of your sketch pad. You can put it any area on the upper part of your sketchpad so long as you know how to draw the shadows. Create a flat surface on your drawing pad. Draw a straight line that will serve as a ground surface. This also adds up to the train to see like an artist’ eyes that we have discussed earlier.

Add different cube sizes. We will use buildings as subject in drawing shadows.

Draw the shadow.

Add more shadows and the cast shadows. In here you will start to notice the difference between the artificial shadow and natural shadow. Natural shadows show when the light source comes from either the sun or the moon which are natural sources of light. Natural shadows have the same direction no matter how large the area is. It will only change if you go into the area where the natural light source’s light is directly facing the point of view of the artist. Examples are sunrise or sunset drawings where the sun is placed at the upper middle part of the landscape. That also applies on full moon drawings where the moon is placed at the middle of the landscape. On the other hand, artificial shadows are created with artificial lights like light bulbs, night lamps, spotlights, streetlights and so on.

Smudge the farther part of the cast shadow.

Add light areas on the surface that faces the light source.





Comments
0 comment