

Disabling the Windows Touchpad

Click the Start Windows Start menu. It’s usually at the bottom-left corner of the screen. Use this method to completely disable the touchpad, regardless of whether you've connected an external mouse.

Type device manager into the search bar. A list of matching results will appear.
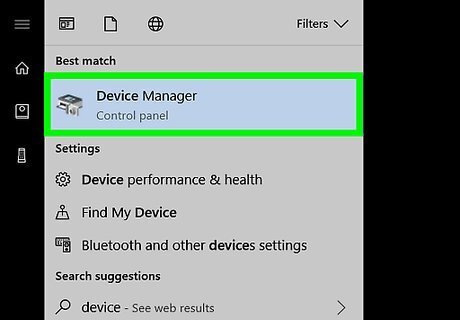
Click Device Manager.
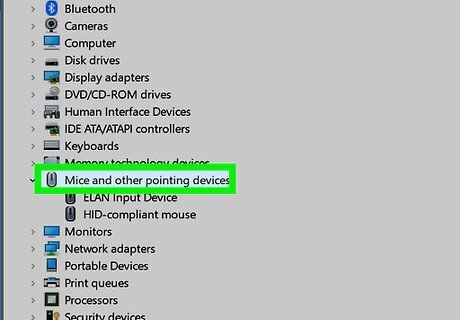
Click the arrow next to “Mice and other pointing devices.” This expands additional options.
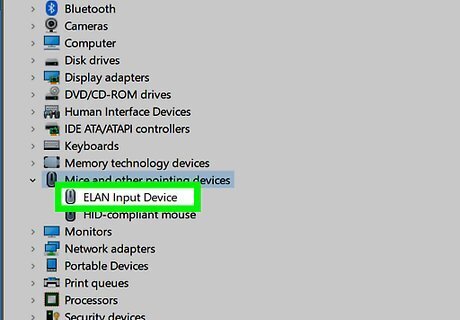
Right-click your touchpad. The name varies, but might contain the word touchpad, trackpad, or clickpad.
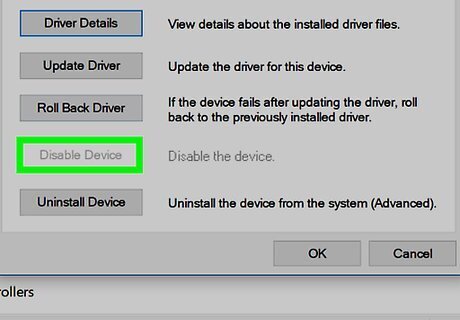
Click Disable. A confirmation message will appear.

Click Yes. The touchpad is now disabled. To re-enable it later, right-click the touchpad, then click Enable.
Disabling the Windows Touchpad when Using a Mouse

Click the Start Windows Start menu. It’s usually at the bottom-left corner of the screen. Use this method to disable the touchpad upon plugging in an external mouse or touchpad.

Click Windows Settings Settings.

Click Devices.
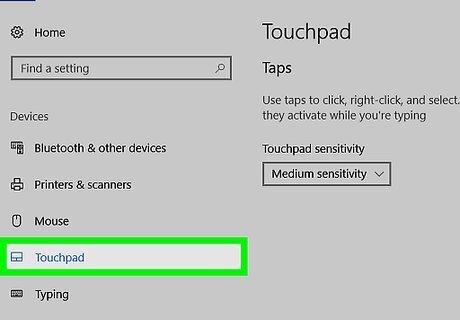
Click Touchpad. It’s in the left column.
Remove the check mark from “Leave touchpad on when a mouse is connected.” Now the touchpad will automatically disable once your external mouse is connected.
Disabling the macOS Trackpad when Using a Mouse

Click the Mac Apple menu. It’s at the top-left corner of the screen. It’s possible to disable your Mac’s trackpad upon connecting an external mouse. Because of restrictions in macOS, removing the external mouse will re-enable the touchpad.
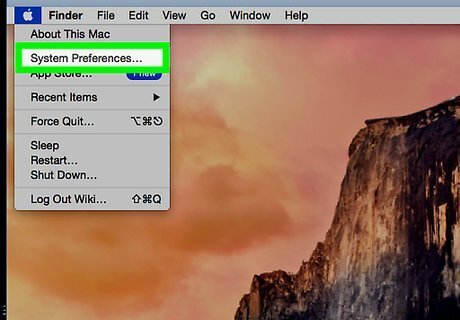
Click System Preferences.
Click Accessibility.
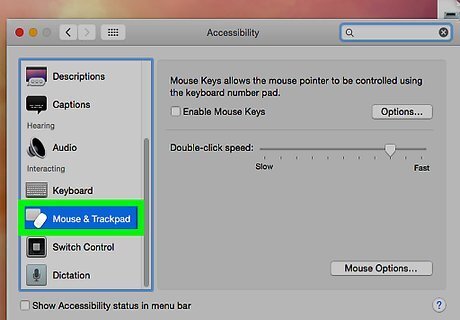
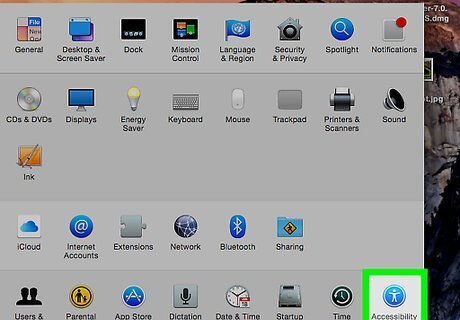
Click Mouse & Trackpad. It’s in the left panel.
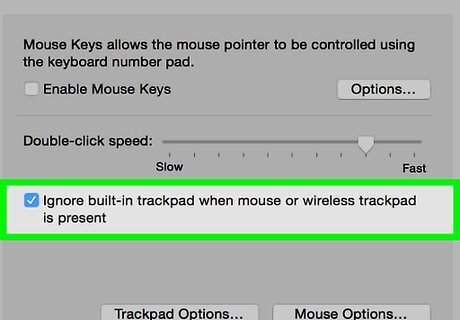
Check the box next to “Ignore built-in trackpad when mouse or wireless trackpad is present.” A check mark will appear in the box, and the change will take effect immediately.


Comments
0 comment