views
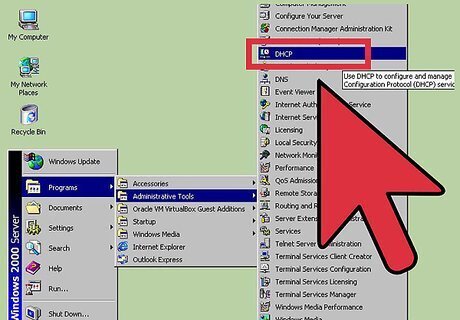
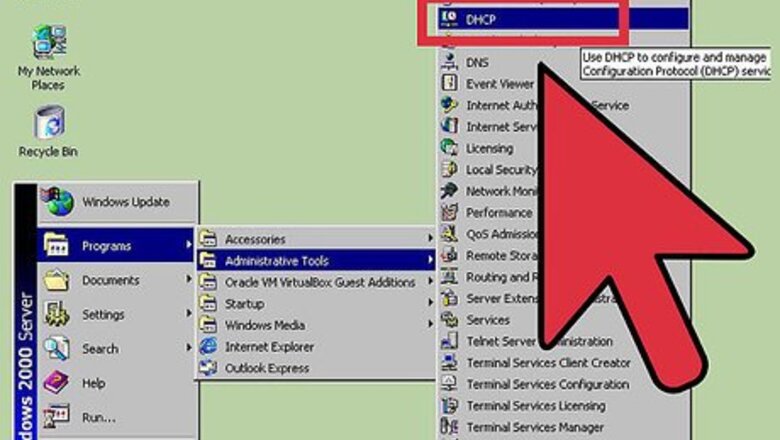
Run DHCP from Start Menu > Programs > Administrative Tools > DHCP
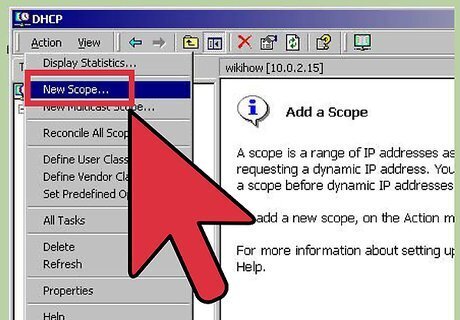
In the DHCP console, highlight the server, and click Action > New Scope menu.
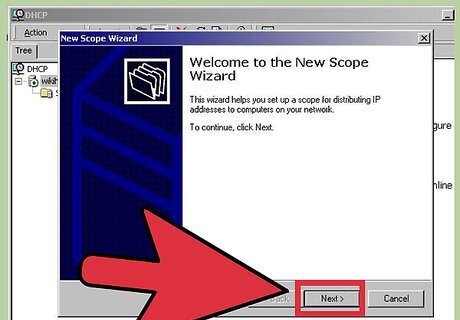
In the welcome screen of the New Scope Wizard, click the Next button.
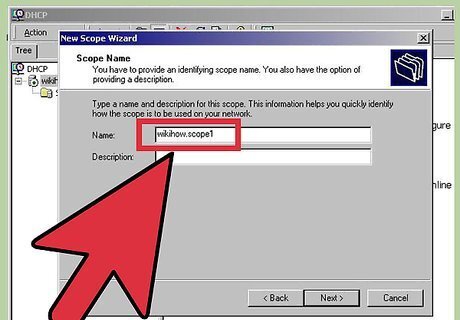
On the Scope Name page, specify a name and description for the scope, and click the Next button. However, it is not mandatory to specify description for the scope.
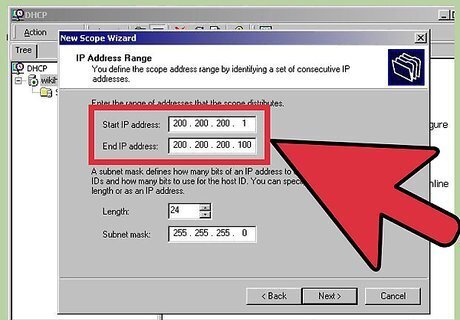
On the IP Address Range page, specify Start IP address, End IP address, and Subnet mask/length of the scope address range, and click the Next button.
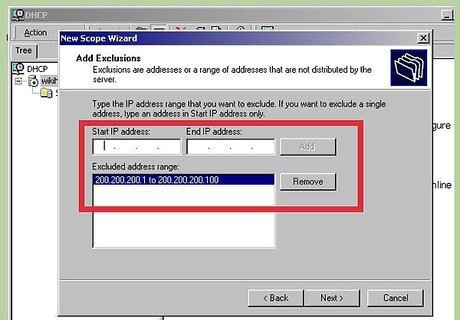
On the Add Exclusions page, specify the Start IP address and the End IP address, and click the Add button. Click the Next button.
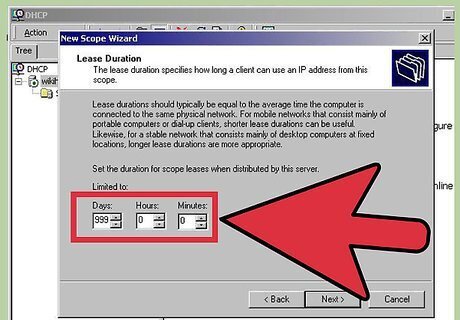
On the Lease Duration page, specify the period for which the scope shall be used, and click the Next button.
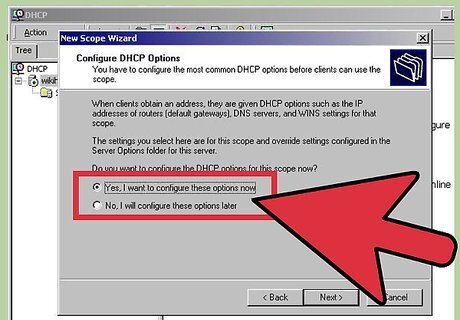
On the Configure DHCP Options page, specify permission to configure DHCP options, and click the Next button.
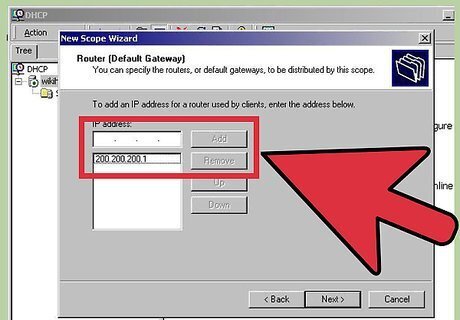
On the Router (Default Gateway) page, specify the IP address of the router, and click the Next button.
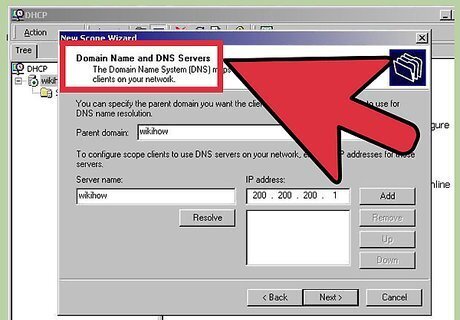
On the Domain Name and DNS Servers page, specify the name of the parent domain, the name of the DNS Server and its IP address, and click the Next button.
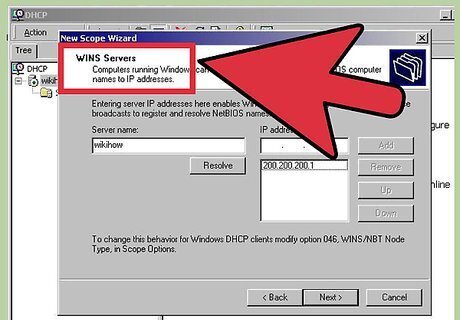
On the WINS Servers page, specify the Server name and its IP address, and click the Add button. Click the Next button.
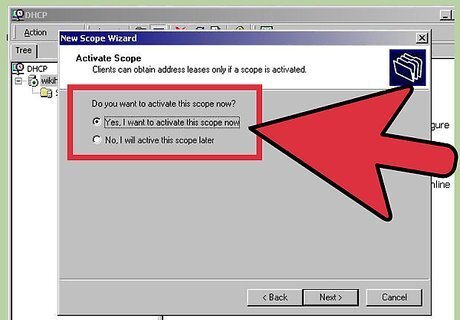
On the Activate Scope page, specify when you want to activate the scope, and click the Next button.
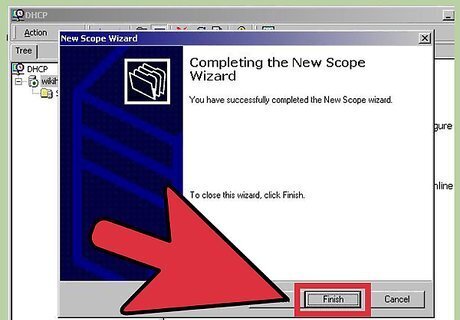
Click the Finish button.


Comments
0 comment