
Using a Cable on an HDTV

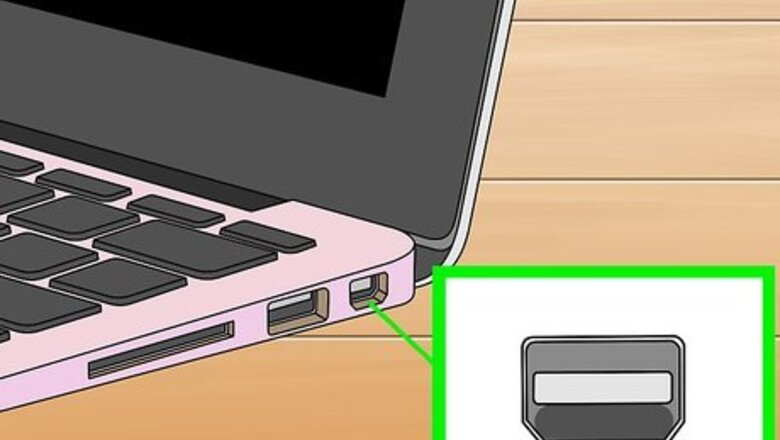
Determine your Mac's video output type. MacBook Pro 2016 and up - These computers use Thunderbolt 3 outputs, which need USB-C connections. You can buy a USB-C to HDMI cable that has a USB-C connector on one end and an HDMI connector on the other. MacBook Pro 2015 and down - These computers have HDMI ports, so you can use a standard HDMI to HDMI cable.
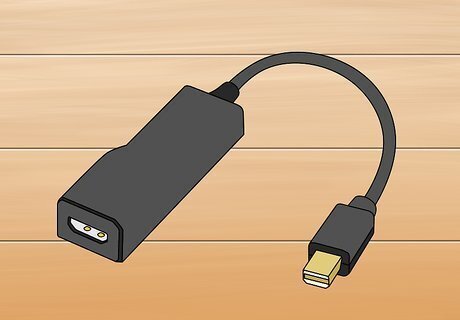
Buy a video cable. Depending on your Mac, you'll need to buy either a Thunderbolt 3 to HDMI cable or a standard HDMI cable.
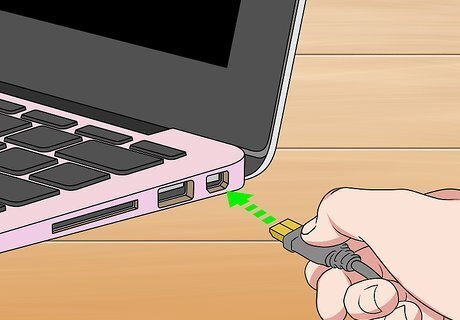
Plug one end of the cable into your Mac. Plug the USB-C end of the cable (MacBook Pro 2016 and up) or one of the cable's HDMI ends (MacBook Pro 2015 and down) into the appropriate port on the right or left side of your MacBook Pro's housing. The cable should fit snugly into the port, but don't force it.
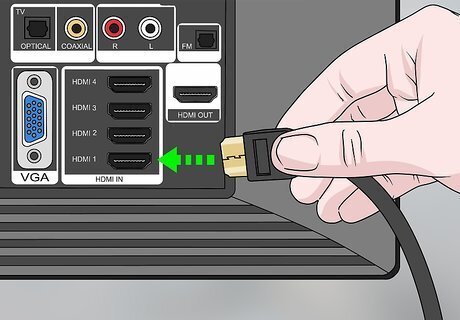
Plug the other end of the cable into your HDTV. The HDMI end of the cable should plug into one of your TV's HDMI slots, which are 5-sided ports usually found on the back or the side of the TV. Depending on your TV's number of HDMI ports, you may have to unplug a different HDMI cable in order to attach your Mac to the TV.
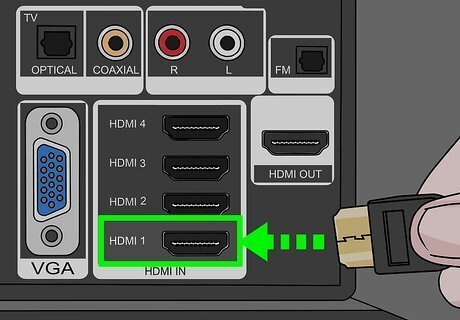
Note the HDMI input number. There should be a name or a number next to the HDMI port into which you plugged the cable; you'll need to know this number in order to select the correct channel.
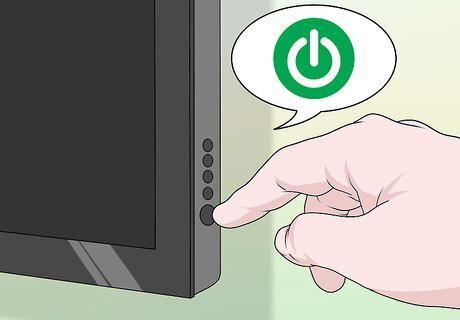
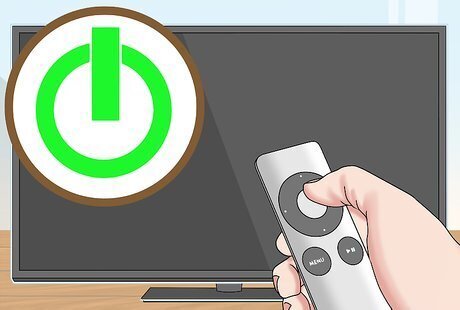
Turn on your HDTV. Press the HDTV's Power button Windows Power to do so.
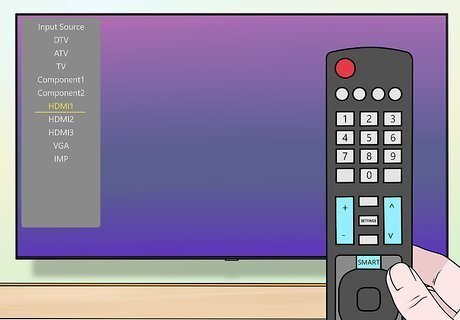
Change the TV's input. Switch your TV's input channel to the HDMI input's number (e.g., HDMI 3). You can usually do this by pressing the TV's Input or Video button until you arrive at the correct input, or by using the Input or Video button on your TV's remote. Once you arrive at the correct input, you should see your MacBook Pro's screen appear on the TV screen after a moment.

Change your Mac's sound and video settings if need be. If the image on the TV isn't correct or the sound is playing through your Mac's speakers instead of the TV's, you can tweak the relevant settings from with your Mac's System Preferences menu.
Using AirPlay on an Apple TV
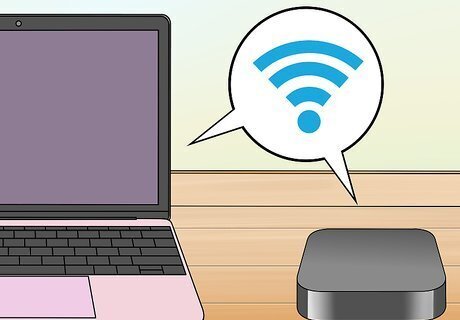
Make sure that both your Apple TV and your MacBook Pro are on the same network. In order for AirPlay to work between your Mac and your Apple TV, you'll need both of them to be on the same Wi-Fi network.
Turn on your Apple TV. Turn on your HDTV and make sure that the input is set to the Apple TV, then press any button on the Apple TV's remote.
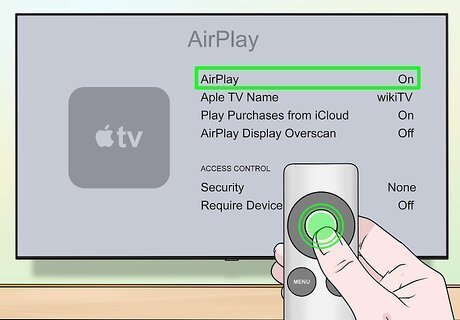
Enable AirPlay on your Apple TV. To do so: Open your Apple TV's Settings Select AirPlay Select AirPlay at the top of the screen. Select Everyone

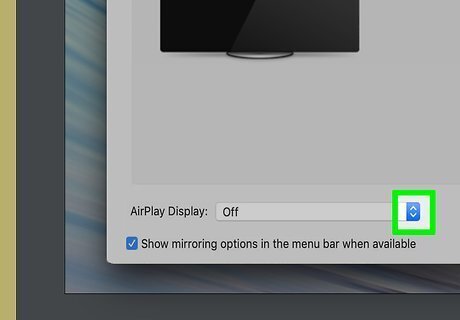
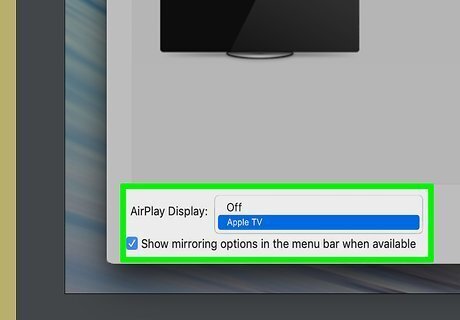
Enable AirPlay on your MacBook Pro. To do so: Open the Apple menu Mac Apple Click System Preferences... Click Display Click the Display tab. Click the "AirPlay Display" drop-down box. Click On Check the "Show mirroring options in the menu bar when available" box.
Click the "AirPlay" menu. It's a box with a triangle in it that's located in the upper-right corner of your Mac's screen. A drop-down menu will appear.
Select your TV's name. Under the "AirPlay To" heading, click the name of the Apple TV to which you want to mirror your Mac's screen. You should see your Mac's screen appear on your TV. You can turn off AirPlay by clicking the "AirPlay" menu icon and then clicking Turn AirPlay Off in the drop-down menu.
Changing Sound and Video Settings

Open your Mac's Apple menu Mac Apple. Click the Apple logo in the top-left corner of the screen. A drop-down menu will appear.
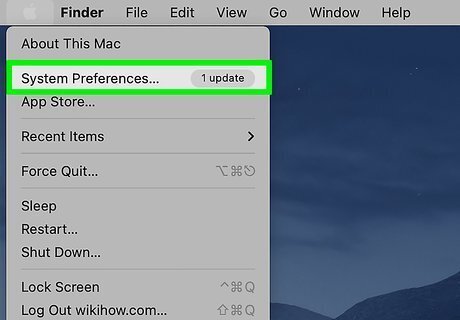
Click System Preferences…. It's near the top of the drop-down menu. Doing so opens the System Preferences window.
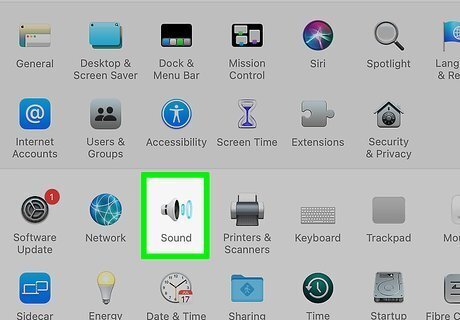
Click Sound. You'll find this speaker-shaped icon in the System Preferences window. The Sound window will open.
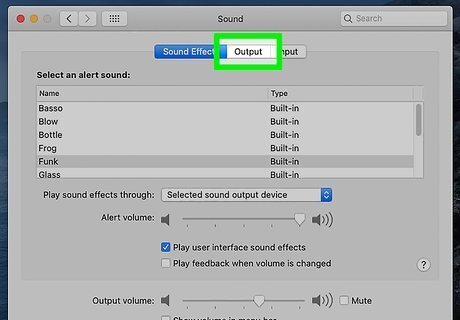
Click Output. This tab is at the top of the Sound window.

Select your TV's speakers. Click the TV or HDMI option at the top of the page. This will ensure that sound is delivered through your TV's speakers and not through your MacBook Pro's speakers.
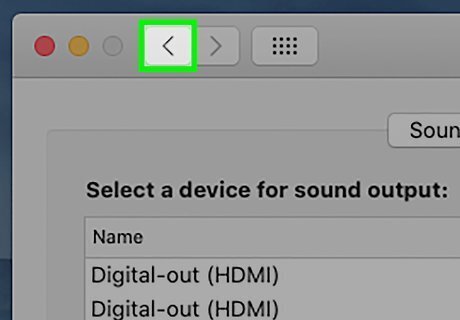
Return to the System Preferences page. Click the "Back" button in the upper-left side of the window to do so.

Click Displays. This computer monitor-shaped icon is in the middle of the System Preferences window.
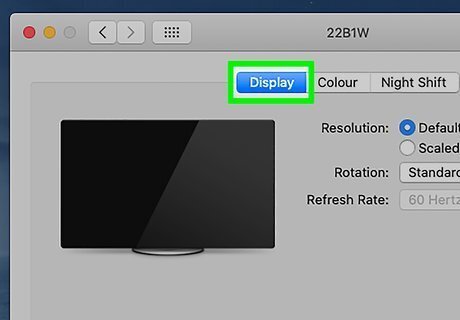
Click the Displays tab. It's in the upper-left corner of the window.
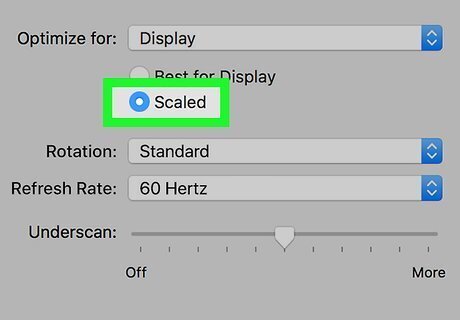
Change the TV's resolution. Check the "Scaled" box, then click a resolution. You can't use a resolution that's higher than your TV's built-in resolution (e.g., 4K).
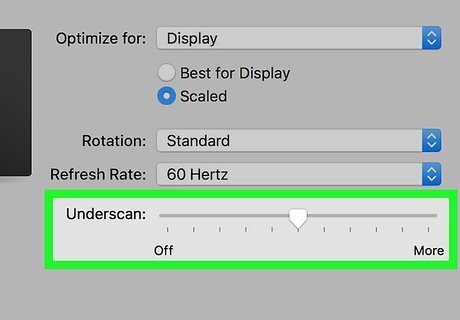
Change the screen scaling. Click and drag the "Underscan" slider that's at the bottom of the page left to show more of your Mac's screen on the TV or right to zoom in the screen. This will help you fit your Mac's screen to your TV if the image on the TV is too large or too small.


Comments
0 comment