
X
Expert Source
Doug LudemannAquarium Care Professional
Expert Interview. 27 August 2019.
To do this, you’ll need an aquarium vacuum, a couple large buckets, and a dechlorinator to remove harmful chemicals from the water you’ll be adding.
Draining Your Tank
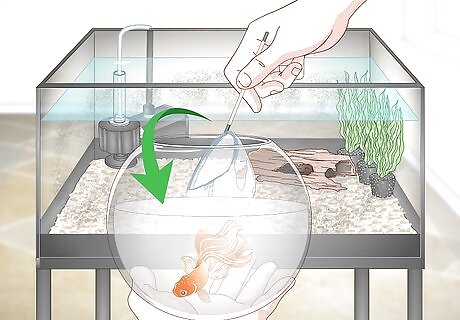
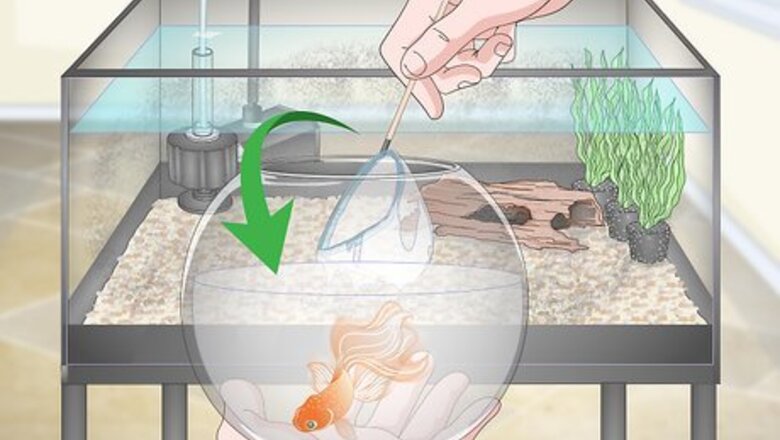
Move your goldfish into a temporary tank or bowl. Before you do anything else, it’s recommended that you remove your goldfish from its main tank and relocate it to a smaller tank or bowl for the time being. Use a spacious plastic container to scoop up your fish, along with a little water from the tank, and transfer it to its temporary home. Your backup tank can be any size. It just needs to be big enough to give your goldfish a little room to swim around. Make sure the tank is filled with fresh, clean water that's been pre-treated with a dechlorinator product to eliminate chlorine and other chemicals.Tip: Giving your goldfish its own place to hang out during the cleaning process will make the whole experience a lot less stressful for it.
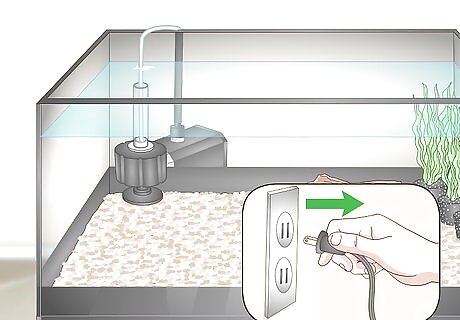
Turn off your tank’s filter, heater, air pump, and other equipment. Shut off anything that could become an obstacle or a hazard while you’re draining and refilling the tank. As a safety precaution, it’s also a good idea to go ahead and unplug the tank from the wall to eliminate any danger of electric shock. Don’t remove your filter just yet. You’ll be taking it out to clean it later once you’ve siphoned some of the water out of tank. Allowing your heater to run while the tank is partially drained could damage it.

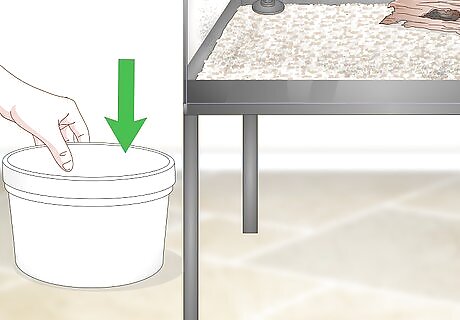
Have an aquarium vacuum and two large buckets on standby. In order to drain the dirty water from your goldfish tank, you’ll need either an automatic or manual aquarium vacuum, also known as a gravel vacuum, pump, or siphon. You’ll also need two separate buckets—one to catch the dirty water as it escapes and the other to treat the fresh water before introducing it to the tank. You can pick up an aquarium vacuum from any pet store for as little as $10. To make things easier on yourself while you’re draining and refilling your tank, use the biggest bucket that you can safely handle while full.
Set your dirty water bucket on the floor directly below the tank. Most newer aquarium vacuums work as siphons, which use gravity to carry the water out of the tank and down into the bucket. Situating the bucket on a flat, stable surface will also make it less likely to spill. If you don’t have enough space for your bucket on the floor, sit it on a chair in front of or off to one side of the tank. Be careful not to accidentally knock your dirty water bucket over while you’re working. If you have a dog or cat at home, keep an eye on them, too.
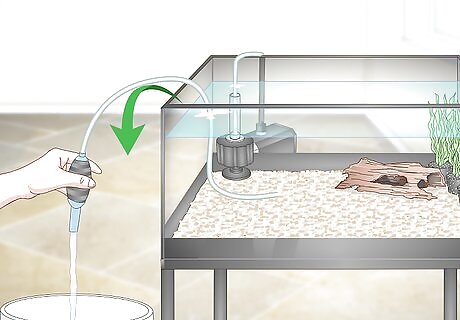
Run your aquarium vacuum from your tank to the draining bucket. If you’re assembling your aquarium vacuum for the first time, simply slip the opening of the rubber hose onto the tapered tip of the hollow intake tube. Then, drop the intake tube into the tank and place the hose inside the bucket, making sure they’re sitting below the surface of the water. Aquarium vacuums often include small clips that allow you to secure the hose to your draining bucket. If your vacuum came with one of these clips, it will come in handy for preventing messes.
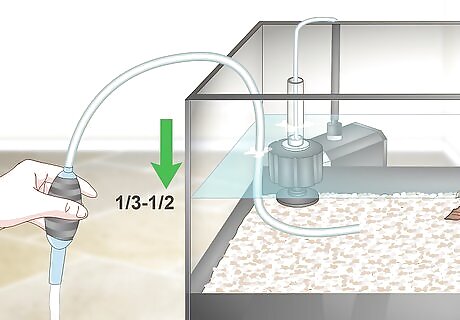
Drain roughly ⅓-½ of the water from the tank. If you’re using a siphon vacuum, all you have to do is shake the intake tube up and down rapidly to get the water moving. If you have a manually-operated pump, squeeze the rubber ball repeatedly to force the water out a little at a time. Keep siphoning or pumping until the water level drops 30-50%. You may need to pause and empty your bucket once or twice if it’s on the small side. You can stop a siphon vacuum at any time by simply lifting the intake tube out of the water. Draining an aquarium can be time-consuming work, but it’s for a good cause—the health and happiness of your goldfish!
Sanitizing Your Tank
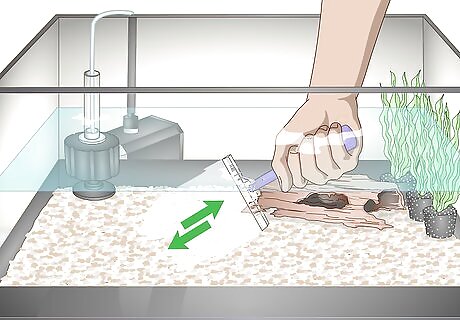
Scrape excess algae off the walls of the aquarium using a squeegee. Glide your squeegee or a flexible plastic scraper along the sides of the tank to remove heavy buildup. It may take a fair amount of pressure to get the worst of it off. Work your way from the top down so that the loose algae falls to the bottom of the tank, where you can then suction it up with your vacuum. Brace yourself against the tank with one hand to keep it from shifting or tipping as you clean. Avoid removing every last bit of algae. Small traces are good for maintaining ideal water conditions.
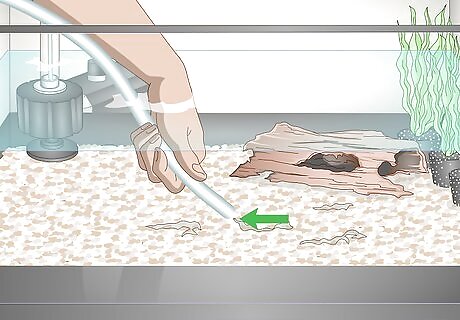
Suction loose debris out of the gravel at the bottom of the tank. Thrust the open end of your vacuum’s intake tube down into the gravel to “stir it.” Agitating the gravel in this way will help free dirt, poop, excess algae, and other trapped waste products. Make sure the vacuum makes contact with the entire surface of the gravel. Your vacuum may start to suck up some of the gravel, but its weight will prevent it from being pulled into the hose.
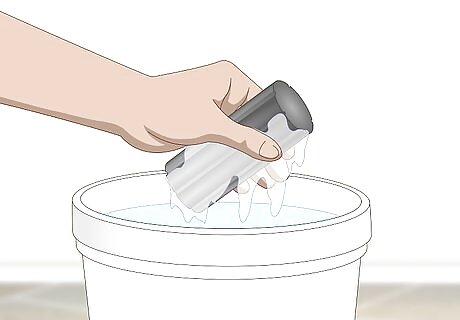
Rinse your filter out thoroughly in your bucket of tank water. Slide the circular sponge off of the filter unit. Squeeze the sponge forcefully under the surface of the water you drained from your tank to wring out all of the gunk and debris it’s collected. Don’t forget to replace the filter when you’re done. Things can get pretty messy here, so you might want to consider pulling on a pair of rubber gloves. To clean an internal power filter, whisk the filter housing through the tank water and use a bottle brush to scrub the impeller outlets (the small, fan-like wheel that pulls the water in).Warning: Never clean your tank's filter with tap water, as it contains chlorine and other chemicals that can kill off beneficial bacteria growing inside.
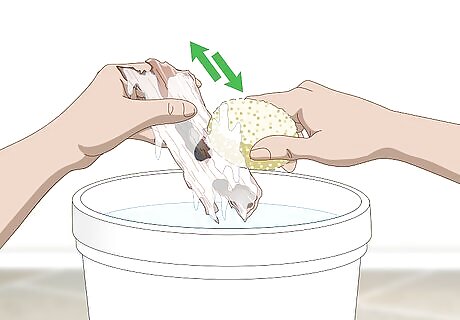
Clean ornaments and decorative fixtures using the tank water. If there are any other accessories in your aquarium that you want to clean, scrub them with a soft-bristled brush or the smooth side of a kitchen sponge inside the bucket of tank water. Remember not to use chlorinated tap water, as it could cause harmful changes to the conditions inside the tank. To deal with heavy buildup, mix up a mild bleach solution by adding 3–4 teaspoons (15–20 mL) to 2 gallons (7.6 L) of warm water. Soak your dingy accessories for 3-5 minutes, then rinse them off and submerge them in tank water for a couple of minutes before putting them back in the aquarium. There's no need to clean real plants and rock formations, as these are part of your goldfish's natural environment.
Refilling the Tank with Clean Water
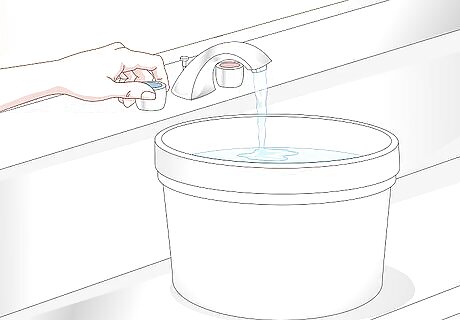
Fill your second, clean bucket with tap water. Run some water from your sink into the bucket, leaving 2–3 inches (5.1–7.6 cm) of space at the top to make the bucket easier to carry without sloshing. It’s best to use warm or lukewarm water, as it will be closer in temperature to the water that was already in the tank previously. Use whatever water source is closest to your aquarium to cut down on the distance you’ll have to tote the bucket back and forth. You may need to fill the bucket multiple times if you’re replacing the water in a particularly large tank.
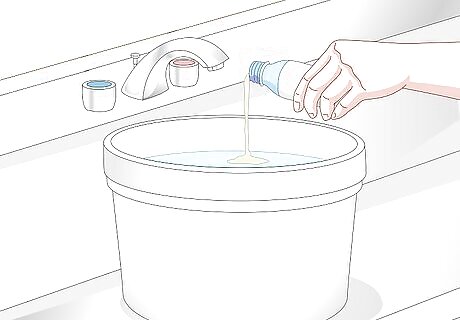
Add a dechlorinator to the tap water to make it safe for your goldfish. Refer to bottle of the product you choose for more detailed directions. Most of the time, it will only take 1-2 drops per 1 gallon (3.8 L) of water to successfully chlorine, chloramine, ammonia, nitrite, and other chemicals and impurities. If left untreated, the chemicals in tap water could wipe out whole colonies of good bacteria, or even harm your goldfish itself.Tip: After adding your dechlorinator, let it sit for 2-5 minutes to make sure it’s had enough time to be effective.
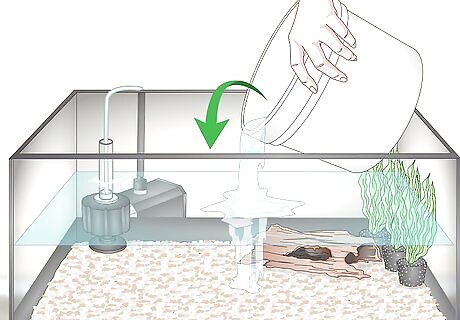
Pour the treated water into the tank gradually. Carefully lift the bucket over the edge of the tank and tilt it so that it flows in little by little. When refilling a large tank, wait 5-10 minutes before adding every next bucket to give the water time to reach a consistent temperature. Continue until you’ve replenished the water to its original level. If you’ve got a thermometer in your tank, look for it to reach a minimum of 60 °F (16 °C) before adding more water. Goldfish are most comfortable at around 65–72 °F (18–22 °C). Unless the water is near room temperature, it may be too cold or too warm for your goldfish. Raising or lowering the temperature in the tank drastically could "shock" your goldfish, leaving it vulnerable to disease.
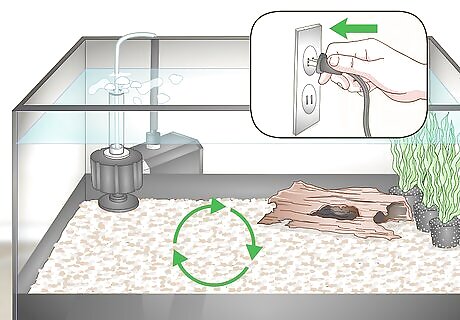
Turn your tank equipment back on. Now that your aquarium is clean, all that’s left to do is reactivate the filter, heater, and air pump. If possible, let everything run for about 20 minutes to bring the water temperature and oxygen back to their optimal levels. Afterwards, return your goldfish to the tank and welcome it home with a snack! Remember to plug your goldfish tank back into the nearest wall outlet.


Comments
0 comment