
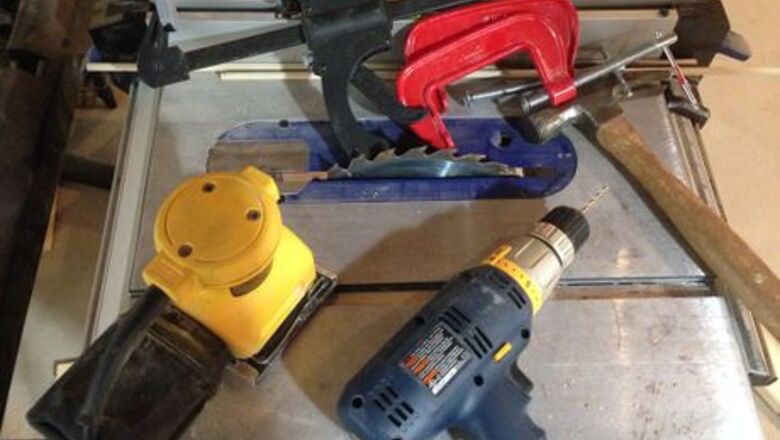

Gather your tools and materials. You may also need the plans that provide dimensions and layout
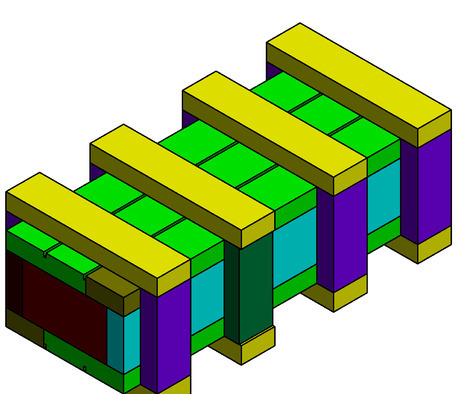
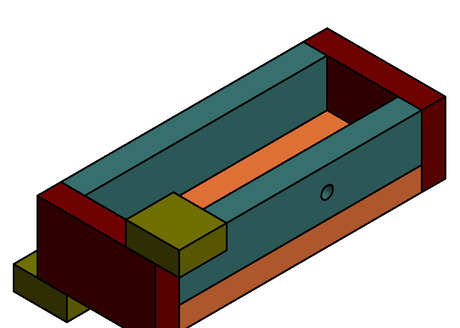
Start with the top level. Use these views when referring to the parts in the steps below. Note that all dimensions are for a perfect fit. Sanding will be required to prevent interference. Puzzle box exploded.png
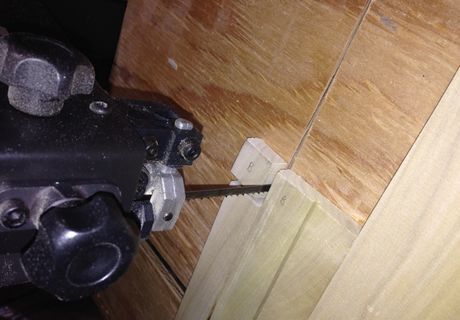
Build the box top and bottom. Cut top and bottom - each is 3 1/2" x 9 3/4". Add 2 grooves to each piece 1 1/8" from each side. I used a table saw which has a 1/16" thick blade. The grooves should be 1/8" deep. Cut corner block off each side. The cuts should line up with the start of the groove and run 1" into the board. You can use a band saw for this cut. Save blocks since they will be used later. Also, add a reference note in pencil on each block to match up to the correct side.Pic4 1.png

Cut box sides and back. Cut box sides – 1 1/2" x 6 1/8" & 1 1/2" x 9 3/4" and box back – 1 1/2" x 2 1/2". Don't drill the hole at this level. It will be added later.
Assemble the box. Assemble top, bottom, sides and back with glue and/or nails. If nailed, keep nails at least 1/2" from the future dowel hole. Sand assembly.

Cut main drawer parts. Cut drawer bottom - 2 1/2" x 5 1/8" , drawer sides - 1 " x 5 1/8" and drawer back - 1 1/2" x 2 1/2". Don't drill hole at this level. It will be added later.
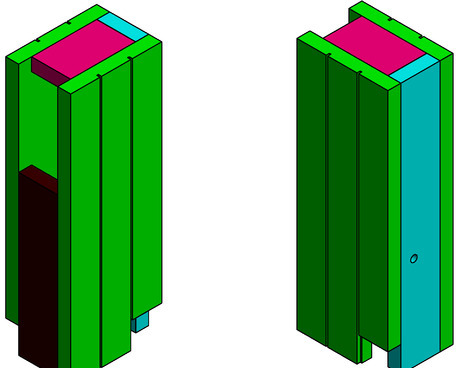
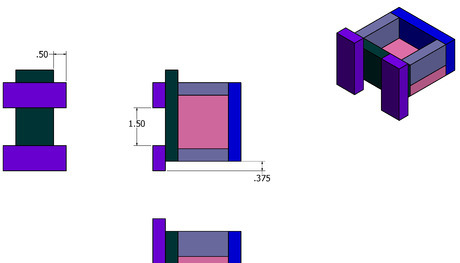
Assemble the main drawer. Assemble bottom, sides, front and back with glue and/or nails. Carefully attach finger blocks as shown. Refer to the reference notes made on the blocks to assure the blocks match the top and bottom sides. Note that thin shims might be required under the blocks to assure alignment with top and bottom sides. Sand assembly.
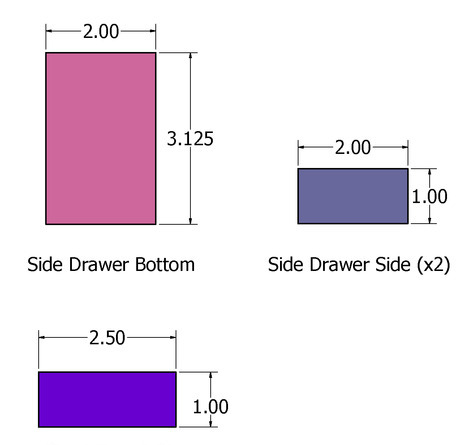
Cut the side drawer parts. Cut drawer bottom - 2" x 3 1/8", drawer sides 2" x 1", drawer front - 3 5/8" x 1 1/2" and drawer back - 3 1/8" x 1 1/2". Two of the eight short trim pieces (2 1/2" x 1") will be added to this assembly.
Assemble side drawer. Don't add trim pieces at this point. Sand assembly.
Add trim. Per the drawing, draw alignment lines around the perimeter of the box for the 4 trim rings. Add the 8 long trim pieces to the top and bottom sides. Next, add 5 short trim pieces to the sides. Then, add the 2 short trim pieces to the side drawer. These should be a snug fit to provide friction so drawer doesn't slide out. Add the last trim piece (dowel trim) - Don't glue this piece.Pic12.png
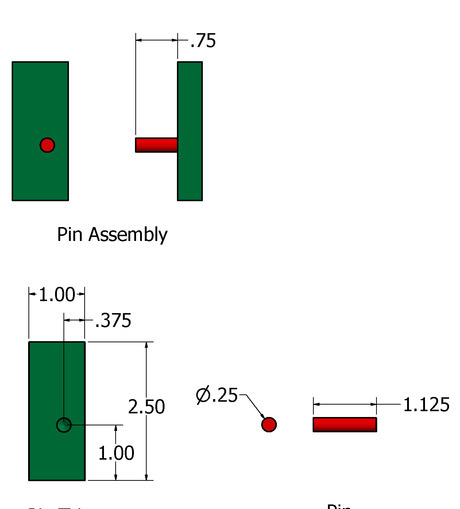
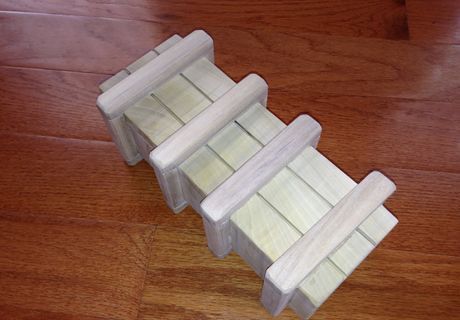
Add pin assembly. Place main drawer inside box. Make sure front of drawer is flush with the front of the box. With side trim aligned, drill a very small hole through the trim, box and drawer. Remove trim and drill a 1/4" diameter hole through box/drawer assembly. With the small hole as a guide, drill a 1/4" diameter, 1/4" deep hole into the trim. Glue pin into the trim. Fill small hole with wood filler or glue/sawdust.
Sand assembly. Clean up the edges of the trim by sanding. You can also round all the corners.
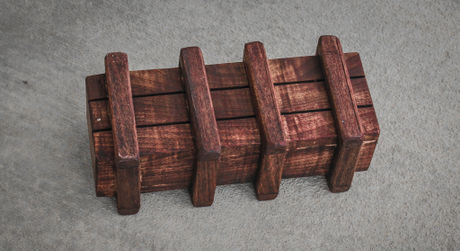
Finish. Finish as desired. This version uses a red oak stain. See description in YouTube videos to download a free drawing file.


Comments
0 comment